Use Bitbucket Cloud as your source code provider»
Spacelift supports Bitbucket Cloud as the code source for your stacks and modules.
You can set up multiple Space-level and one default Bitbucket Cloud integration per account.
Create the Bitbucket Cloud integration»
Bitbucket Cloud integration details
Learn more about setting up and using the Bitbucket integration on the Bitbucket Cloud source control page.
Initial setup»
- On the Integrate Services > Discover all integrations screen, click View on the Bitbucket Cloud card, then Set up Bitbucket Cloud.

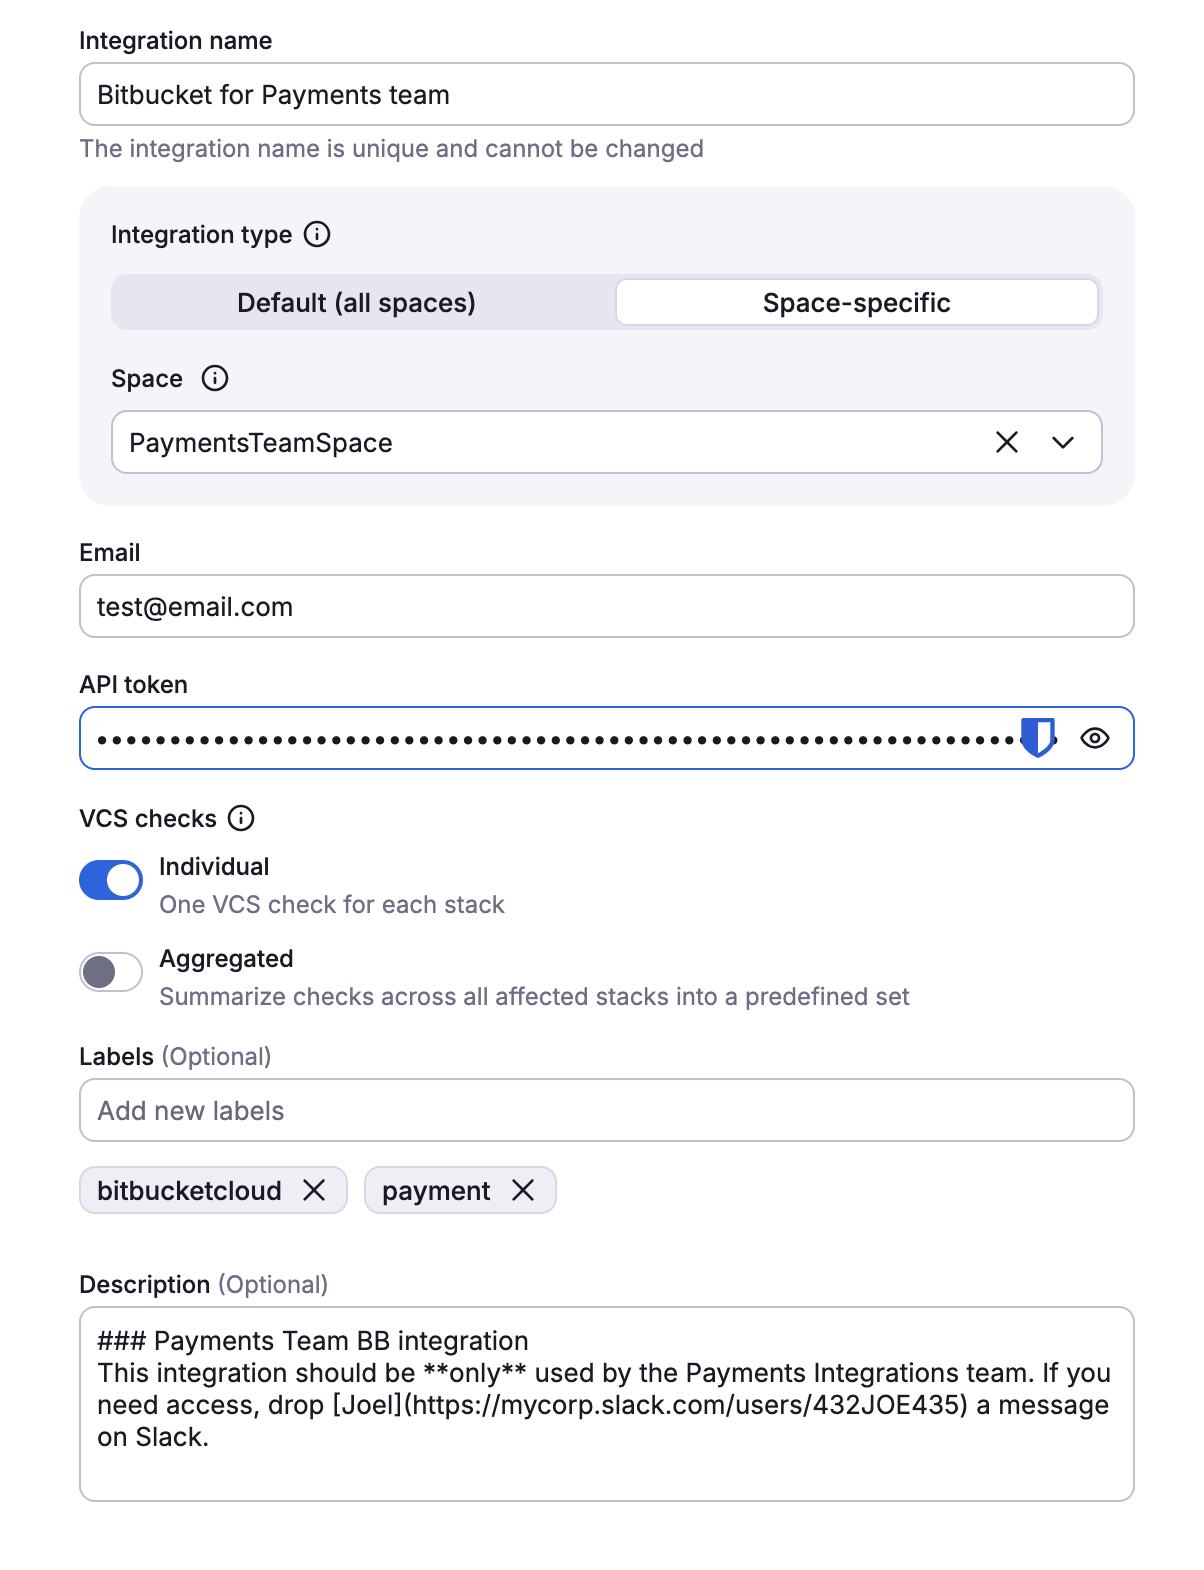
- Integration name: Enter a name for your integration. It cannot be changed later because the Spacelift webhook endpoint is generated based on this name.
- Integration type: Default (all spaces) or Space-specific. Each Spacelift account can only support one default integration per VCS provider, which is available to all stacks and modules in the same Space as the integration.
Migration from App Passwords to API Tokens
Previously, this integration used Bitbucket App Passwords for authentication. Atlassian has deprecated App Passwords and replaced them with API tokens.
Create your API token»
You will need to create an API token for this integration on the Bitbucket Cloud site.
- Navigate to Atlassian account settings > Security > Create API token with scopes.
-
Fill in the details to create a new API token:
- Choose a name for your API token.
- Set an expiration date.
-
Select Bitbucket as the app.
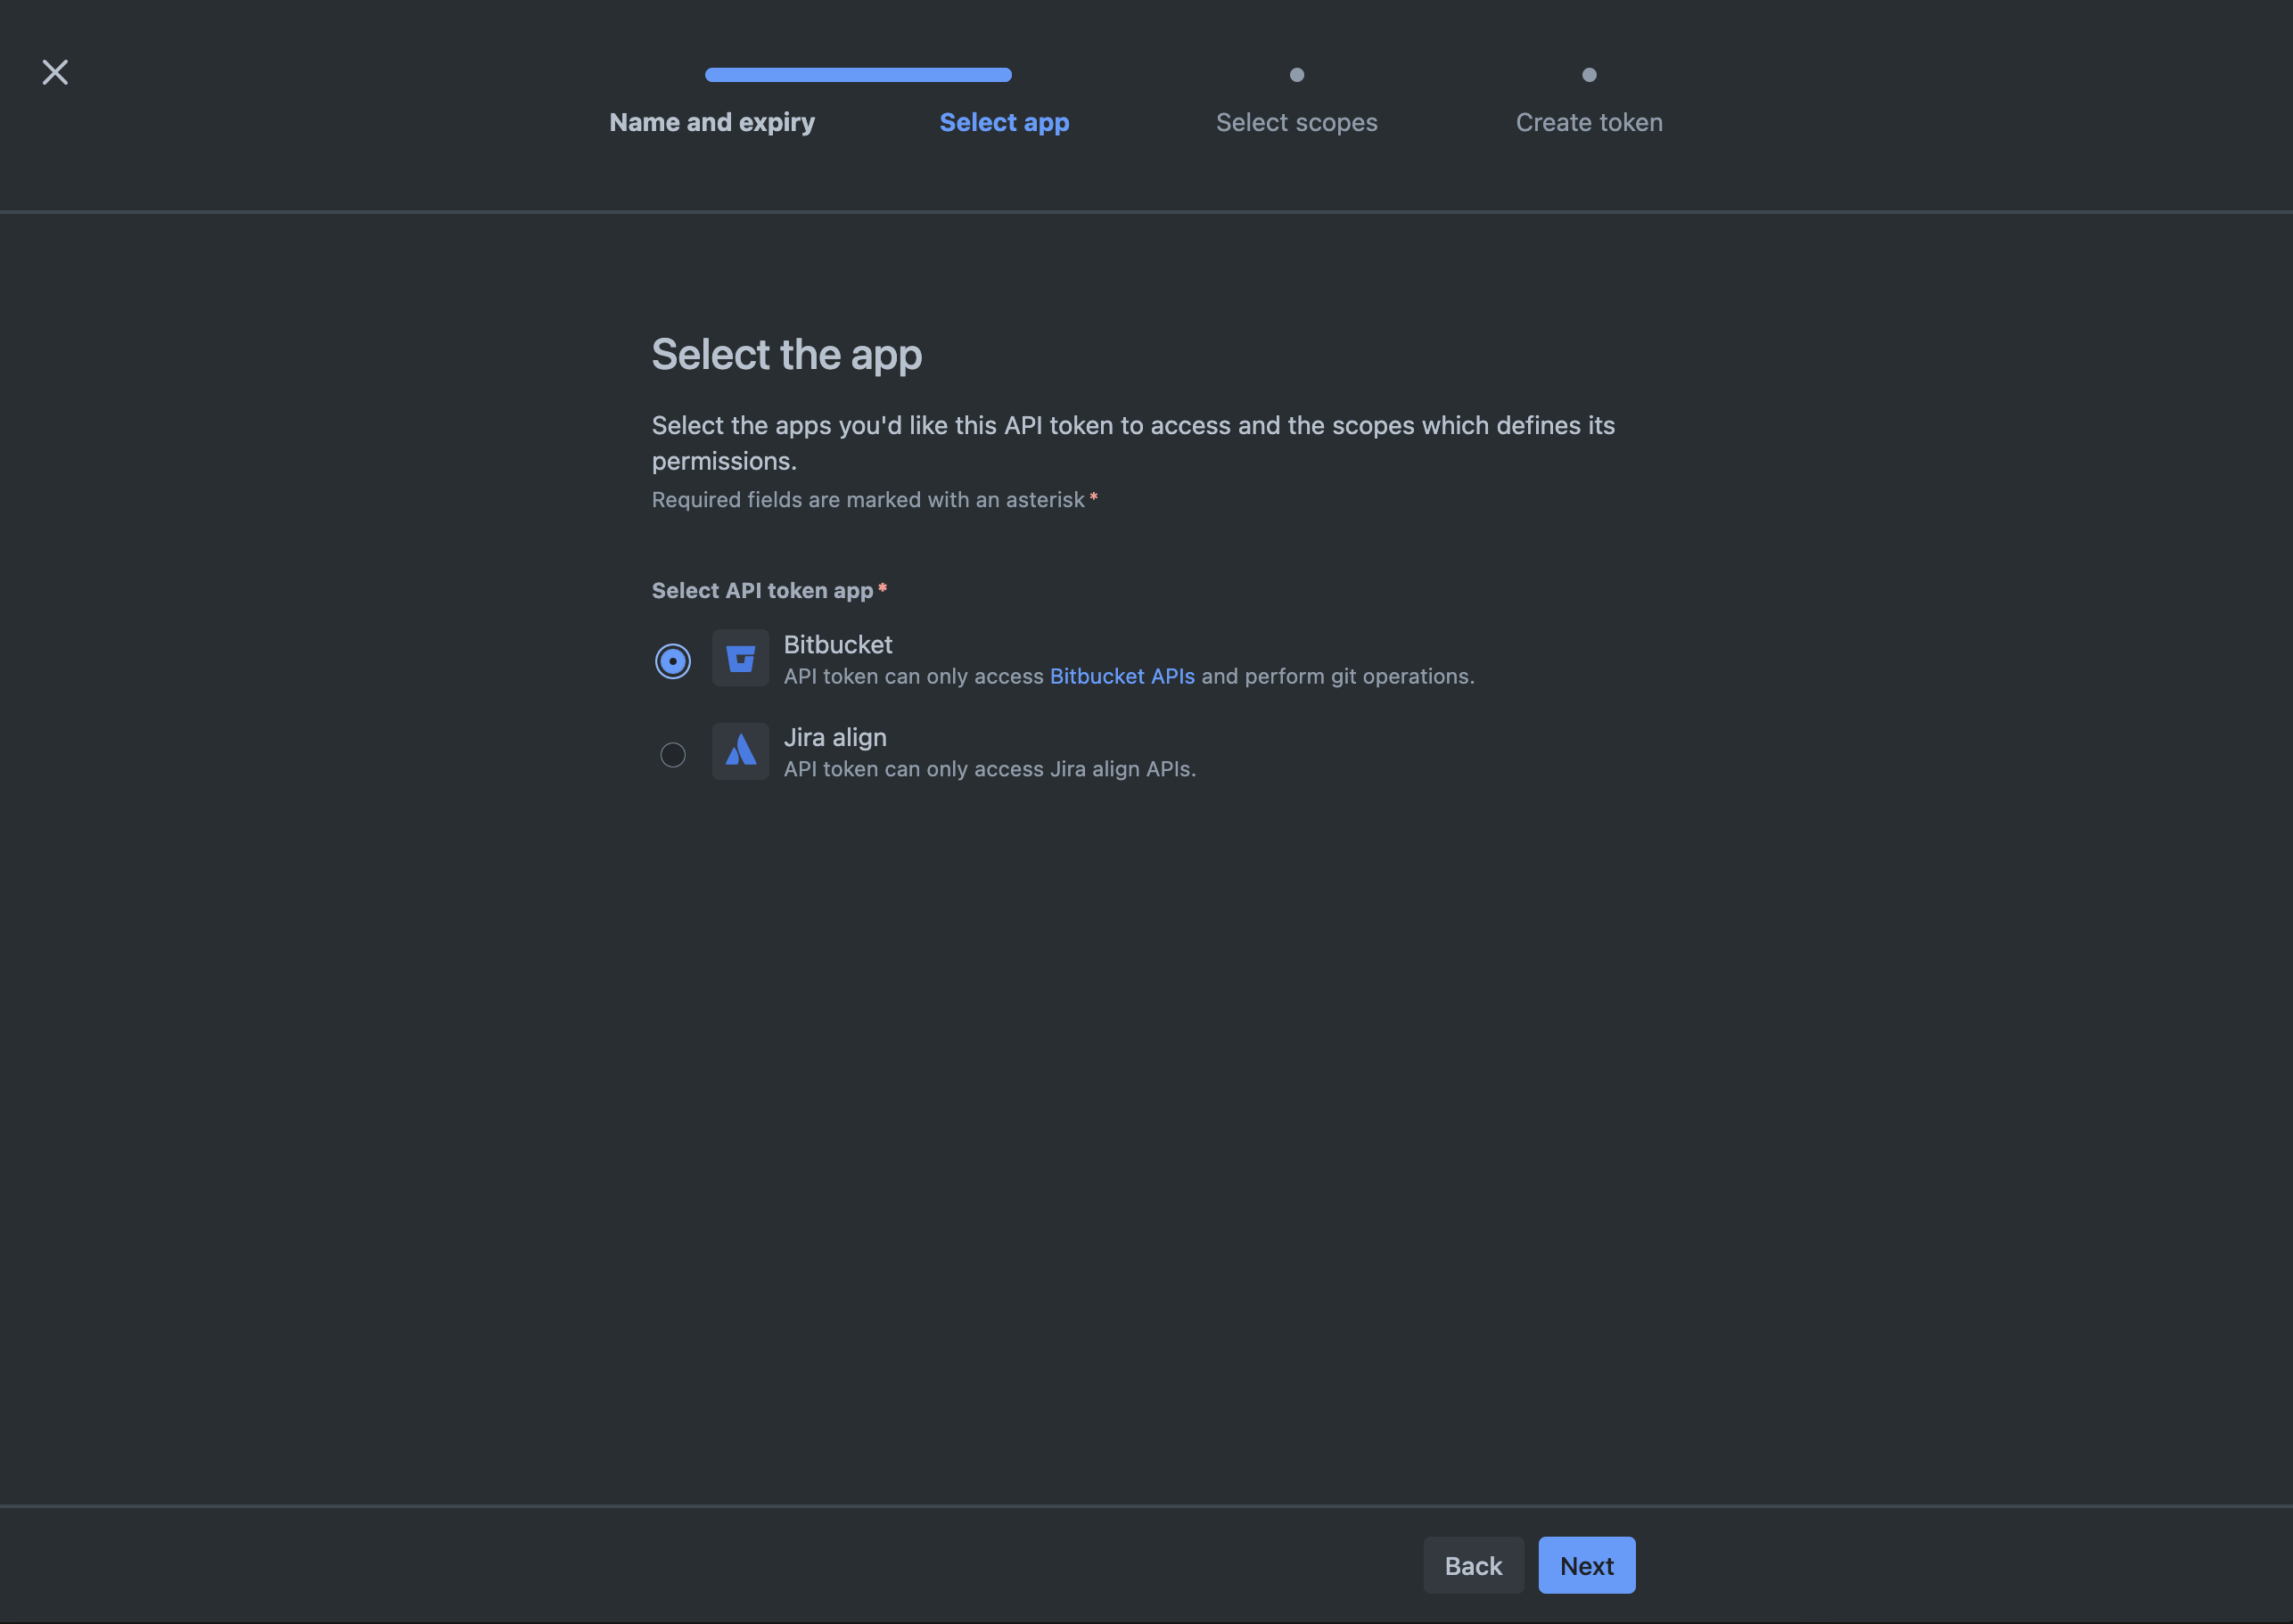
-
Select read permissions for:
- Repository (
read:repository:bitbucket) - Pull requests (
read:pullrequest:bitbucket) - Workspace (
read:workspace:bitbucket)
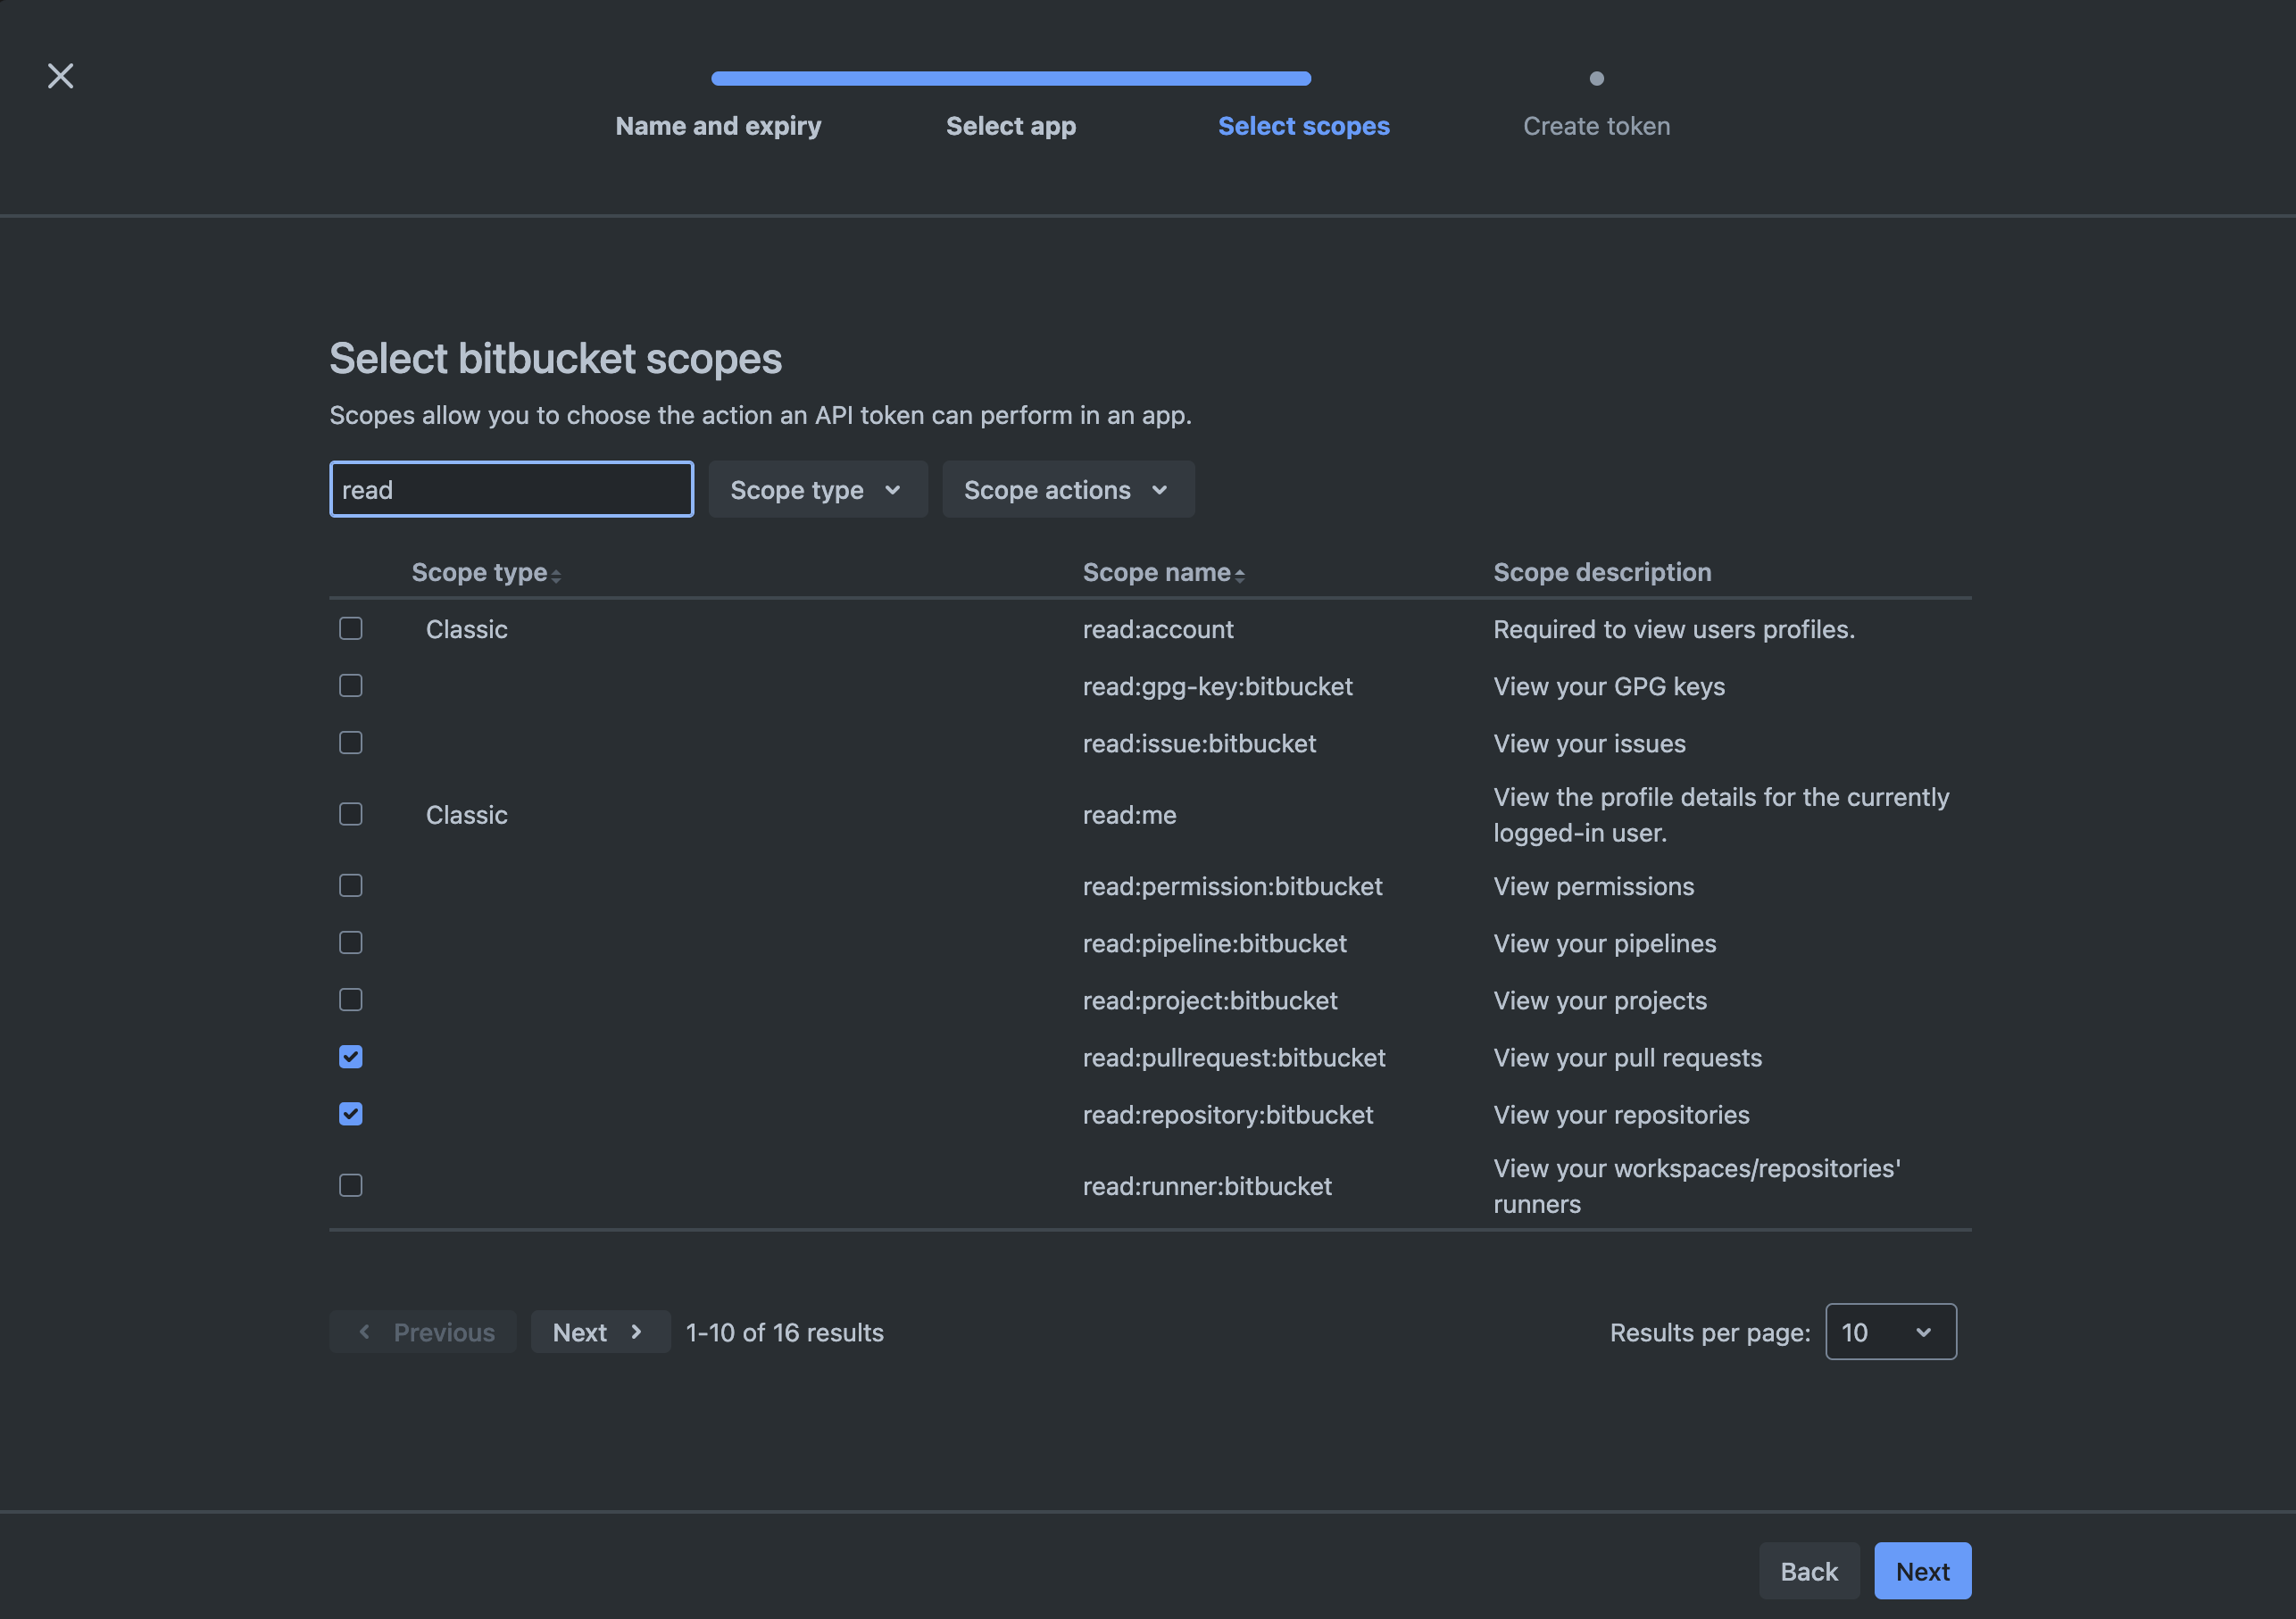
- Repository (
-
Click Create.
- Copy the API token details to finish the integration in Spacelift.
Copy details into Spacelift»
Now that your API token has been created, return to the integration configuration screen in Spacelift.
- Email: Enter your Bitbucket Cloud email address.
- API token: Paste the API token that Spacelift will use to access your Bitbucket Cloud repository.
- Labels: Organize integrations by assigning labels to them.
- Description: A markdown-formatted free-form text field to describe the integration.
- Click Set up to save your integration details.
Set up webhooks»
For every Bitbucket Cloud repository being used in Spacelift stacks or modules, you will need to set up a webhook to notify Spacelift about project changes.
Note
Default integrations are visible to all users of the account, but only root Space admins can see their details.
Space-level integrations will be listed to users with read access to the integration Space. Integration details, however, contain sensitive information (such as the webhook secret) and are only visible to those with admin access.
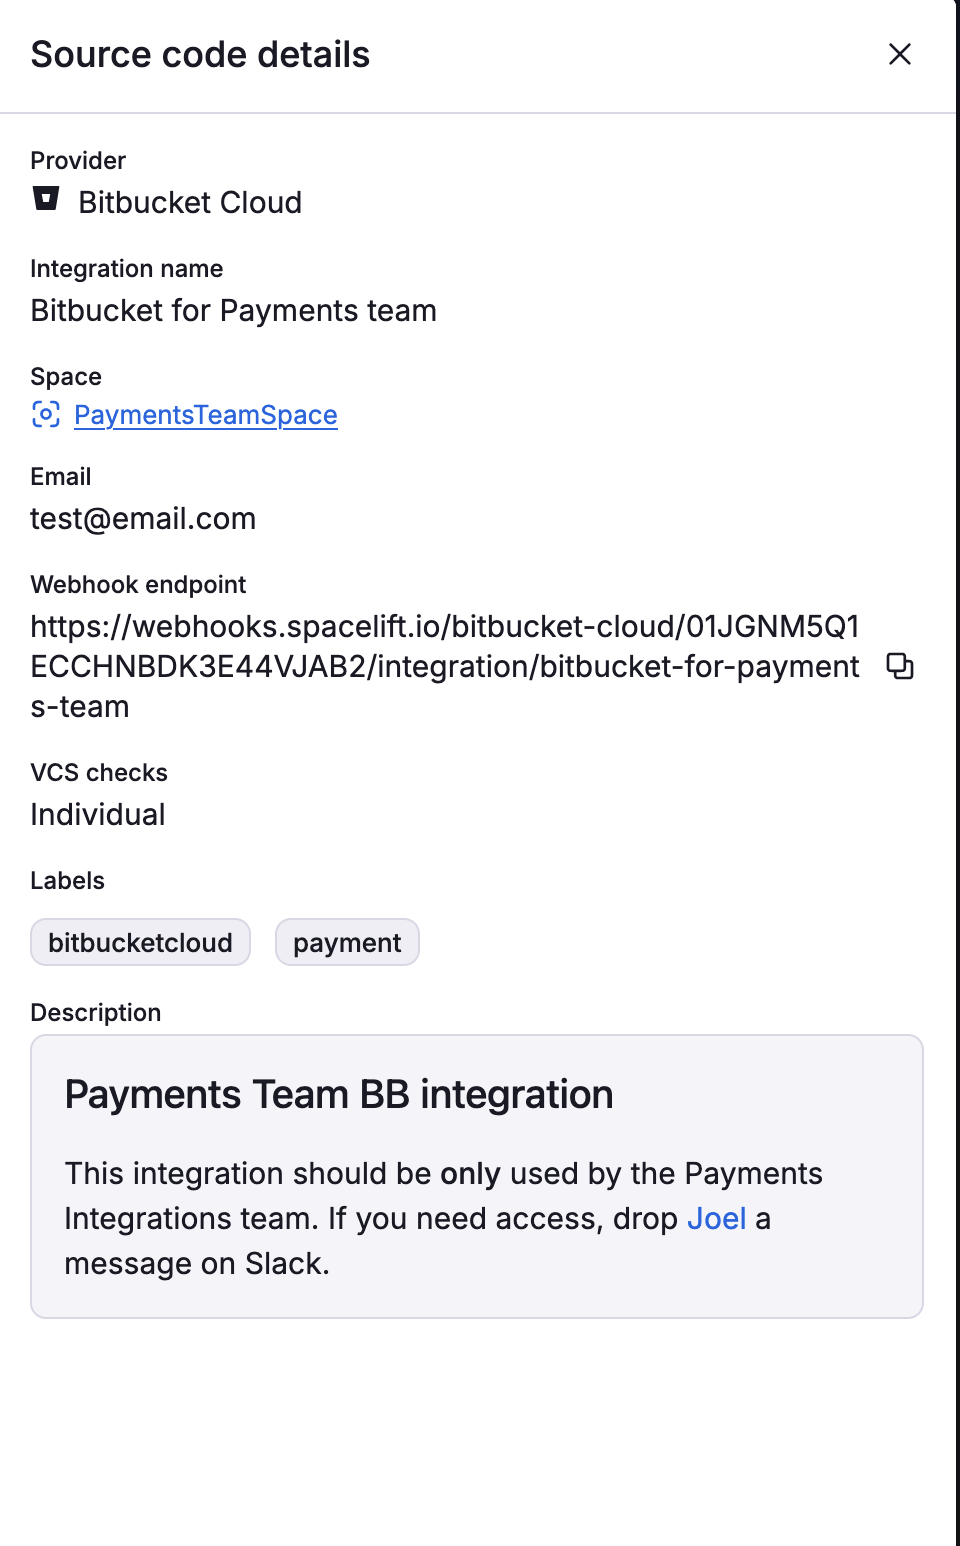
- On the Integrate Services > Discover all integrations page, click View on the Bitbucket Cloud card, then click the three dots next to the integration name.
- Click See details to find the webhook endpoint and webhook secret.
Configure webhooks in Bitbucket Cloud»
For each repository you want to use with Spacelift, you now need to add webhooks in Bitbucket Cloud.
- In Bitbucket Cloud, select the repository you are connecting to Spacelift.
- Navigate to Repository settings > Webhooks.
- Click Add webhook.
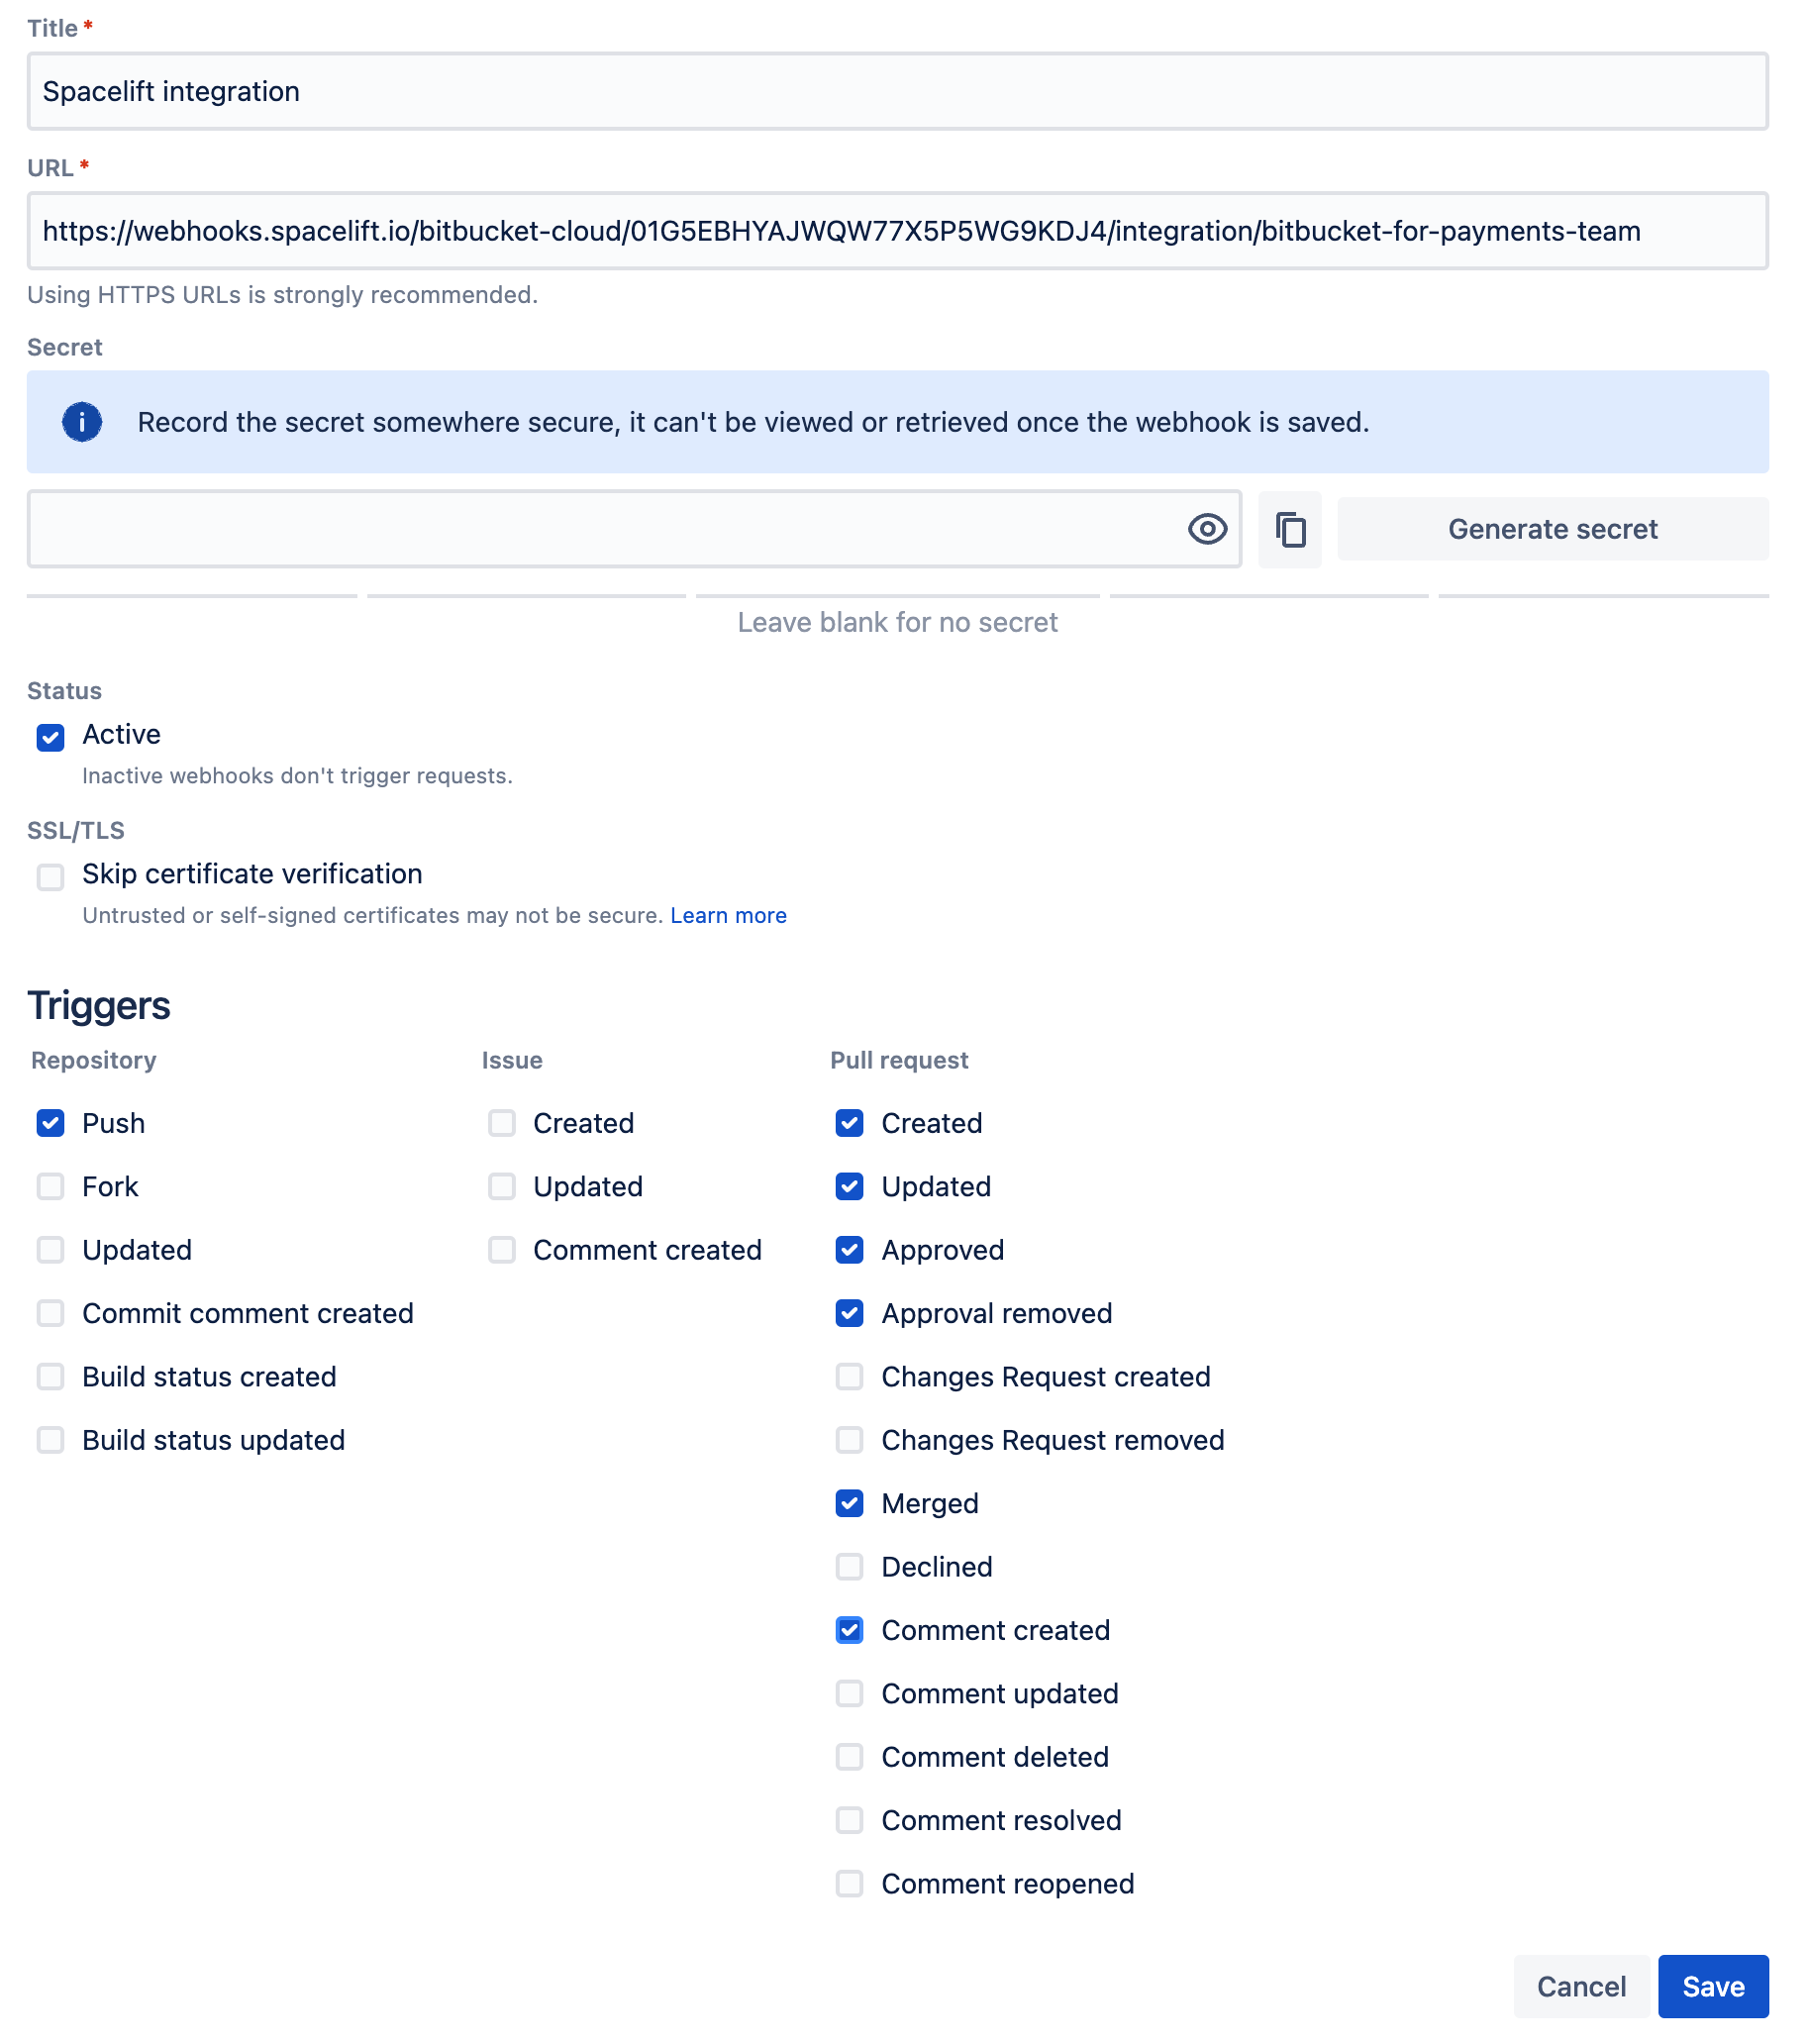
- Title: Enter a name for the webhook.
- URL: Paste the webhook endpoint from Spacelift.
- Secret: Paste the webhook secret from Spacelift.
- Status: Check Active.
- Triggers:
- Under Repository, check Push.
- Under Pull Request, check:
- Created
- Updated
- Approved
- Approval removed
- Merged
- Comment created
- Click Save.
Install Pull Request Commit Links app»
Finally, you should install the Pull Request Commit Links app to be able to use this API. The app is installed automatically when you go to the commit's details and click Pull requests.

✅ Step 1 of the Quick Start is complete! Now you can connect your cloud account.