Amazon Web Services (AWS)»
Hint
This feature is only available to paid Spacelift accounts. Please check out our pricing page for more information.
Warning
Until Terraform and OpenTofu versions 1.6.0, the AWS S3 state backend did not support authenticating with OIDC.
If you need to use the AWS S3 state backend with older versions, you can use the following workaround:
- Add the following command as a
before_inithook (make sure to replace<ROLE ARN>with your IAM role ARN).
1 | |
- Comment out the
role_arnargument in thebackendblock. - Comment out the
assume_role_with_web_identitysection in the AWS provider block.
Alternatively, you can use the dedicated AWS Cloud Integration that uses AWS STS to obtain temporary credentials.
Configure Spacelift as an identity provider»
You need to set up Spacelift as a valid identity provider for your AWS account. This is done by creating an OpenID Connect identity provider. You can do it declaratively using any of the IaC providers, programmatically using the AWS CLI, or with the console.
For illustrative purposes, we will use the console:
- Go to the AWS console and select the IAM service.
- Click Identity providers in the left-hand menu.
- Click Add provider in the top bar.

- Select OpenID Connect as the provider type.

- Click Get thumbprint. This is required by AWS and protects you from a certain class of MitM attacks.
Hint
Add iss to Provider URL and you will need to add aud to Audience.
Replace demo.app.spacelift.io with the hostname of your Spacelift account.
Once created, the identity provider will be listed in the "Identity providers" table.
Add Spacelift OIDC as the role provider»
You can click on the provider name to see the details. From here, you will also be able to assign an IAM role to this new identity provider:
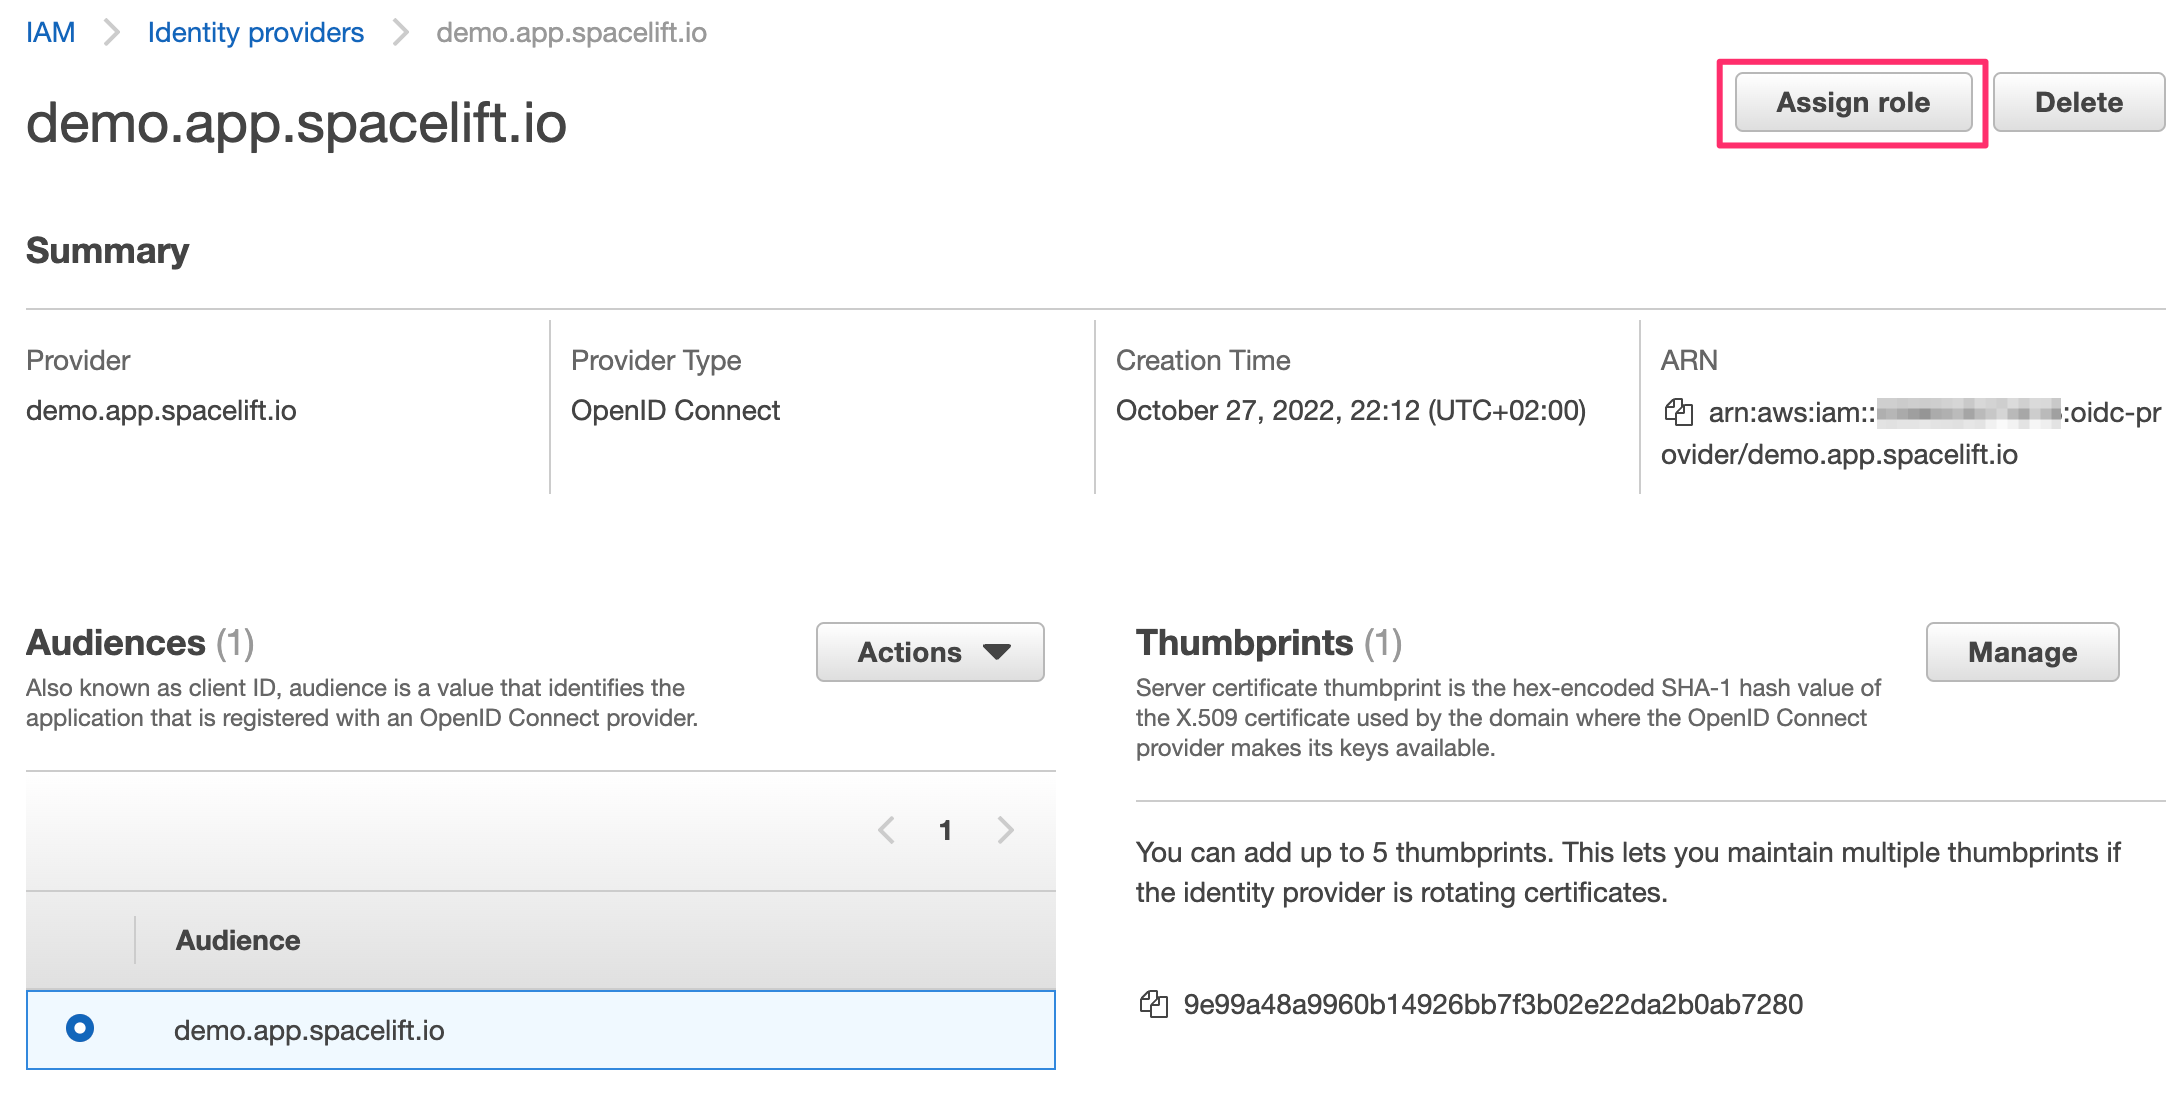
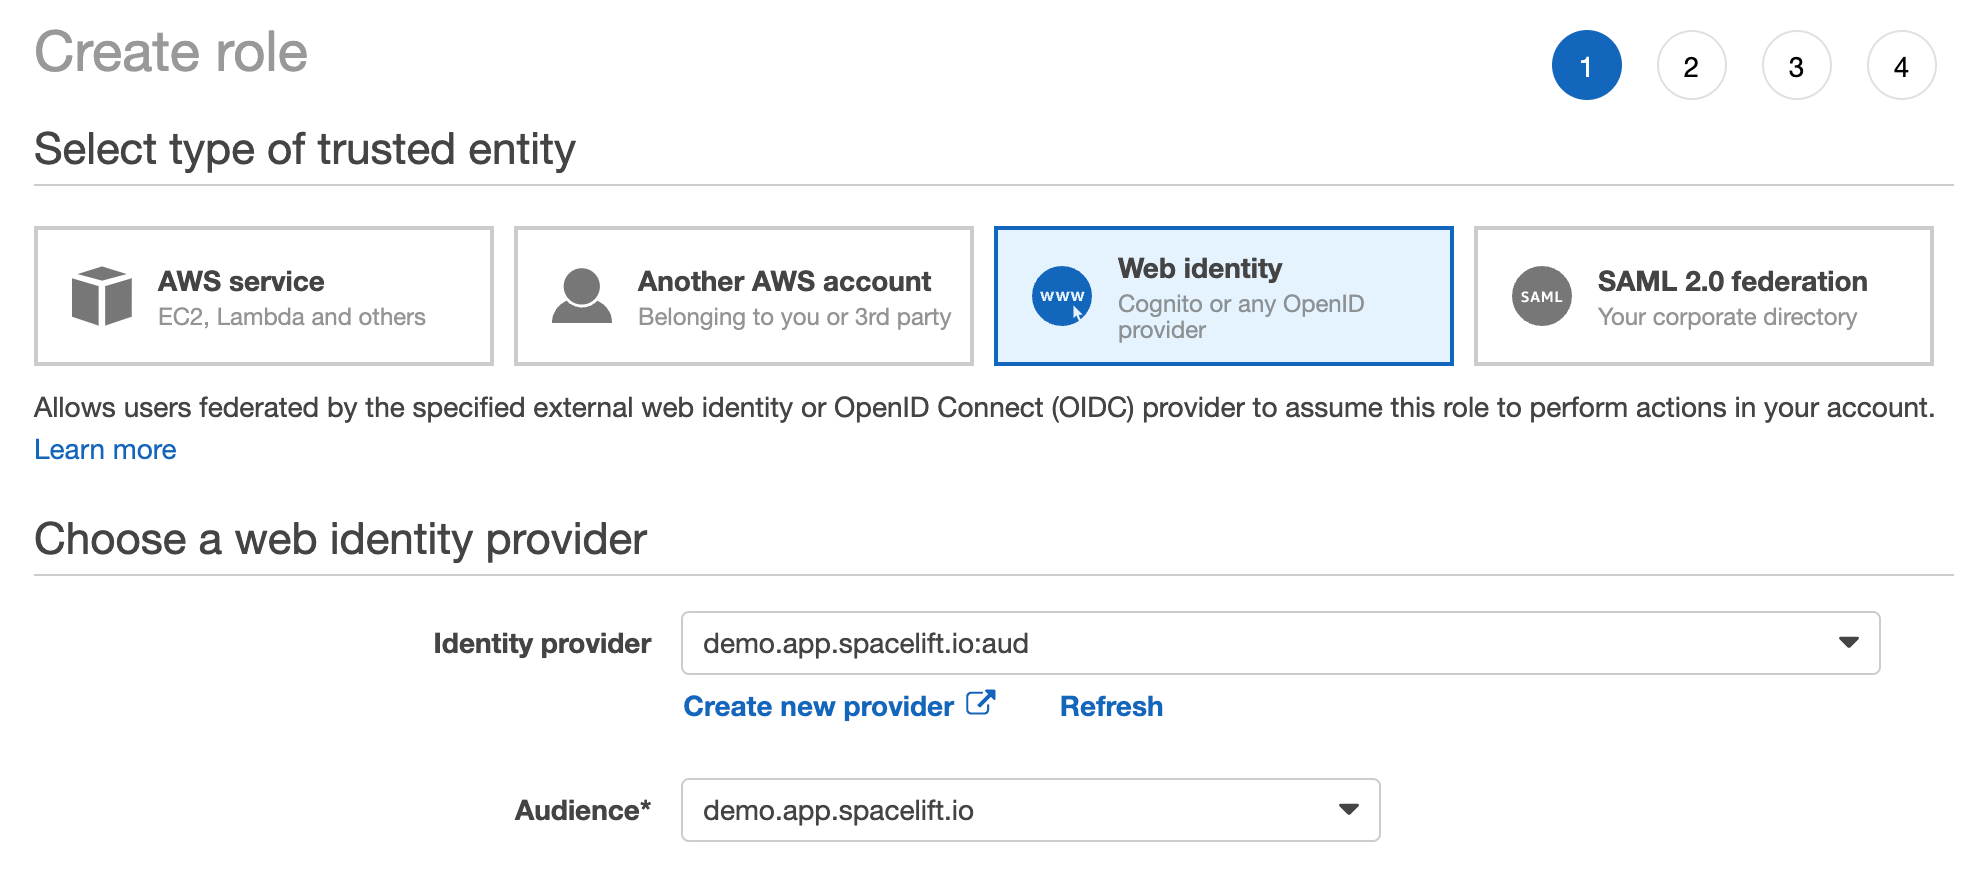
- Click Assign role, and choose to create a new role.
- Click Web identity and select the new Spacelift OIDC provider as the trusted entity.
- Select the audience from the dropdown (there should only be one option).
- The rest of the process is the same as for any other role creation. Select the policies you want to attach to the role, and add tags and a description.
- Once you're done, click Create role.
If you go to your new role's details page, in the Trust relationships section you will notice that it is now associated with the Spacelift OIDC provider:

This trust relationship is very relaxed and will allow any stack or module in the demo Spacelift account to assume this role. If you want to be more restrictive, you will want to add more conditions. For example, we can restrict the role to be only assumable by stacks in the production space (with space ID production-01HND497T9JKR76MR3KA2CDJHP) by adding the following condition:
1 2 3 | |
Hint
You will need to replace demo.app.spacelift.io with the hostname of your Spacelift account.
You can also restrict the role so only a specific stack can assume it, using the stack ID:
1 2 3 | |
You can mix and match these to get the exact constraints you need. You can learn more about the intricacies of AWS IAM conditions in the official docs. Remember that AWS does not seem to support custom claims, so you will need to use the standard ones to do the matching (primarily sub, as shown above).
The full sub is constructed as follows:
- Format:
space:<space_id>:(stack|module):<stack_id|module_id>:run_type:<run_type>:scope:<read|write> - For example:
space:legacy-01KJMM56VS4W3AL9YZWVCXBX8D:stack:infra:run_type:TRACKED:scope:write
Wildcards»
You can use wildcards like "*" in your OIDC token, as long as the wildcard matches the exact format of the sub claim: space:<space_id>:(stack|module):<stack_id|module_id>:run_type:<run_type>:scope:<read|write>.
For example, you could create a policy like this, which would cover most internal spaces, stacks, run types, and scopes:
1 2 3 4 5 | |
space:production-*: Covers any internal Space ID that begins with "production-".stack:*: Matches any stack inside that production space.run_type:*: Covers all types of runs (e.g., PROPOSED, TRACKED).scope:*: Covers both read and write scopes for that run.
Wherever you need tighter control of access or which spaces and stacks are affected, replace the wildcard with the exact value for that portion of the claim.
Using custom subject templates»
If you have configured a custom OIDC subject template that includes the {spacePath} placeholder, you can create more sophisticated trust policies based on your space hierarchy.
For example, if you have a space hierarchy like:
1 2 3 4 | |
You can create a trust policy that grants access to all stacks within the production branch and all its descendants:
1 2 3 | |
This is particularly useful when you have identically-named spaces in different branches. For instance, if you have both /root/production/us-east-1 and /root/staging/us-east-1, you can distinguish between them in your trust policies:
1 2 3 4 5 6 | |
Hint
See the Customizing the OIDC Subject Claim guide for more information on how to configure custom subject templates and migrate existing trust policies safely.
Session tagging»
You can enable OIDC session tagging by adding the label feature:aws_oidc_session_tagging to your stack. This allows Spacelift to pass principal tags during the AssumeRoleWithWebIdentity call, which can be useful for auditing and access control.
When session tagging is enabled, Spacelift sets the following tags on the assumed role session:
| Tag key | Value |
|---|---|
run |
The ULID of the run |
stack |
The slug of the stack |
space |
The slug of the space the stack belongs to |
All three tags are marked as transitive, meaning they are automatically carried forward when your role assumes another role. This is useful when managing resources across multiple AWS accounts, as the Spacelift context remains attached throughout the role chain.
To use session tagging, your IAM role's trust relationship must include the sts:TagSession action:
1 2 3 4 5 6 7 8 9 10 11 12 13 14 15 16 17 18 19 20 | |
Hint
Replace demo.app.spacelift.io with the hostname of your Spacelift account, and update the AWS account ID in the Federated ARN.
Configure the Terraform provider»
Once the Spacelift-AWS OIDC integration is set up, the Terraform provider can be configured without the need for any static credentials. The aws_role_arn variable should be set to the ARN of the role that you want to assume:
1 2 3 4 5 6 | |