Create a stack in Spacelift»
Creating a stack involves 9 steps, most of which are optional. Required tasks are marked with an asterisk here:
- *Name, describe, and label the stack.
- *Create a link between your new stack and an existing source code repository.
- *Choose the backend vendor.
- Define common behavior of the stack.
- Assign roles.
- Create stack hooks.
- Attach a cloud integration.
- Attach policies.
- Attach contexts.
- *Review the summary and create your stack.
To get started, click Create stack on the Ship Infra > Stacks page or Create first stack from the LaunchPad.

1. Stack details»
Fill in required stack details.
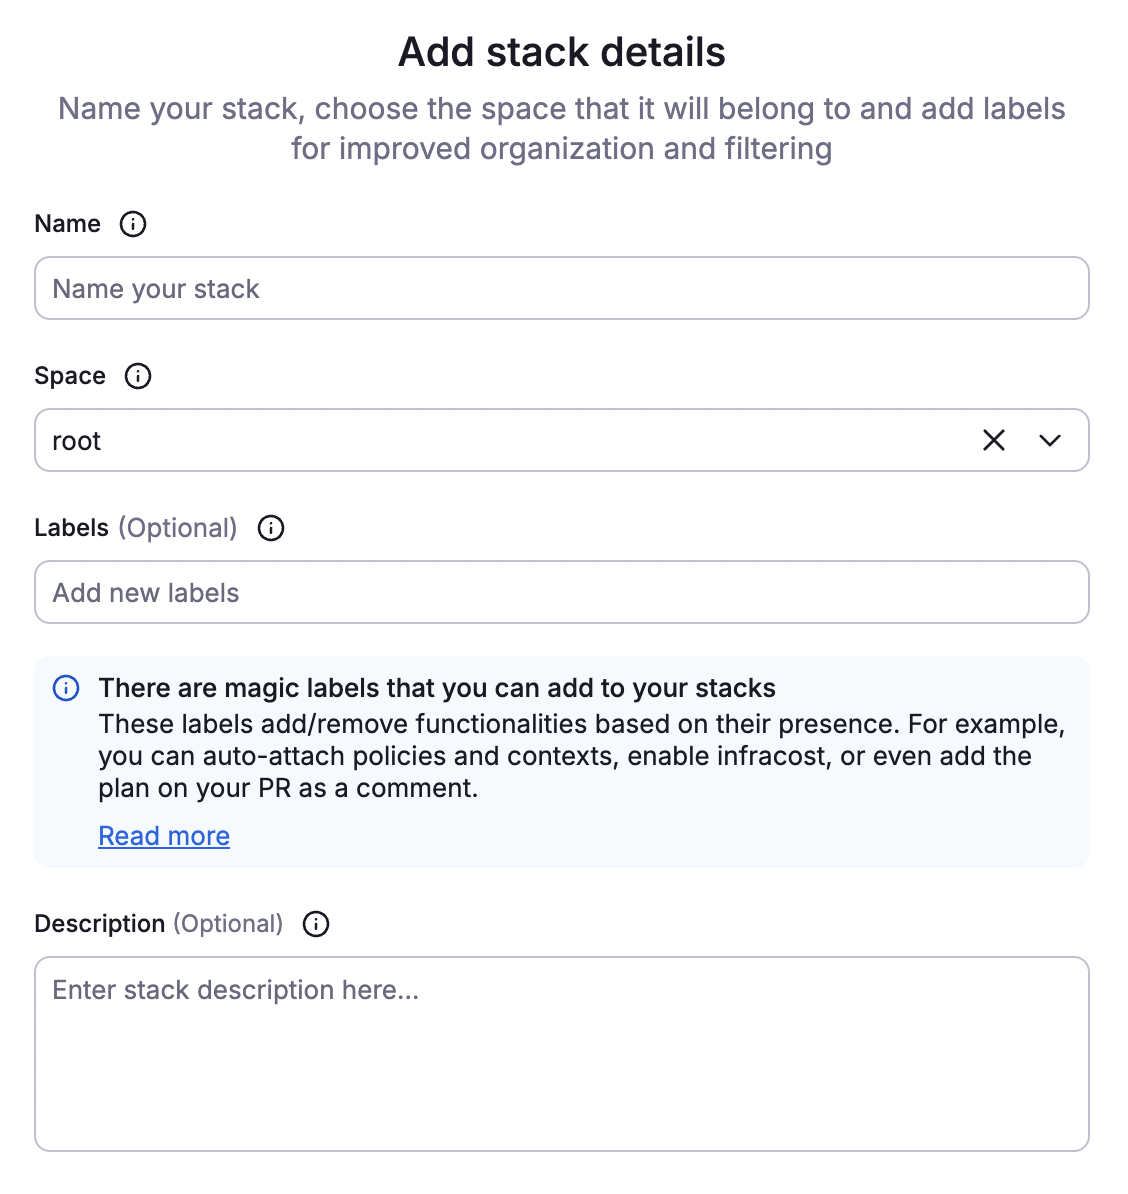
- Name: Enter a unique, descriptive name for your stack.
- Space: Select the space to create the stack in.
- Labels (optional): Add labels to help sort and filter your stacks.
- Description (optional): Enter a (markdown-supported) description of the stack and the resources it manages.
- Click Continue.
2. Connect to source code»
Connect your VCS provider as configured during LaunchPad step 1 and fill in the details.
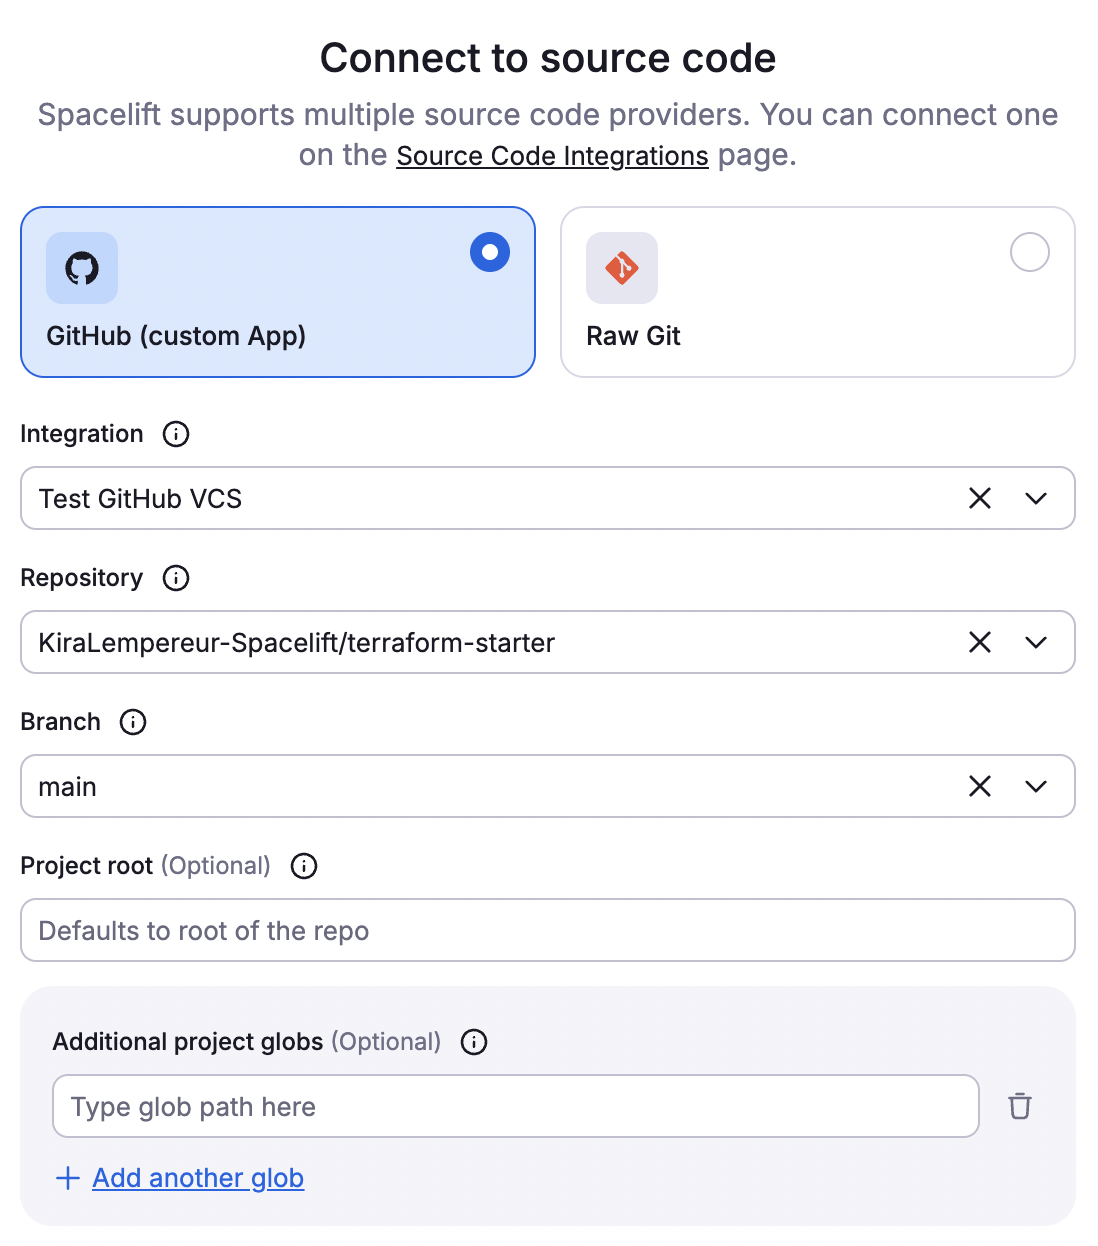
- Integration: Verify the VCS integration name is correct.
- Repository: Select the repository to manage in Spacelift. If you have multiple repositories linked to one VCS, leave blank.
- Branch: Select the branch of the repository to manage with this stack.
- Project root (optional): If the entrypoint of the stack is different than the root of the repo, enter its path here.
- Project globs (optional): Enter additional files and directories that should be managed by the stack.
- Click Continue.
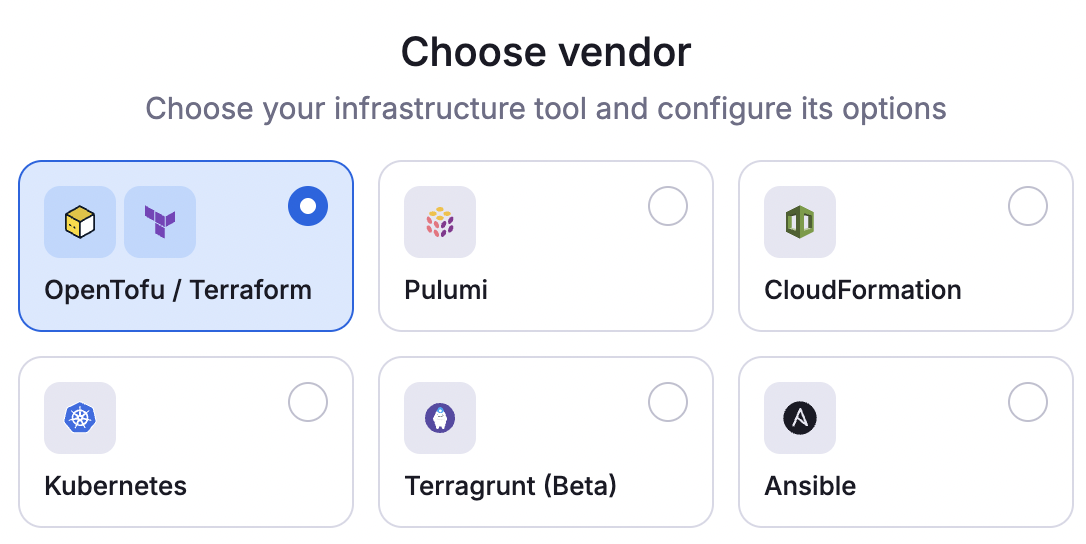
3. Choose vendor»
Select your IaC vendor and fill in the required details, then click Create & continue.
OpenTofu/Terraform»
- Workflow tool: Set to OpenTofu, Terraform (FOSS), or Custom.
- With OpenTofu or Terraform (FOSS), select a specific version or enter a version range.
- Smart Sanitization (recommended): Choose whether Spacelift attempts to sanitize sensitive resources created by OpenTofu/Terraform.
- Manage State (recommended): Choose whether Spacelift should handle the OpenTofu/Terraform state.
- If disabled: Optionally enter a workspace.
- If enabled: Configure these options:
- External state access: Allow external read-only access for other stacks or users with write permissions to the Stack's space.
- Import existing state file: Enable to import a state file from your previous backend.
- Click Create & continue.
Pulumi»
- Login URL: Enter the URL to your Pulumi state backend.
- Stack name: Enter a name for your Pulumi stack. This is separate from the name of the Spacelift stack, but you can give both the same name.
- Click Create & continue.
AWS CloudFormation»
- Region: Enter the AWS region your stack will be located in (e.g.
us-east-2). - Stack name: Enter the name of the corresponding CloudFormation stack.
- Entry template file: Enter the path to the template file in your repo describing the root CloudFormation stack.
- Template bucket: Enter the location of the S3 bucket to store processed CloudFormation templates, so Spacelift can manage the state properly.
- Click Create & continue.
Kubernetes»
- Namespace (optional): Enter the namespace of the Kubernetes cluster you want to run commands on. Leave blank for multi-namespace stacks.
- Workflow tool: Select the tool used to execute workflow commands.
- Kubernetes: Provide the kubectl version the worker will download.
- Custom: No configuration needed.
- Click Create & continue.
Terragrunt»
- Terragrunt version: Select a specific Terraform version or enter a version range.
- Tool: Select the tool used to make infrastructure changes:
- OpenTofu/Terraform (FOSS): Select a specific Terraform version or enter a version range.
- Manually provisioned: Outside of Spacelift, ensure the tool is available to the worker via a custom image or hook and set the
TERRAGRUNT_TFPATHenvironment variable to tell Terragrunt where to find it.
- Smart Sanitization (recommended): Choose whether Spacelift attempts to sanitize sensitive resources created by OpenTofu/Terraform.
- Use All Run: Enable to use Terragrunt's run-all feature.
- Skip replan (beta): When using Run All, skip the second planning phase during the
applystage. - Manage state: Allow Spacelift to manage the Terragrunt state.
- Click Create & continue.
Ansible»
- Playbook: Enter the playbook file to run in the stack.
- Click Create & continue.
Once you've configured your vendor information, click Continue to Define stack behavior.
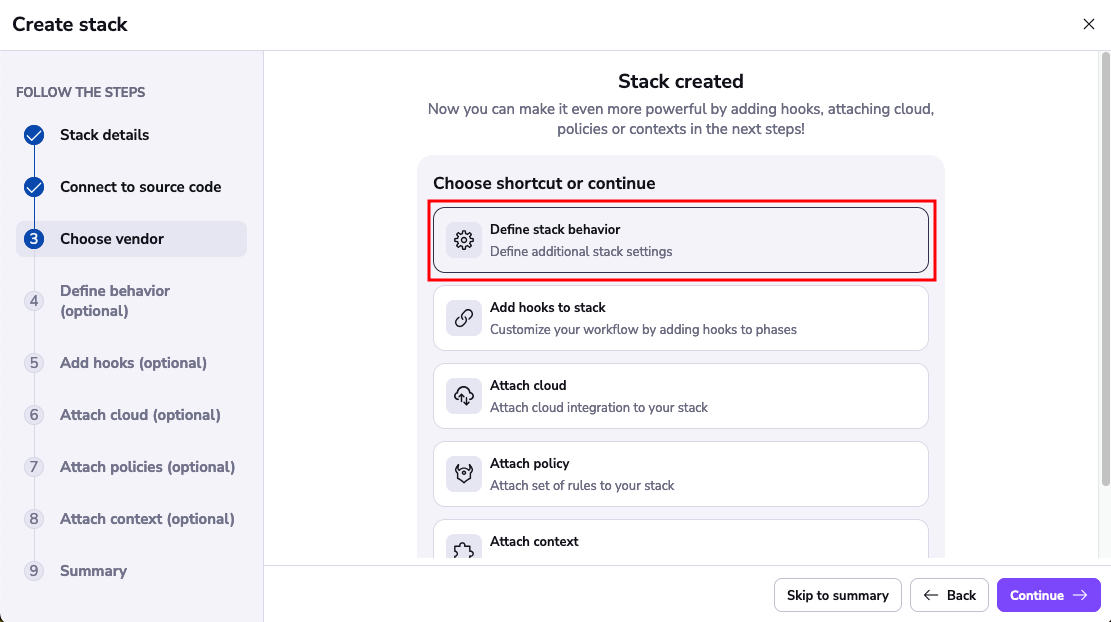
4. Define behavior»
Determine and set additional behaviors for your stack.
- Worker pool: Choose which worker pool to use (default is public workers).
- Runner image: Use a custom runner for your runtime environment.
- Allow run promotion: Allows you to promote a proposed run to a tracked run (i.e. deploy from a feature branch).
- Autodeploy: Automatically deploy changes to your code.
- Autoretry: Automatically retry deployment of invalidated proposed runs. For stacks using private workers only.
- Enable local preview: Preview how code changes will execute with the spacectl CLI feature.
- Enable secret masking: Automatically redact secret patterns from logs.
- Protect from deletion (recommended): Protect your stacks from accidental deletion.
- Transfer sensitive outputs across dependencices: Pass sensitive outputs from this stack to dependent stacks.
Once you've configured your settings, click Save & continue.
5. Assign roles»
You can assign roles to your stack to control access and permissions to other Spacelift resources. This is done through role attachments. This is useful if you want to manage Spacelift resources using IaC. See more details in the Terraform provider documentation.
6. Add hooks»
You also have the ability to control what happens before and after each runner phase using stack hooks. Define commands that run during the following phases:
- Initialization
- Planning
- Applying
- Destroying
- Performing
- Finally
Once you've added all hooks, click Save & continue.
7. Attach cloud»
If desired, attach the cloud provider integration configured in LaunchPad step 2.
- Select the cloud provider the stack will use.
- Attach integration: Choose the name of the integration the stack will use.
- Read: Use the integration during read phases.
- Write: Use the integration during write phases.
- Click Attach.
- Click Continue.
8. Attach policies»
If you're just following the LaunchPad steps, you won't have any policies yet. If you did configure policies, you will be able to attach them here:
- Approval: Who can approve or reject a run and how a run can be approved.
- Plan: Which changes can be applied.
- Push: How Git push events are interpreted.
- Trigger: What happens when blocking runs terminate.
Click Continue.
9. Attach context»
Contexts are sets of environment variables and related configuration, including hooks, that can be shared across multiple stacks. By attaching a context, you ensure your stack has all the necessary configuration elements it needs to operate, without repeating the setup for each stack.
If you're just following the LaunchPad steps, you won't have any contexts yet. If you did configure contexts, you will be able to attach them here.
Click Continue.
10. Summary»
Review your settings before finalizing your stack, then click Confirm.
✅ Step 3 of the Quick Start is complete! Now you can invite teammates.