Helm»
There is no native support within Spacelift for Helm, but you can use the helm template command in a before plan hook to generate the Kubernetes resource definitions to deploy.
Please note, the following caveats apply:
- Using
helm templatemeans that you are not using the full Helm workflow, which may cause limitations or prevent certain Charts from working. - You need to use a custom Spacelift worker image that has Helm installed, or alternatively you can install Helm using a before init hook.
The rest of this page will go through an example of deploying the Spacelift Workerpool Helm Chart using the Kubernetes integration. See here for an example repository.
Prerequisites»
The following prerequisites are required to follow the rest of this guide:
- A Kubernetes cluster that you can authenticate to from a Spacelift stack.
- A namespace called
spacelift-workerthat exists within that cluster.
Repository Creation»
Start by creating a new repository for your Helm stack. This repository only needs to contain a single item - a kustomization.yaml file:
1 2 3 4 5 6 7 8 | |
The kustomization file is used to tell kubectl where to find the file containing the output of the helm template command, and prevents kubectl from attempting to apply every yaml file in your repository. This is important if you want to commit a values.yaml file to your repository.
Info
Our example repository contains a values.yaml file used to configure some of the chart values. This isn't required, and is simply there for illustrative purposes.
Create a new Stack»
Define Behavior»
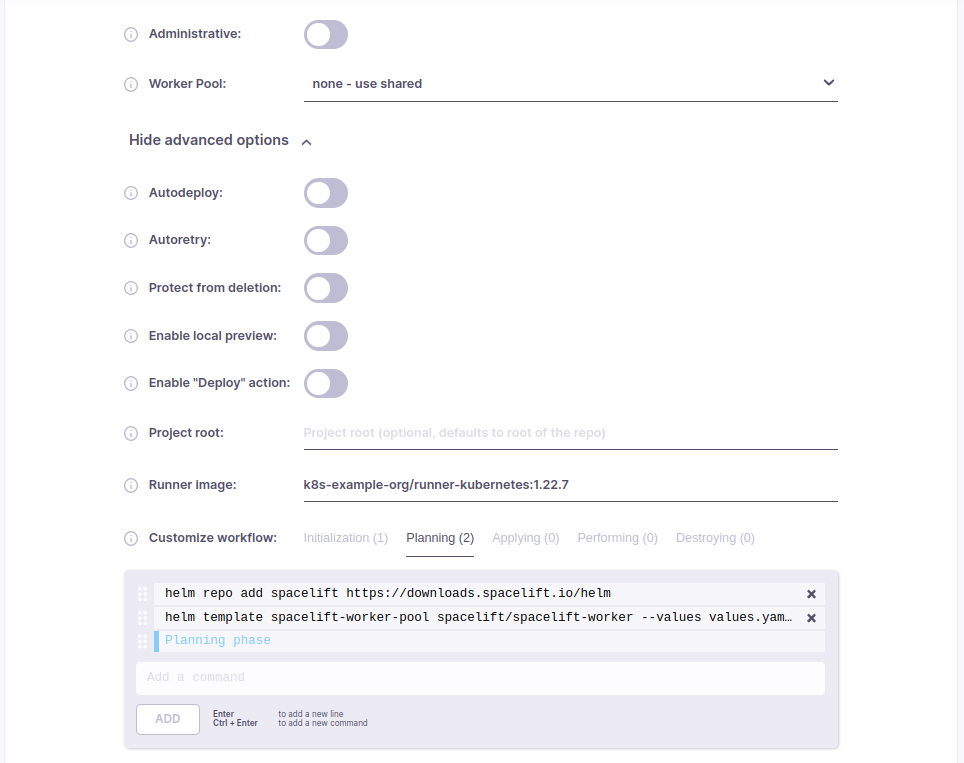
Follow the same steps to create your stack as per the Getting Started guide, but when you get to the Define Behavior step, add the following commands as before plan hooks:
1 2 | |
Also, make sure to specify your custom Runner image that has Helm installed if you are not installing Helm using a before init hook.
Once you've completed both steps, you should see something like this:

Configure Environment»
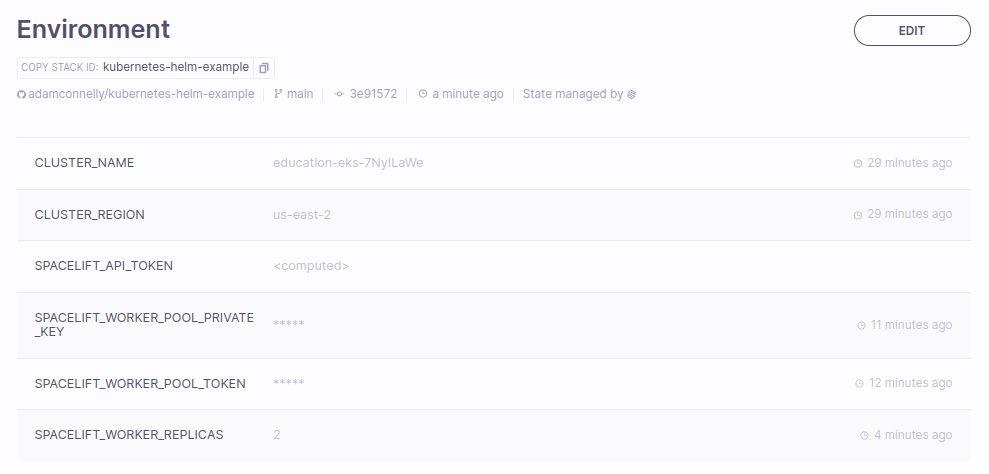
Once you have successfully created your Stack, add values for the following environment variables to your Stack environment:
SPACELIFT_WORKER_REPLICAS- the number of worker pool replicas to create.SPACELIFT_WORKER_POOL_TOKEN- the token downloaded when creating your worker pool.SPACELIFT_WORKER_POOL_PRIVATE_KEY- your base64-encoded private key.
Your Stack environment should look something like this:

Configure Integrations»
Configure any required Cloud Provider integrations as per the Getting Started guide.
Trigger a Run»
This example assumes that a Kubernetes namespace called spacelift-worker already exists. If it doesn't, create it using kubectl create namespace spacelift-worker before triggering a run.
Info
You can use a Spacelift Task to run the kubectl create namespace command.
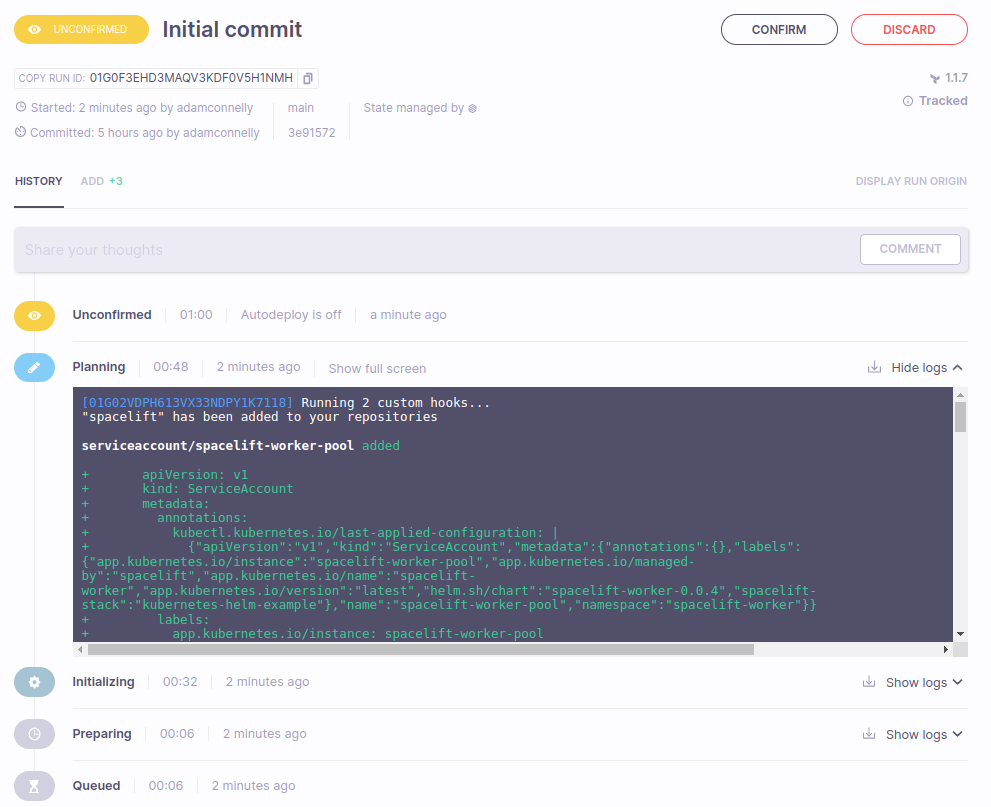
Triggering runs works exactly the same as when not using Helm. Once the planning stage has completed, you should see a preview of your changes, showing the Chart resources that will be created:

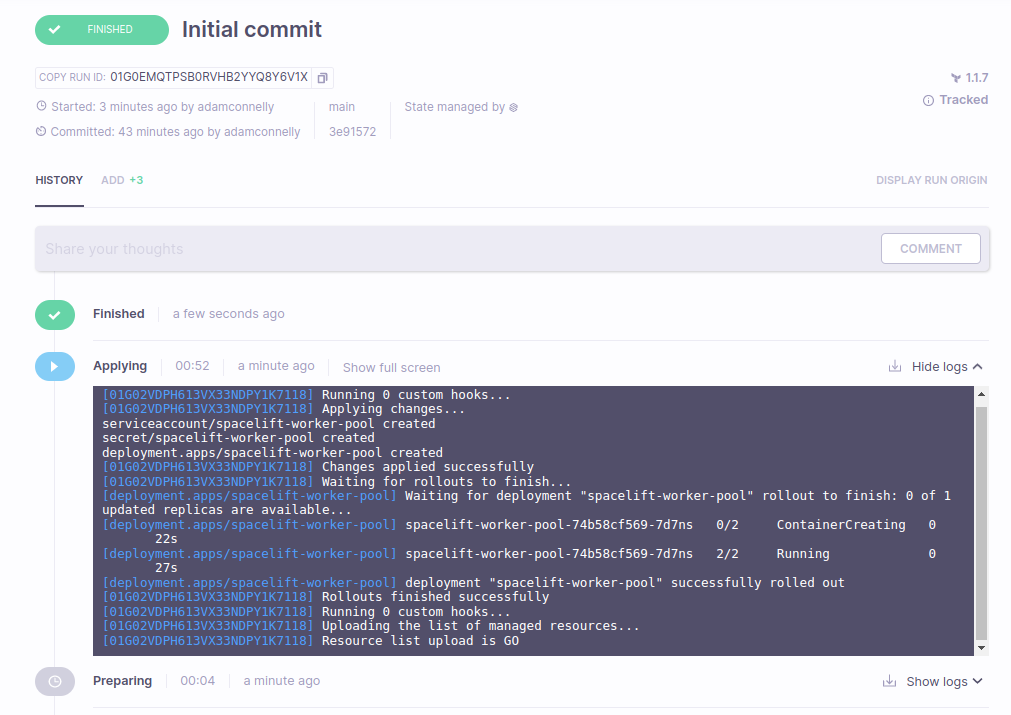
After approving the run, you should see the changes applying, along with a successful rollout of your Chart resources:
