Organize stacks»
Depending on the complexity of your infrastructure, the size of your team, your particular needs, and your preferred way of working, you may end up managing a lot of stacks. Spacelift offers several options for searching through your stacks, from basic query-based searching to filtering by status and' label-based folders.
Video Walkthrough»
Customize your table view»
You can customize the table view to suit your needs. Click the Customize list gear icon at the top-right to open a customizing drawer.

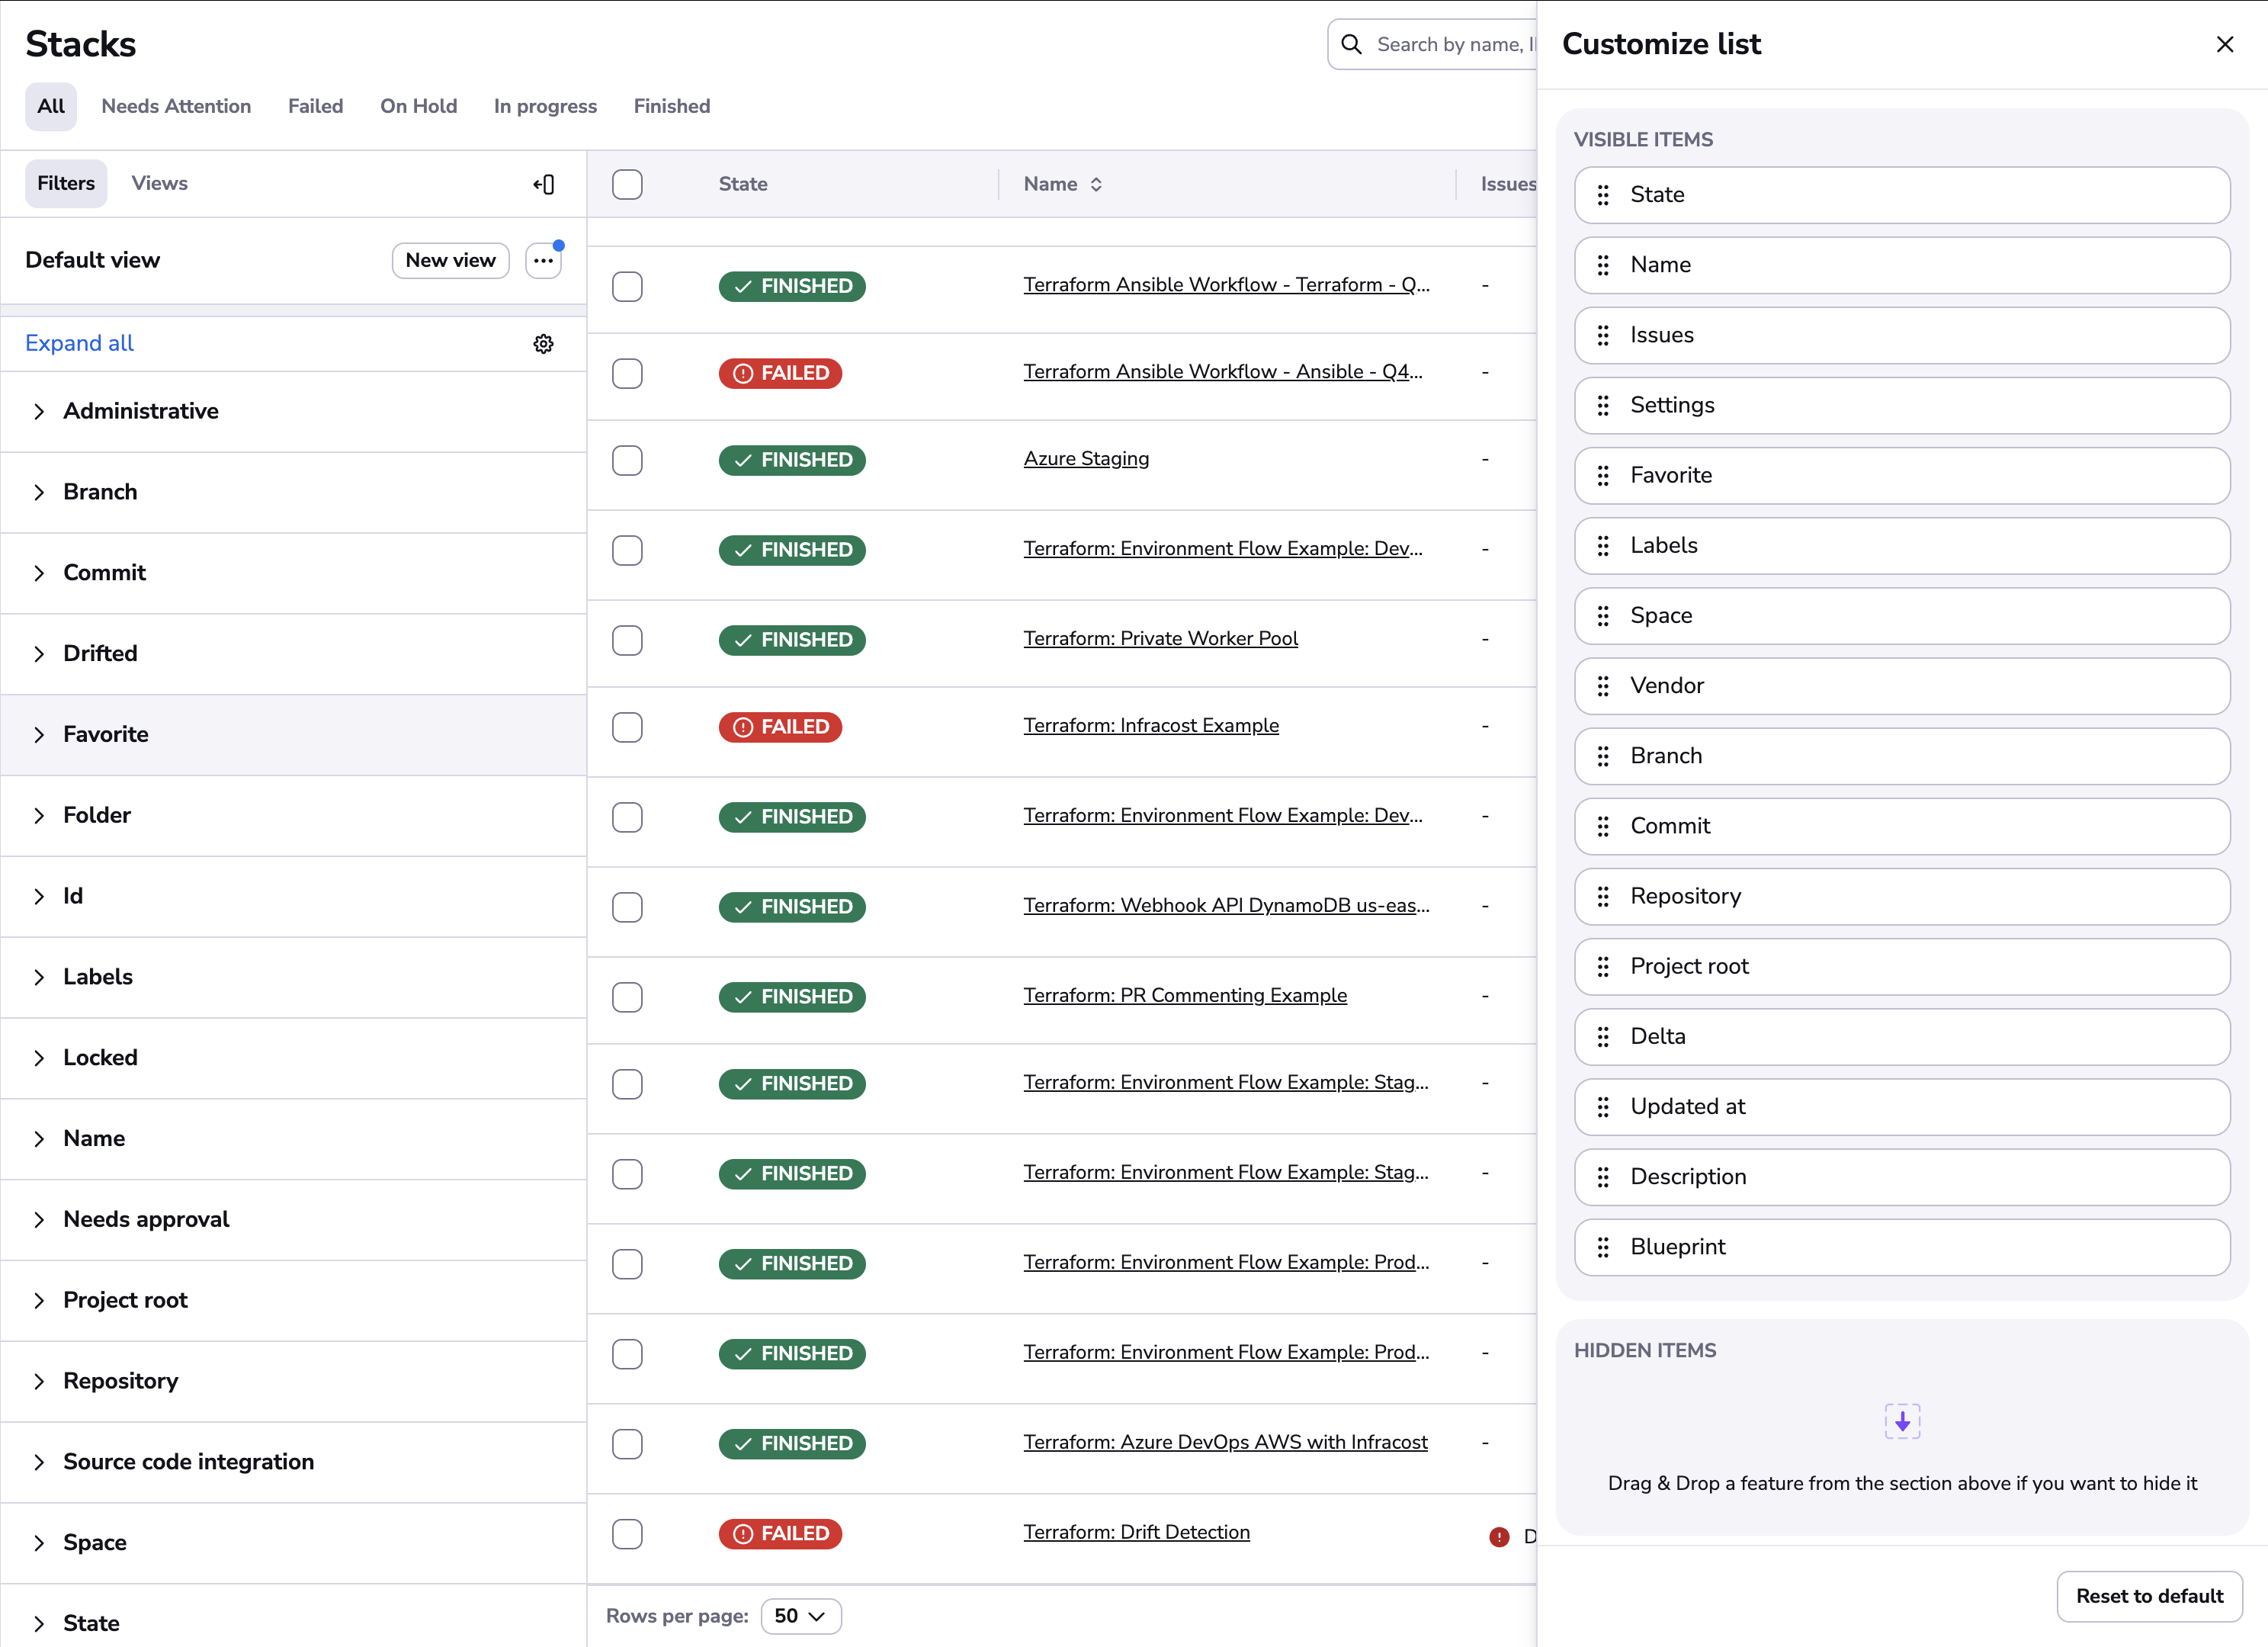
- Drag and drop columns to rearrange or hide them from view. The name column cannot be hidden.
- Alternatively, outside the customize list drawer, hover over the column header and click Hide.

- Alternatively, outside the customize list drawer, hover over the column header and click Hide.
- To reset your settings, click Reset to default at the bottom of the customization drawer.
You can also resize columns in the list by dragging the separator:

Query-based search and filter»

You can search and filter by these stack properties in the search bar:
- name
- ID (slug)
- any of its labels
Filter by state»
Filtering stacks by state is useful for identifying action items like plans pending confirmation (unconfirmed state) or failed jobs that require fixing. Use the State section on the left-hand sidebar, which displays all states attached to your stacks. Click state checkboxes to filter the list of stacks.
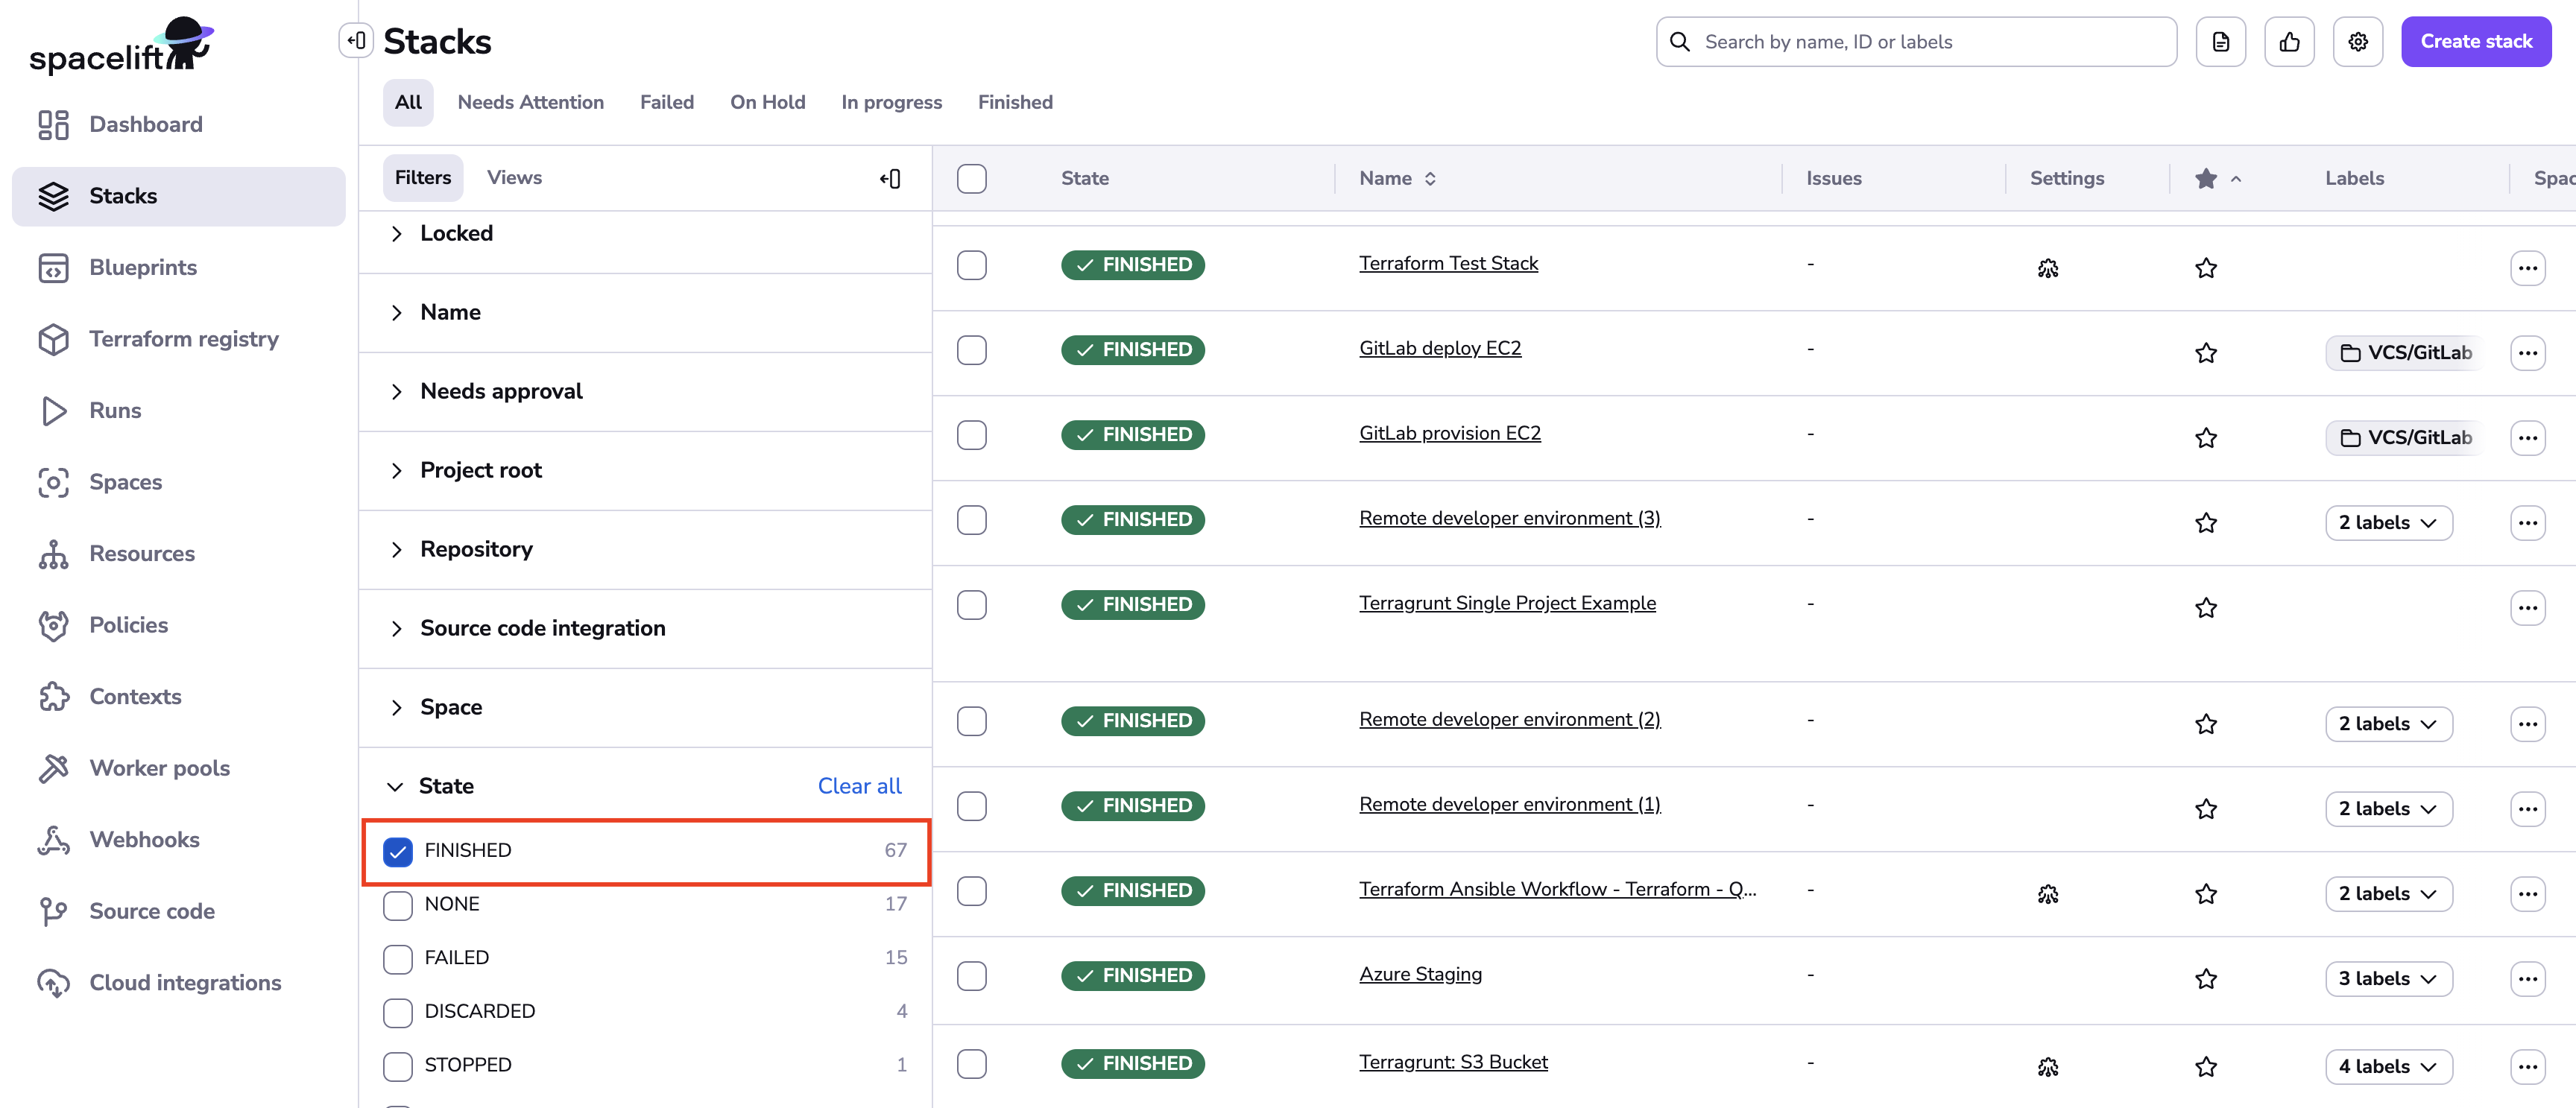
You can also use our predefined tabs to filter some specific group of states:

| Predefined Tab Label | State |
|---|---|
| Needs Attention | unconfirmed |
| Failed | failed |
| On Hold | none, confirmed, or replan-requested |
| In Progress | applying, destroying, initializing, planning, preparing-apply, or preparing-replan |
| Finished | finished |
Label-based folders»
You can group stacks by attaching folder labels to them, which are regular labels prefixed with folder:. In the stacks list, the folder: prefix is replaced width a folder icon.
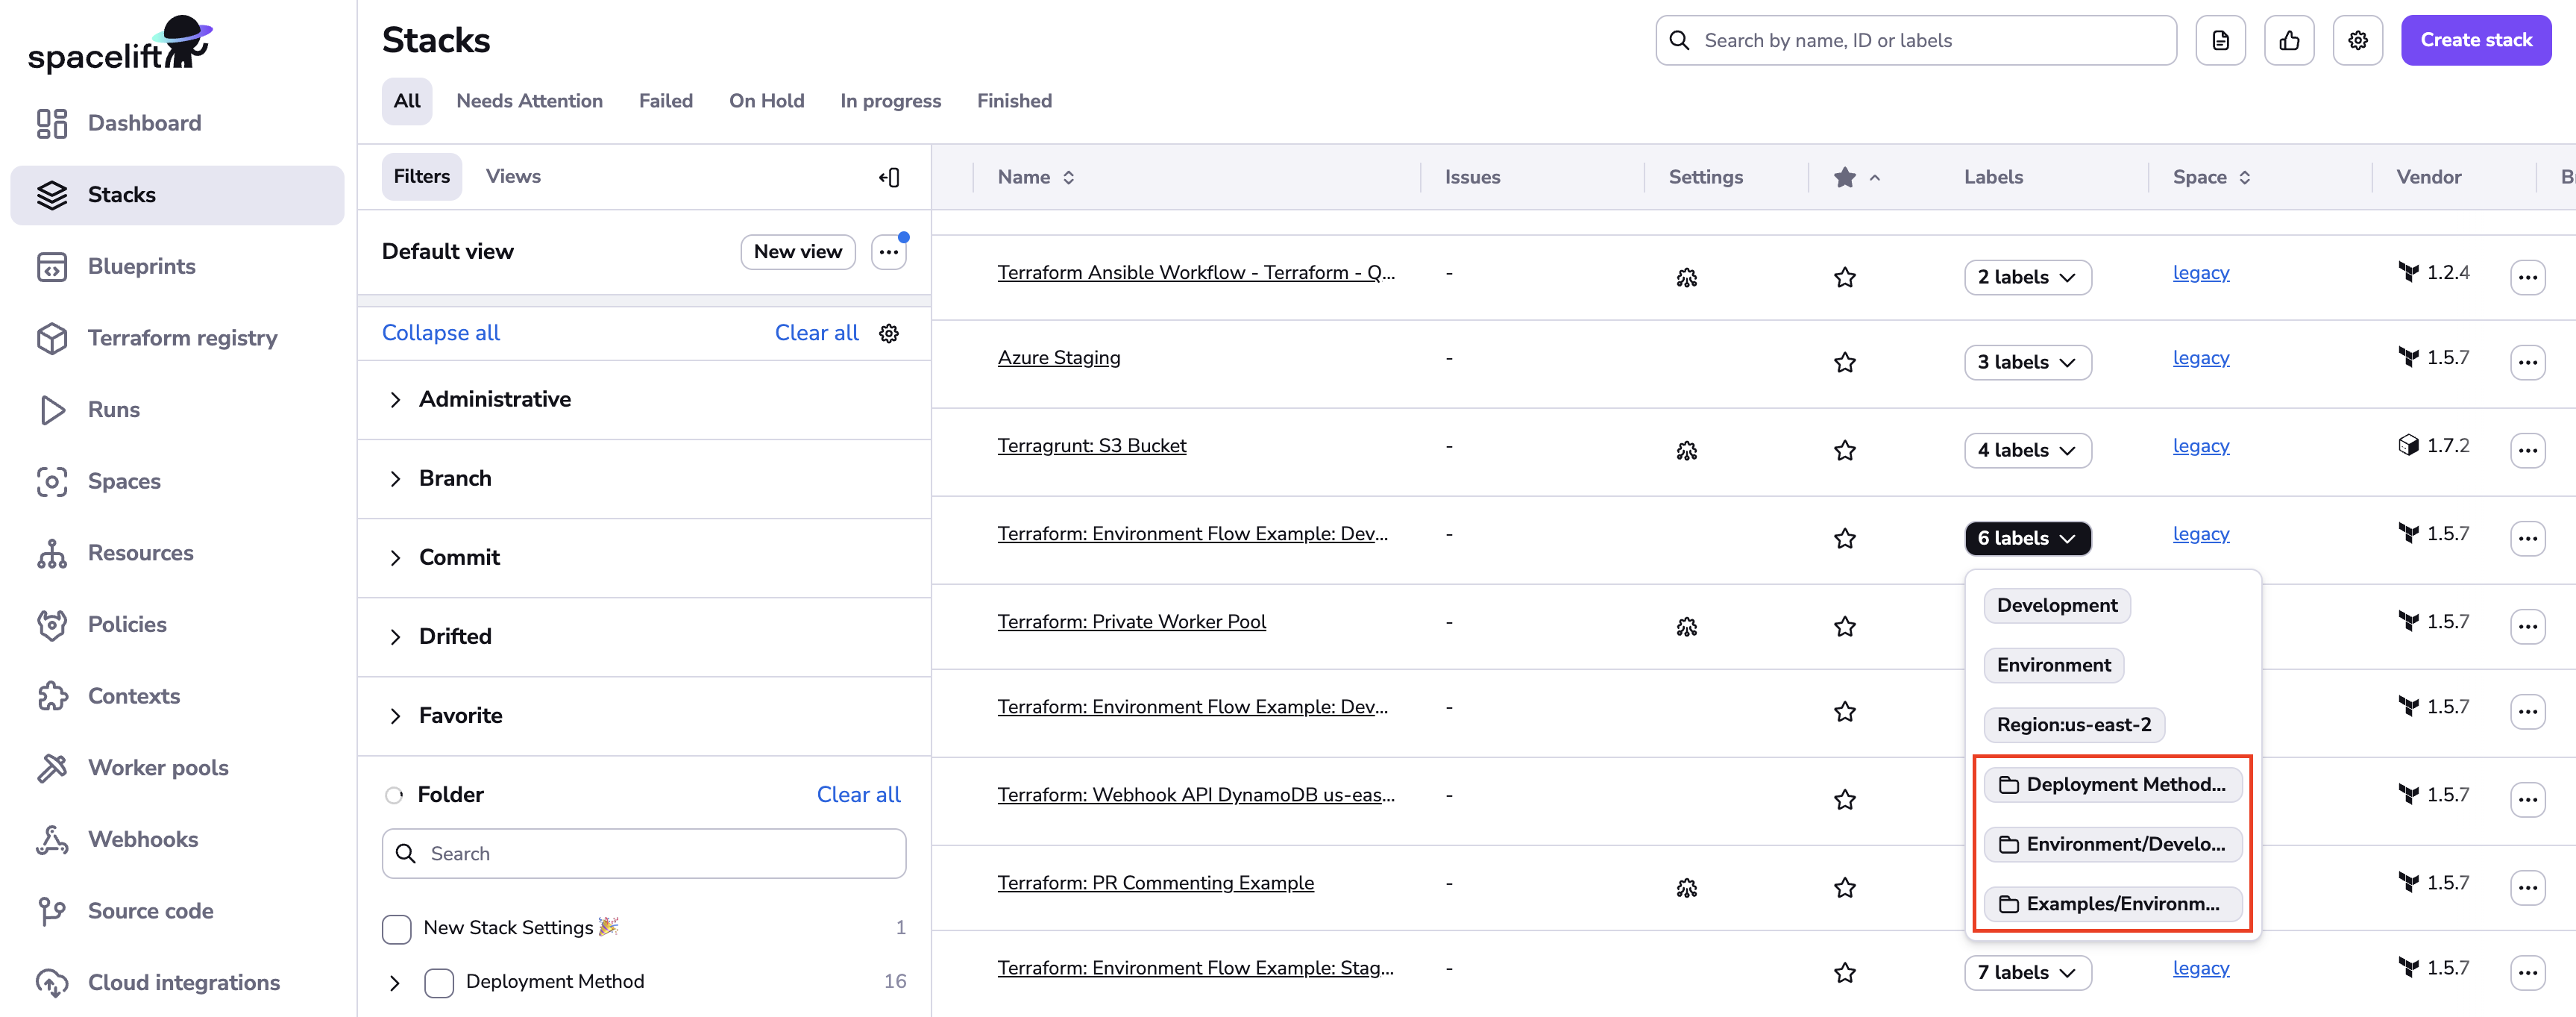
Your folder labels will appear in the Folders section of the Filters sidebar menu, allowing you to use the checkboxes to filter the list by folder labels.
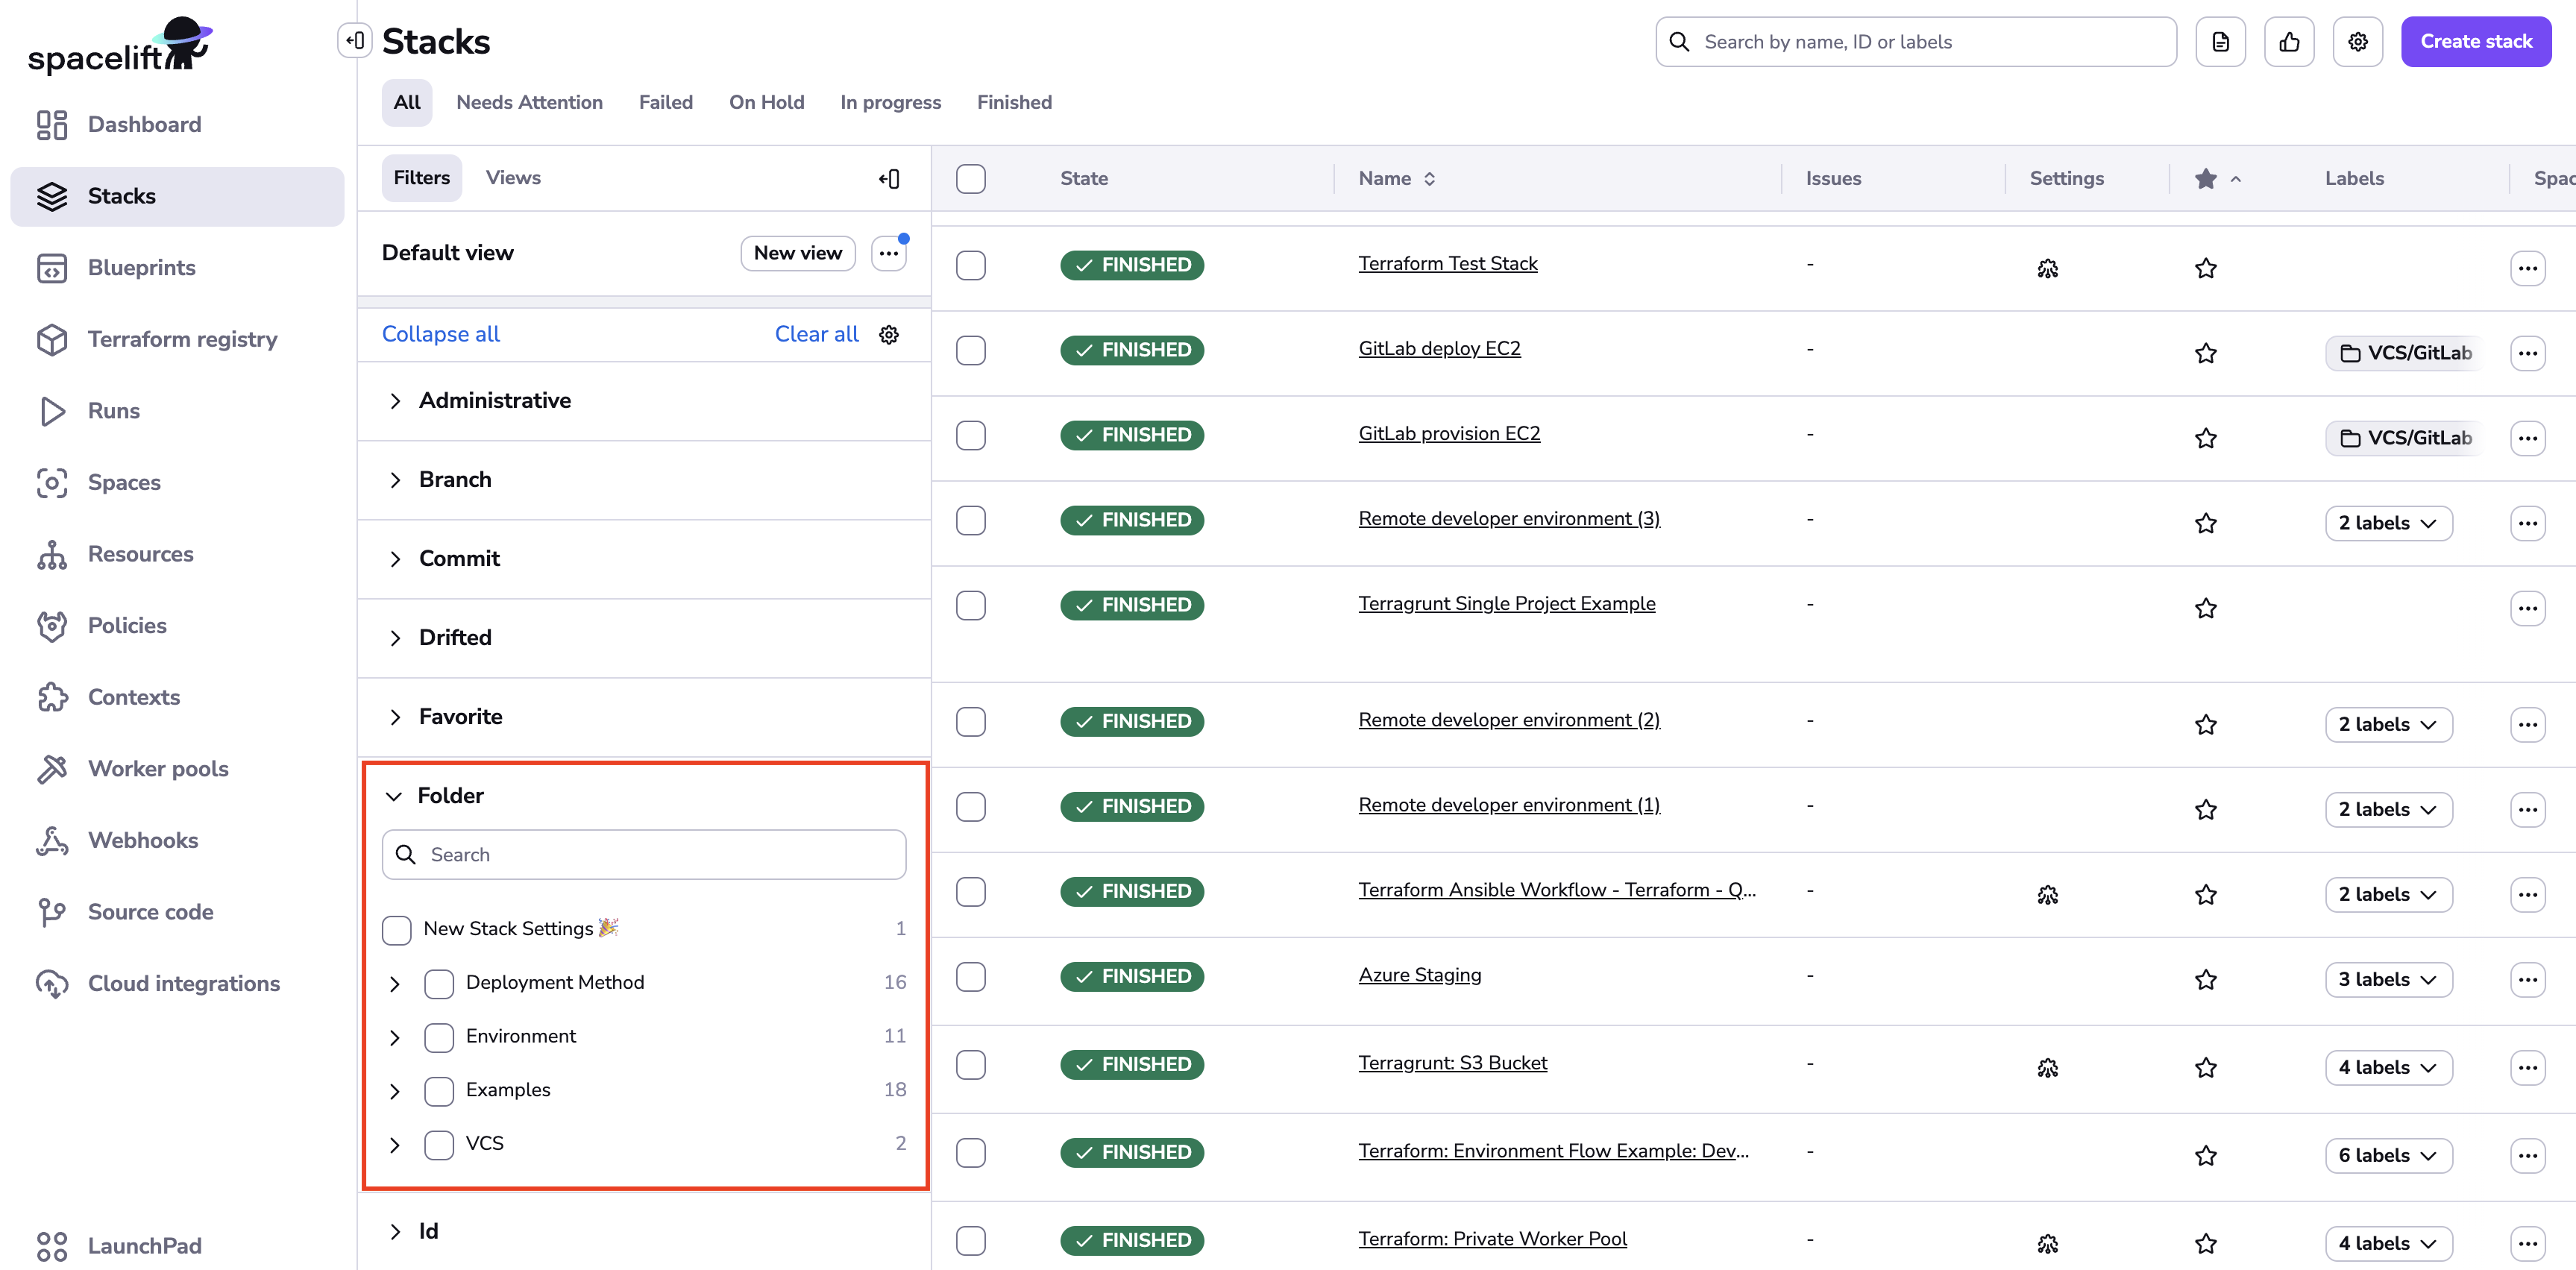
Nesting and multiple folder labels»
Folder labels can be nested, allowing you to create hierarchies or arbitrary classifications of your stacks.
A single stack can have any number of folder labels set, in which case it belongs to all the collections. If you use more than one folder label on a single stack, they act more like labels in e-mail inboxes rather than directories in your filesystem.
Save filters in views»
You can save filter views to easily apply filters to your stacks list.

- Select all filters you would like to apply.
- If desired, add a search query or sorting option in the top-right.
- Click New View, then enter a descriptive name for the filter view.
- Check the box to set the new view as your default, if desired.
- If you want to edit your default view, click Views, click the three dots beside the view name you want to use as default, then click Use as your default view.
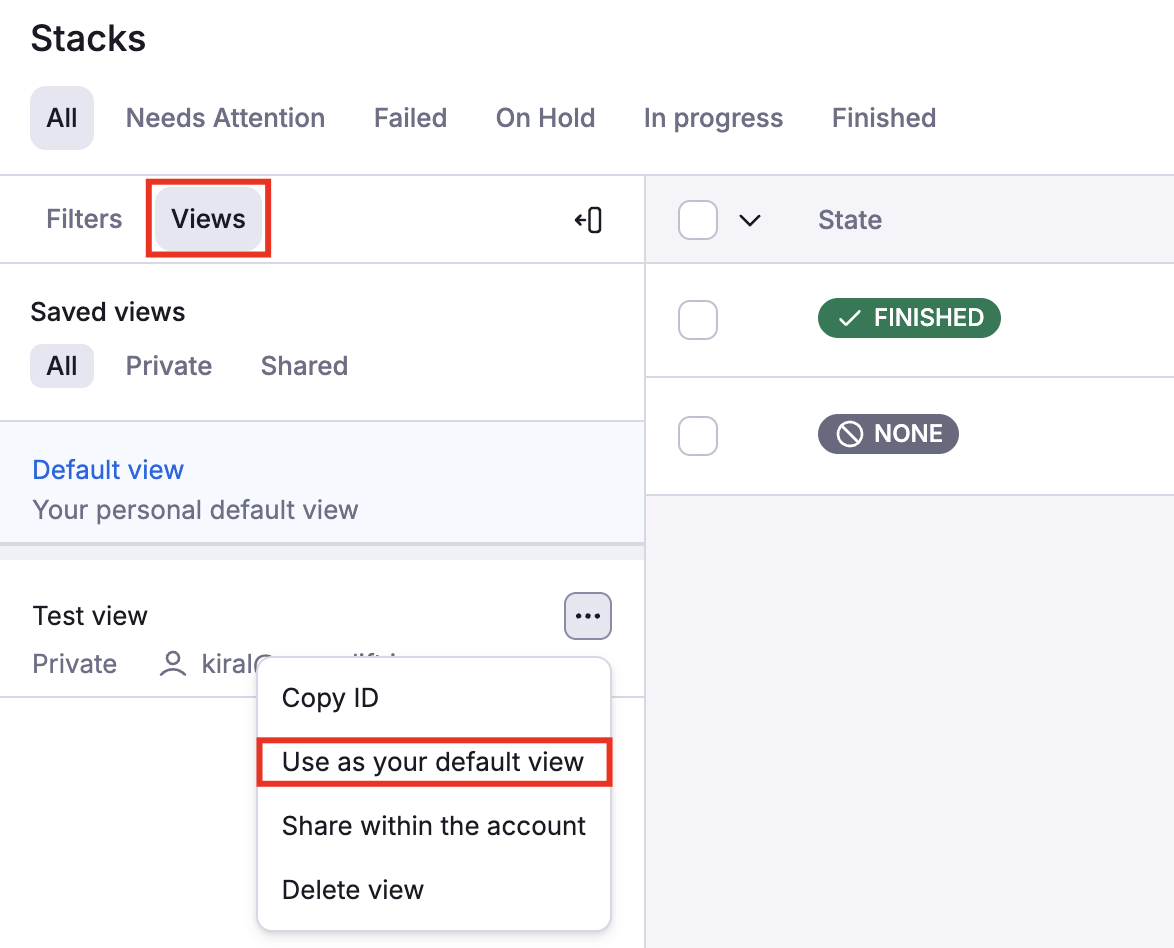
- If you want to edit your default view, click Views, click the three dots beside the view name you want to use as default, then click Use as your default view.
- Click Save.
If you set a filter view as your default, the next time you log in or navigate to the Stacks tab, your personal default view will be applied.
Shared views»
Filter views can be private (default for new views) or public to all users of the account. To share a filter view, if you are an admin user, click the three dots beside the view name and click Share within the account. The view will now be visible for all users within the account.
Reset to default view»
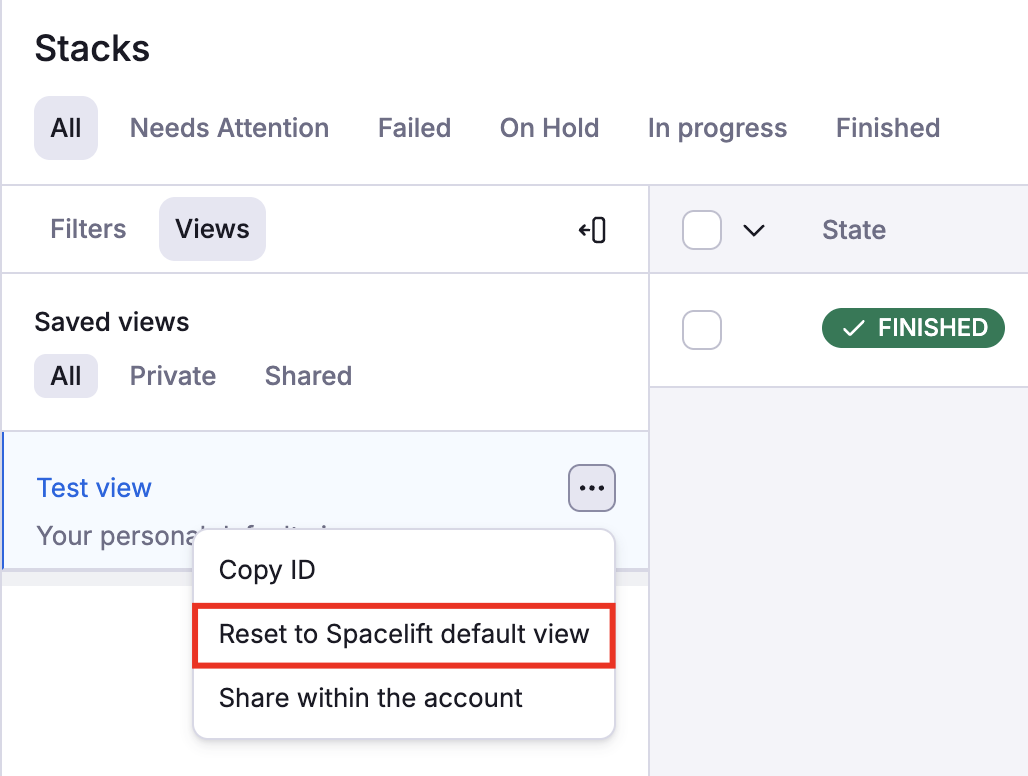
To quickly reset your default view to Spacelift's default (no active filters):
- Click Views to see your available filter views.
- Click the three dots beside the view name you're using as default.
- Click Reset to Spacelift default view.
- All sorting, search, and filter parameters will be cleared.
Manage view»
Manage existing views when you click the three dots next to New view.
- Click Update to update your current filter view with any new filters, searches, and/or sorting settings.
- Click Edit name to change the name of the current filter view.
- Click Delete to remove a private view. If the view has been shared with other users on the account, it cannot be deleted.
