Integrate Spacelift with Amazon Web Services (AWS)»
The AWS integration allows Spacelift runs or tasks to automatically assume an IAM role in your AWS account, and in the process, generate a set of temporary credentials. These credentials are then exposed as computed environment variables during the run/task that takes place on the Spacelift stack where the integration is attached.
AWS_ACCESS_KEY_IDAWS_SECRET_ACCESS_KEYAWS_SECURITY_TOKENAWS_SESSION_TOKEN
These temporary credentials are enough for both the AWS Terraform provider and the Amazon S3 state backend to generate a fully authenticated AWS session without further configuration.
To use the AWS integration, you need to set it up and attach it to any stacks that need it.
Set up the AWS IAM role»
Prerequisites
To set up the AWS integration, you need:
- The ability to create IAM roles for your AWS account.
- Administrator access to your Spacelift account.
Step 1: Create a role in AWS»
Before creating the Spacelift AWS integration, you need an AWS IAM Role within your AWS account.
Multiple AWS accounts
You can extend this role to have cross-account permissions to the target accounts to allow Spacelift to access multiple AWS accounts. See AWS documentation for more details.
- Within your AWS account, navigate to AWS IAM.
-
Select the Roles section and click Create role.

Step 2: Configure trust policy»
You will need to configure a custom trust policy for the IAM role in AWS to allow Spacelift to assume the role and generate temporary credentials. When completing the role assumption, Spacelift will pass extra information in the ExternalId attribute, allowing you to add additional layers of security to your role.
External ID Format: <spacelift-account-name>@<integration-id>@<stack-slug>@<read|write>
<spacelift-account-name>: The name of the Spacelift account, found in the lower left-hand side of the Spacelift platform UI.<integration-id>: The ID of the AWS Cloud Integration.<stack-slug>: The slug of the stack that the AWS Cloud Integration is attached to.<read|write>: Set to eitherreadorwritebased upon the event that initiated the role assumption. The Planning phase usesreadwhile the Applying phase useswrite.
Given the format of the External ID passed by Spacelift, you can further secure your IAM Role trust policies for more granular security. For example, you may wish to lock down an IAM Role so that it can only be used by a specific stack.
Example trust policies»
Here's an example trust policy statement that allows any stack within your Spacelift account to use the IAM Role.
Make sure to replace:
yourSpaceliftAccountNamewith your actual Spacelift account name.<principal>based on your environment:- for spacelift.io, use
324880187172. - for us.spacelift.io, use
577638371743.
- for spacelift.io, use
1 2 3 4 5 6 7 8 9 10 11 12 13 14 15 16 17 | |
Here's an example trust policy that locks down an IAM Role so it can only be used by the stack stack-a.
Make sure to replace:
yourSpaceliftAccountNamewith your actual Spacelift account name.<principal>based on your environment:- for spacelift.io, use
324880187172. - for us.spacelift.io, use
577638371743.
- for spacelift.io, use
1 2 3 4 5 6 7 8 9 10 11 12 13 14 15 16 17 | |
- In AWS' Create Role wizard, select Custom trust policy.
- Paste the configured trust policy, then click Next.
Step 3: Configure role permissions»
- Check the boxes to attach at least one permissions policy to your IAM role.
- Ensure it has sufficient permissions to deploy any resources your IaC code defines.
- Click Next.
Info for Terraform users
For Terraform users managing their own state file, give your role sufficient permissions to access your state. Terraform documents the permissions required for S3-managed state and for DynamoDB state locking.
Step 4: Create IAM role»
- Enter a role name and description, then review your configuration.
- Click Create role.
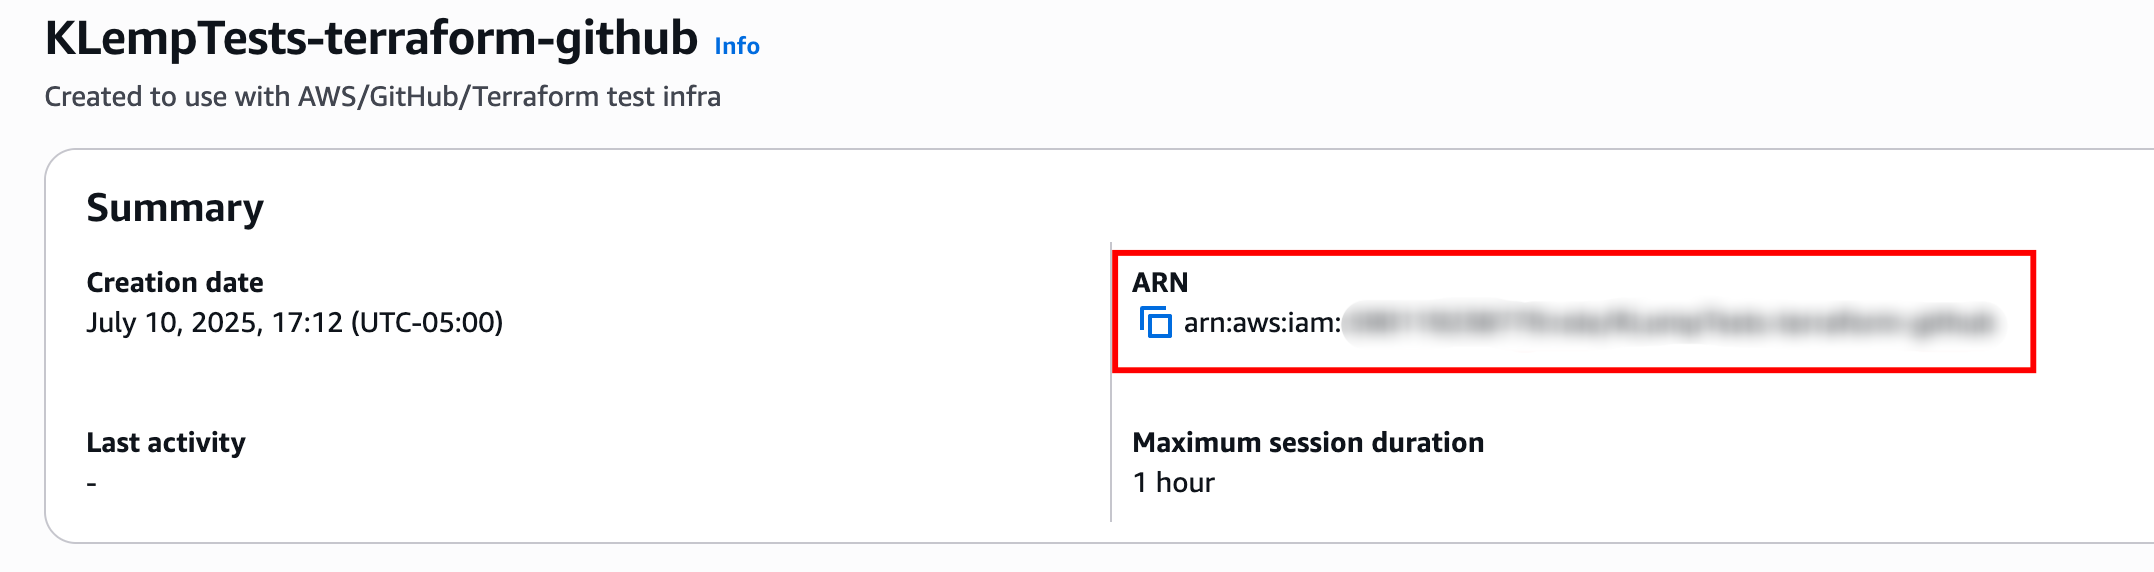
- Once the role is created, click View role or its name in the list.
-
Copy the IAM role ARN to set up the integration in Spacelift.
Create the cloud integration in Spacelift»
-
On the Integrate Services > Discover all integrations screen, click View on the AWS card, then Set up integration.
-
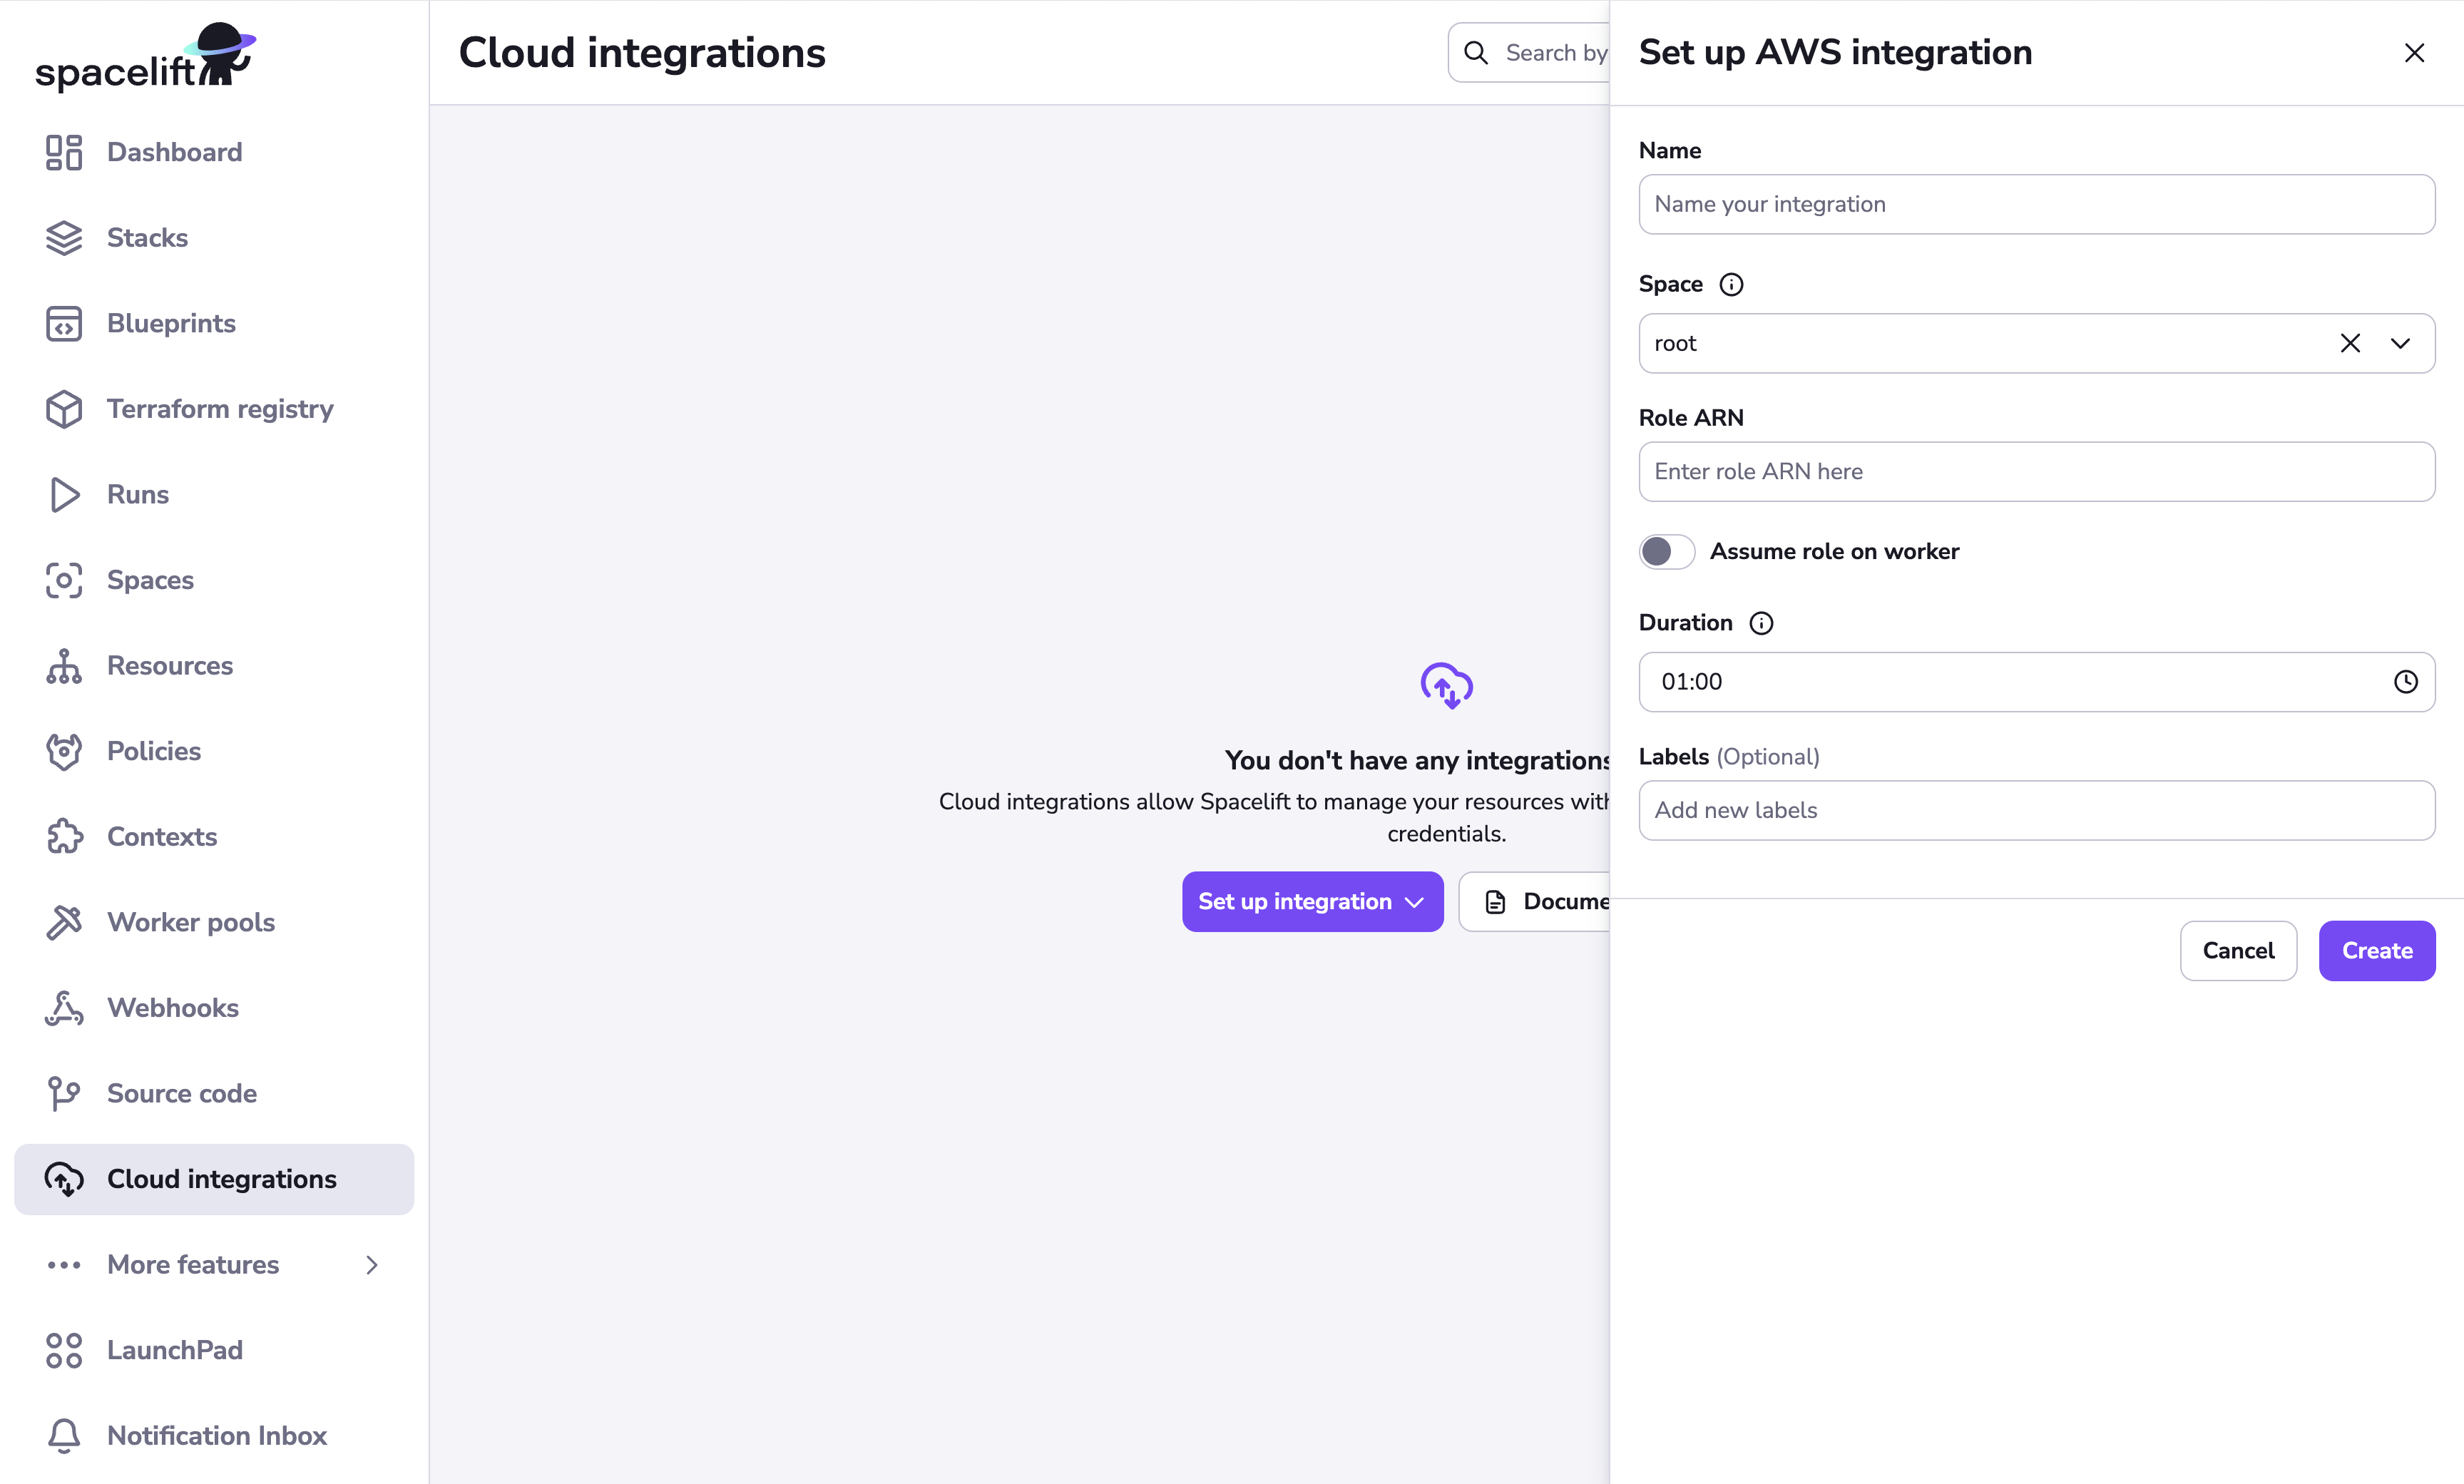
Fill in the integration details:
- Name: Enter a name for the cloud integration.
- Space: Select the space that can access the integration.
- Role ARN: Paste the ARN copied from the IAM role you created in AWS.
- Assume role on worker: If enabled, role assumption will be performed on your private worker rather than on Spacelift's end. You can also specify a custom External ID to use during role assumption.
- Duration (optional): Select how long the role session will last, from 15 minutes to 1 hour (default).
- Region (optional): Set the AWS regional endpoint to use (such as us-east-2).
- Labels (optional): Enter a label or labels to help sort your integrations if needed.
- Enable auto-attach (optional): If enabled, the integration will be automatically attached to any stacks or modules that have a matching label. To use this feature, add a label with the format
autoattach:<your_label>to the integration, then enable this toggle. Any stack or module with the<your_label>label will have this integration auto-attached.
- Click Set up.
Warning
If you receive an error message when trying to set up the integration in Spacelift, see Troubleshoot trust relationship issues.
✅ Step 2 of the Quick Start is complete! Now you can create your first stack.
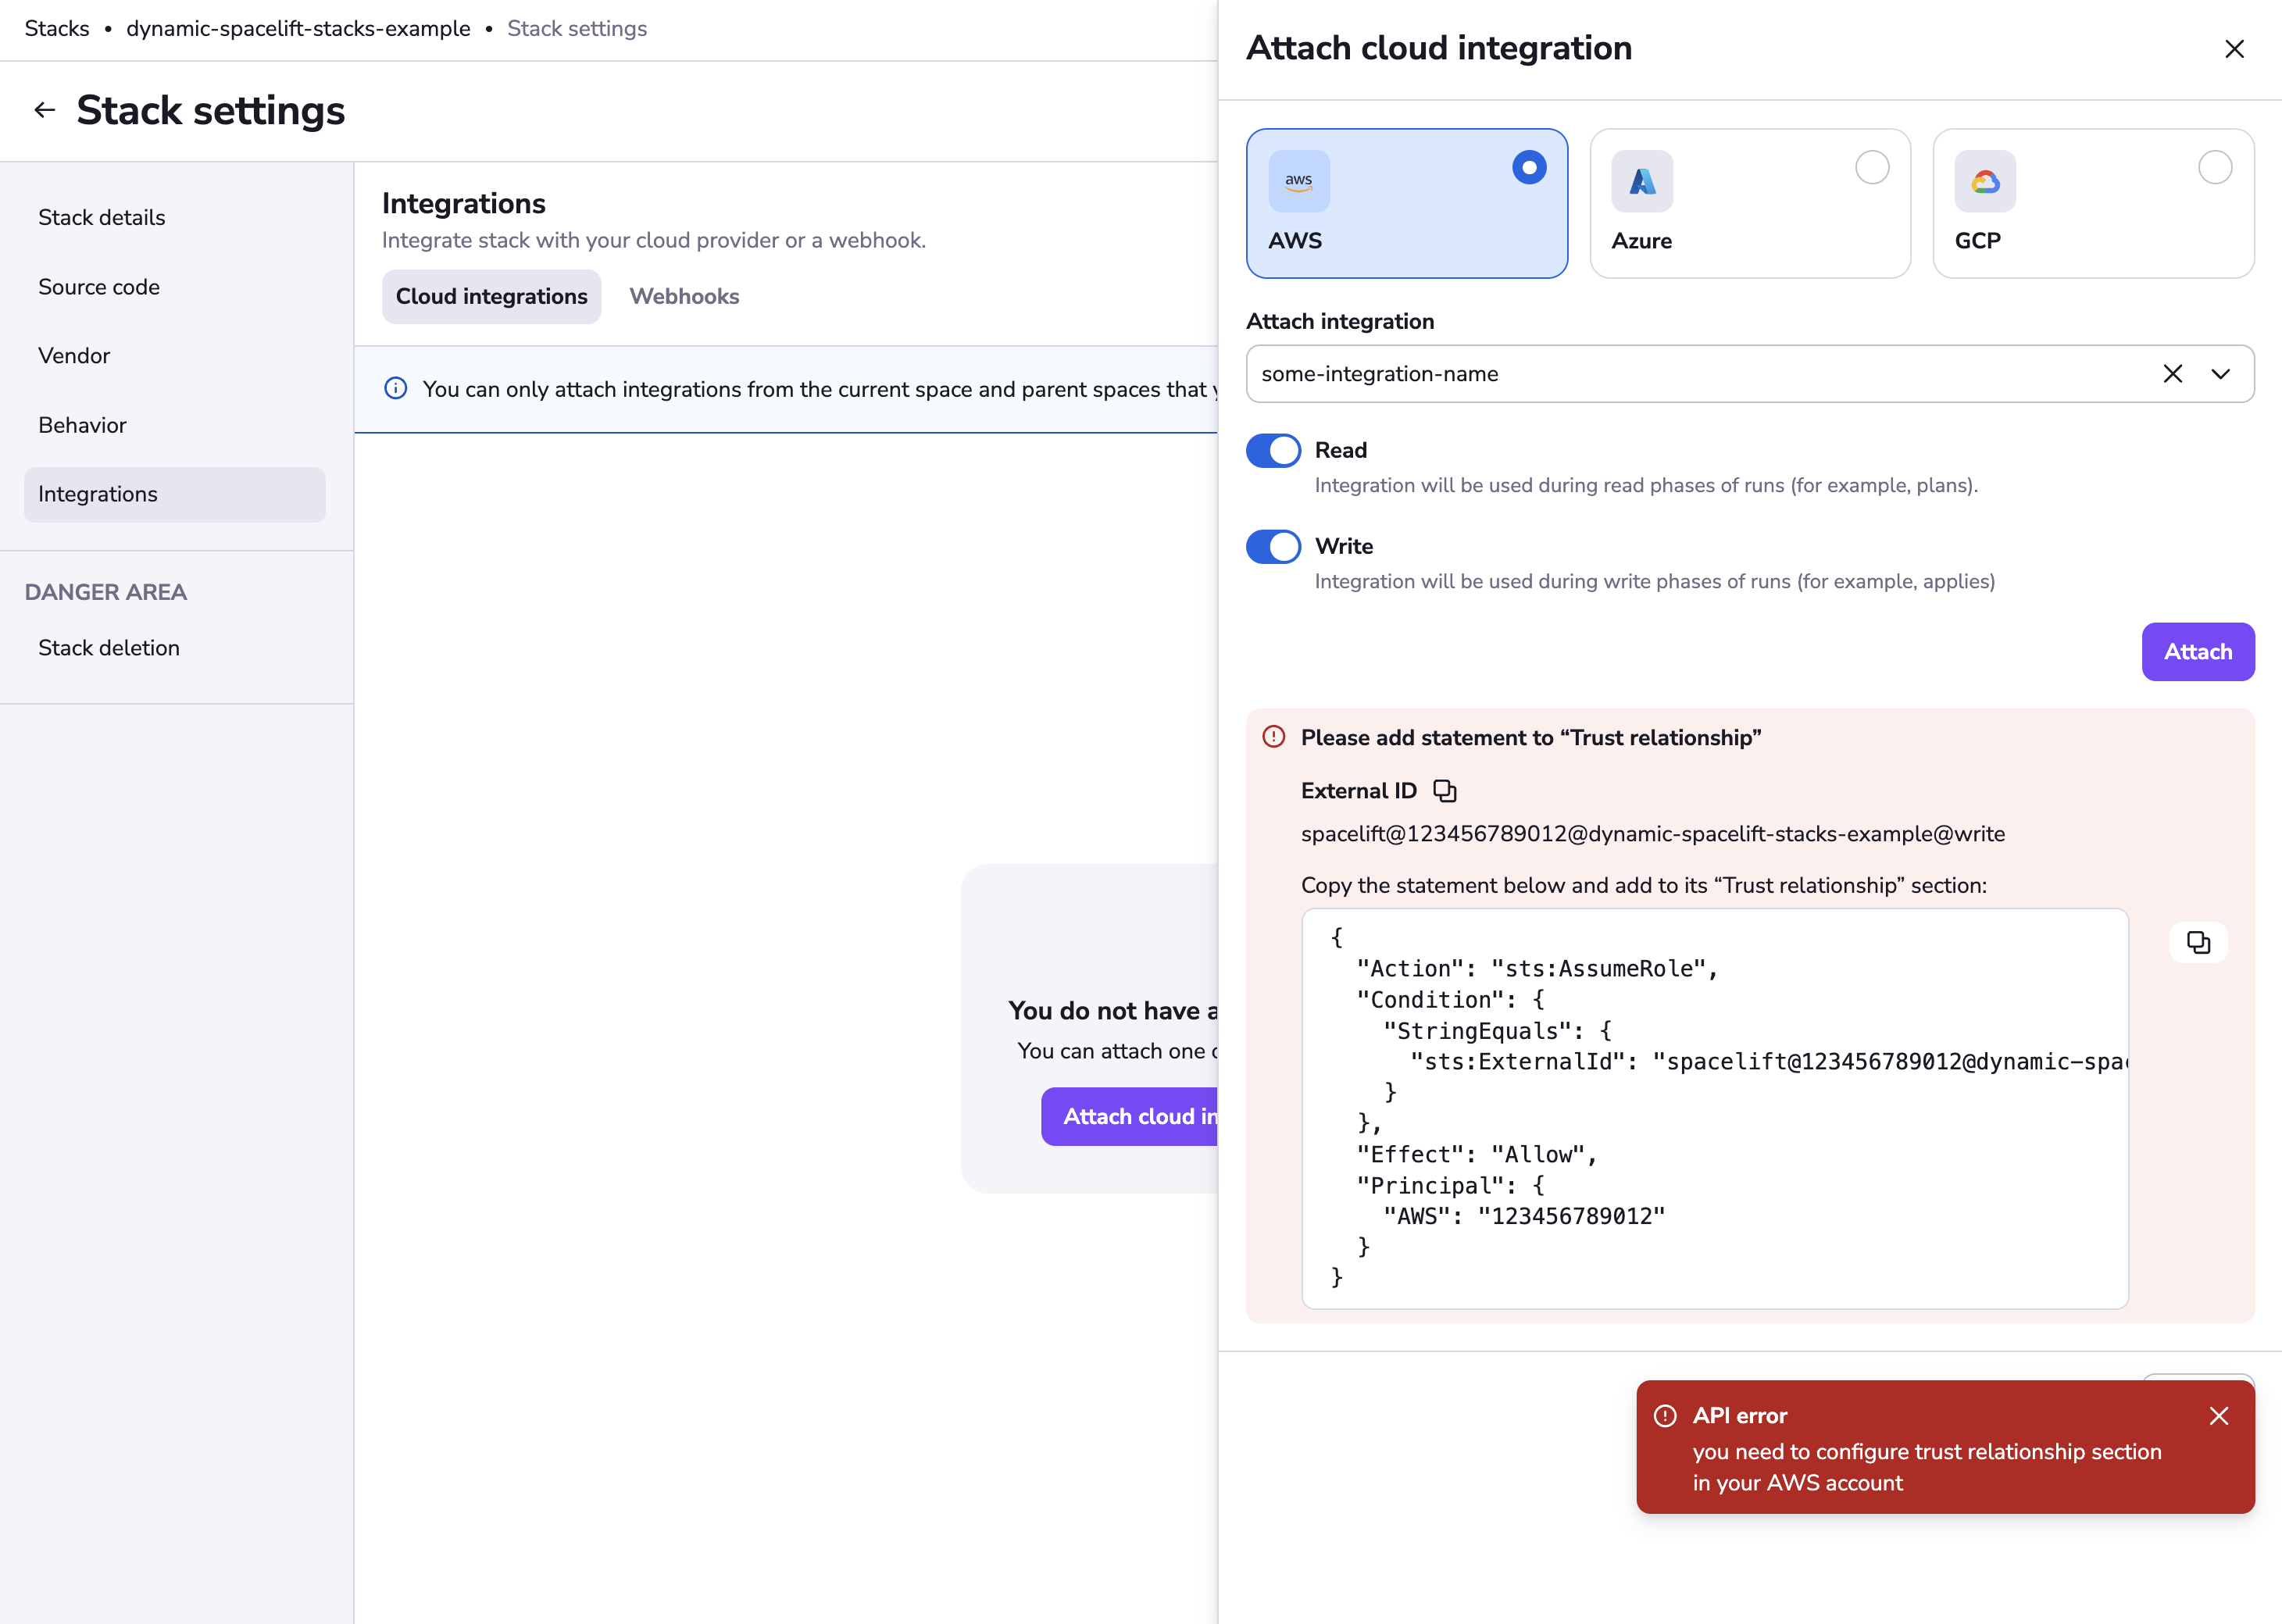
Troubleshoot trust relationship issues»
If you get the error you need to configure trust relationship section in your AWS account when attaching a cloud integration to a stack:
There are a couple of common causes to check.
Incorrect or missing trust relationship policy»
The error message in the UI includes a tailored trust relationship policy example. This policy allows Spacelift to assume the IAM role and must be added to the Trust relationships section of your role in AWS IAM. See Step 2: Configure trust policy for more information.
STS (Security Token Service) not enabled»
This error can occur if the AWS STS (Security Token Service) is not enabled in your account.
Make sure STS is enabled in the following regions:
- eu-west-1
- eu-central-1 (used for disaster recovery failover)
You can enable STS by following this AWS guide.