Microsoft Entra ID OIDC Setup Guide»
This guide provides step-by-step instructions to set up Single Sign-On (SSO) with Microsoft Entra ID (formerly Azure Active Directory) for Spacelift. The process includes creating an app registration in Azure, configuring token claims, and finalizing the setup within Spacelift.
Warning
Before setting up SSO, we recommend creating backup credentials for your Spacelift account. These can be used in case of SSO misconfiguration or for other emergency procedures.
Prerequisites»
- Spacelift account with admin permissions
- Azure account with permissions to create an "App registration" within Microsoft Entra ID
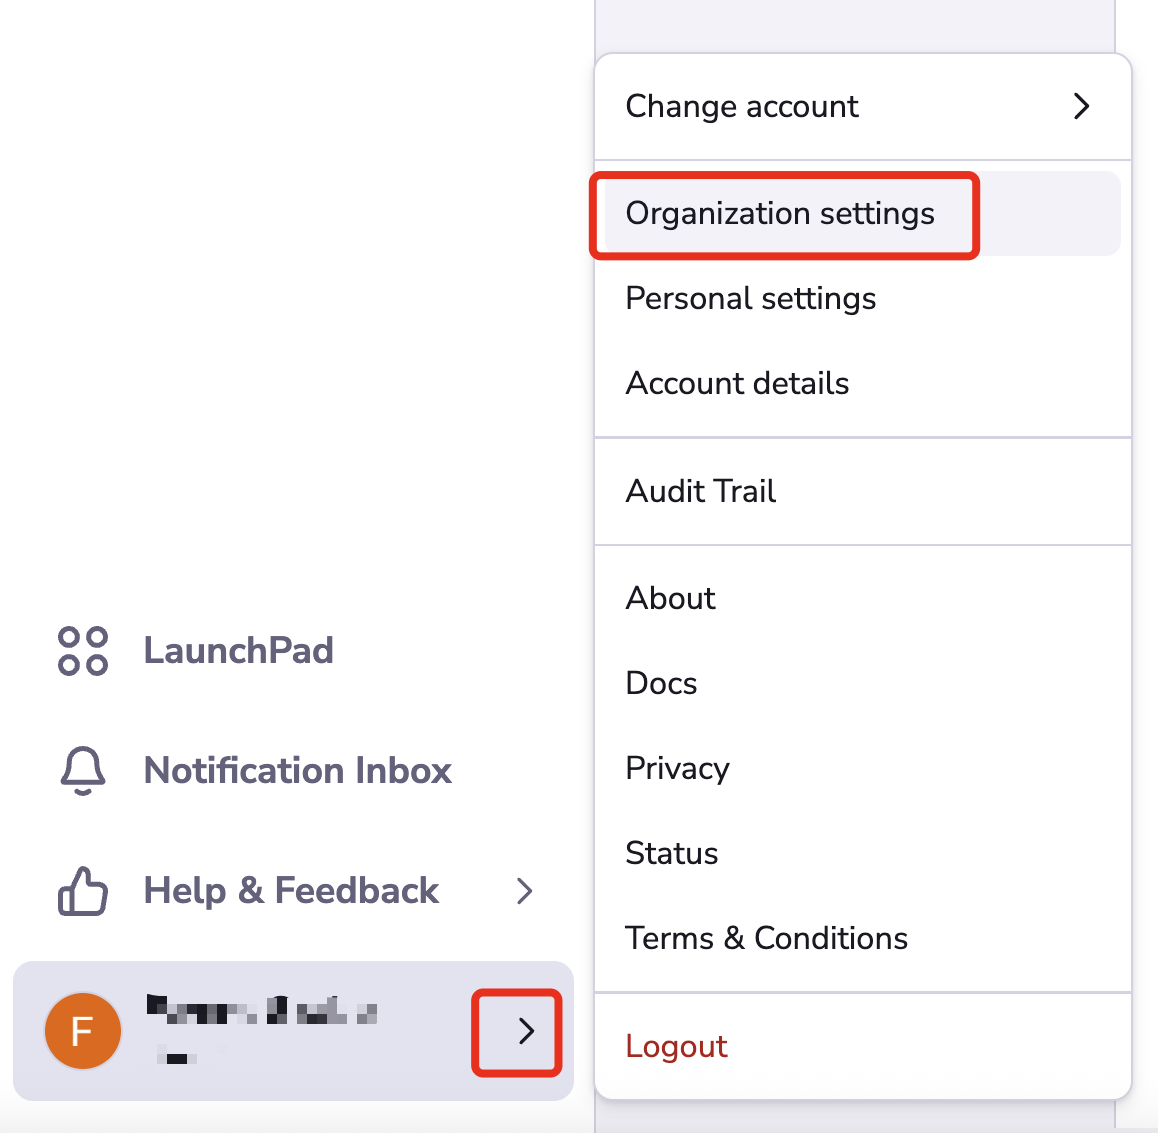
Configure Account Settings»
Open Organization settings for your Spacelift account. You can find this panel at the bottom left by clicking the arrow next to your name.
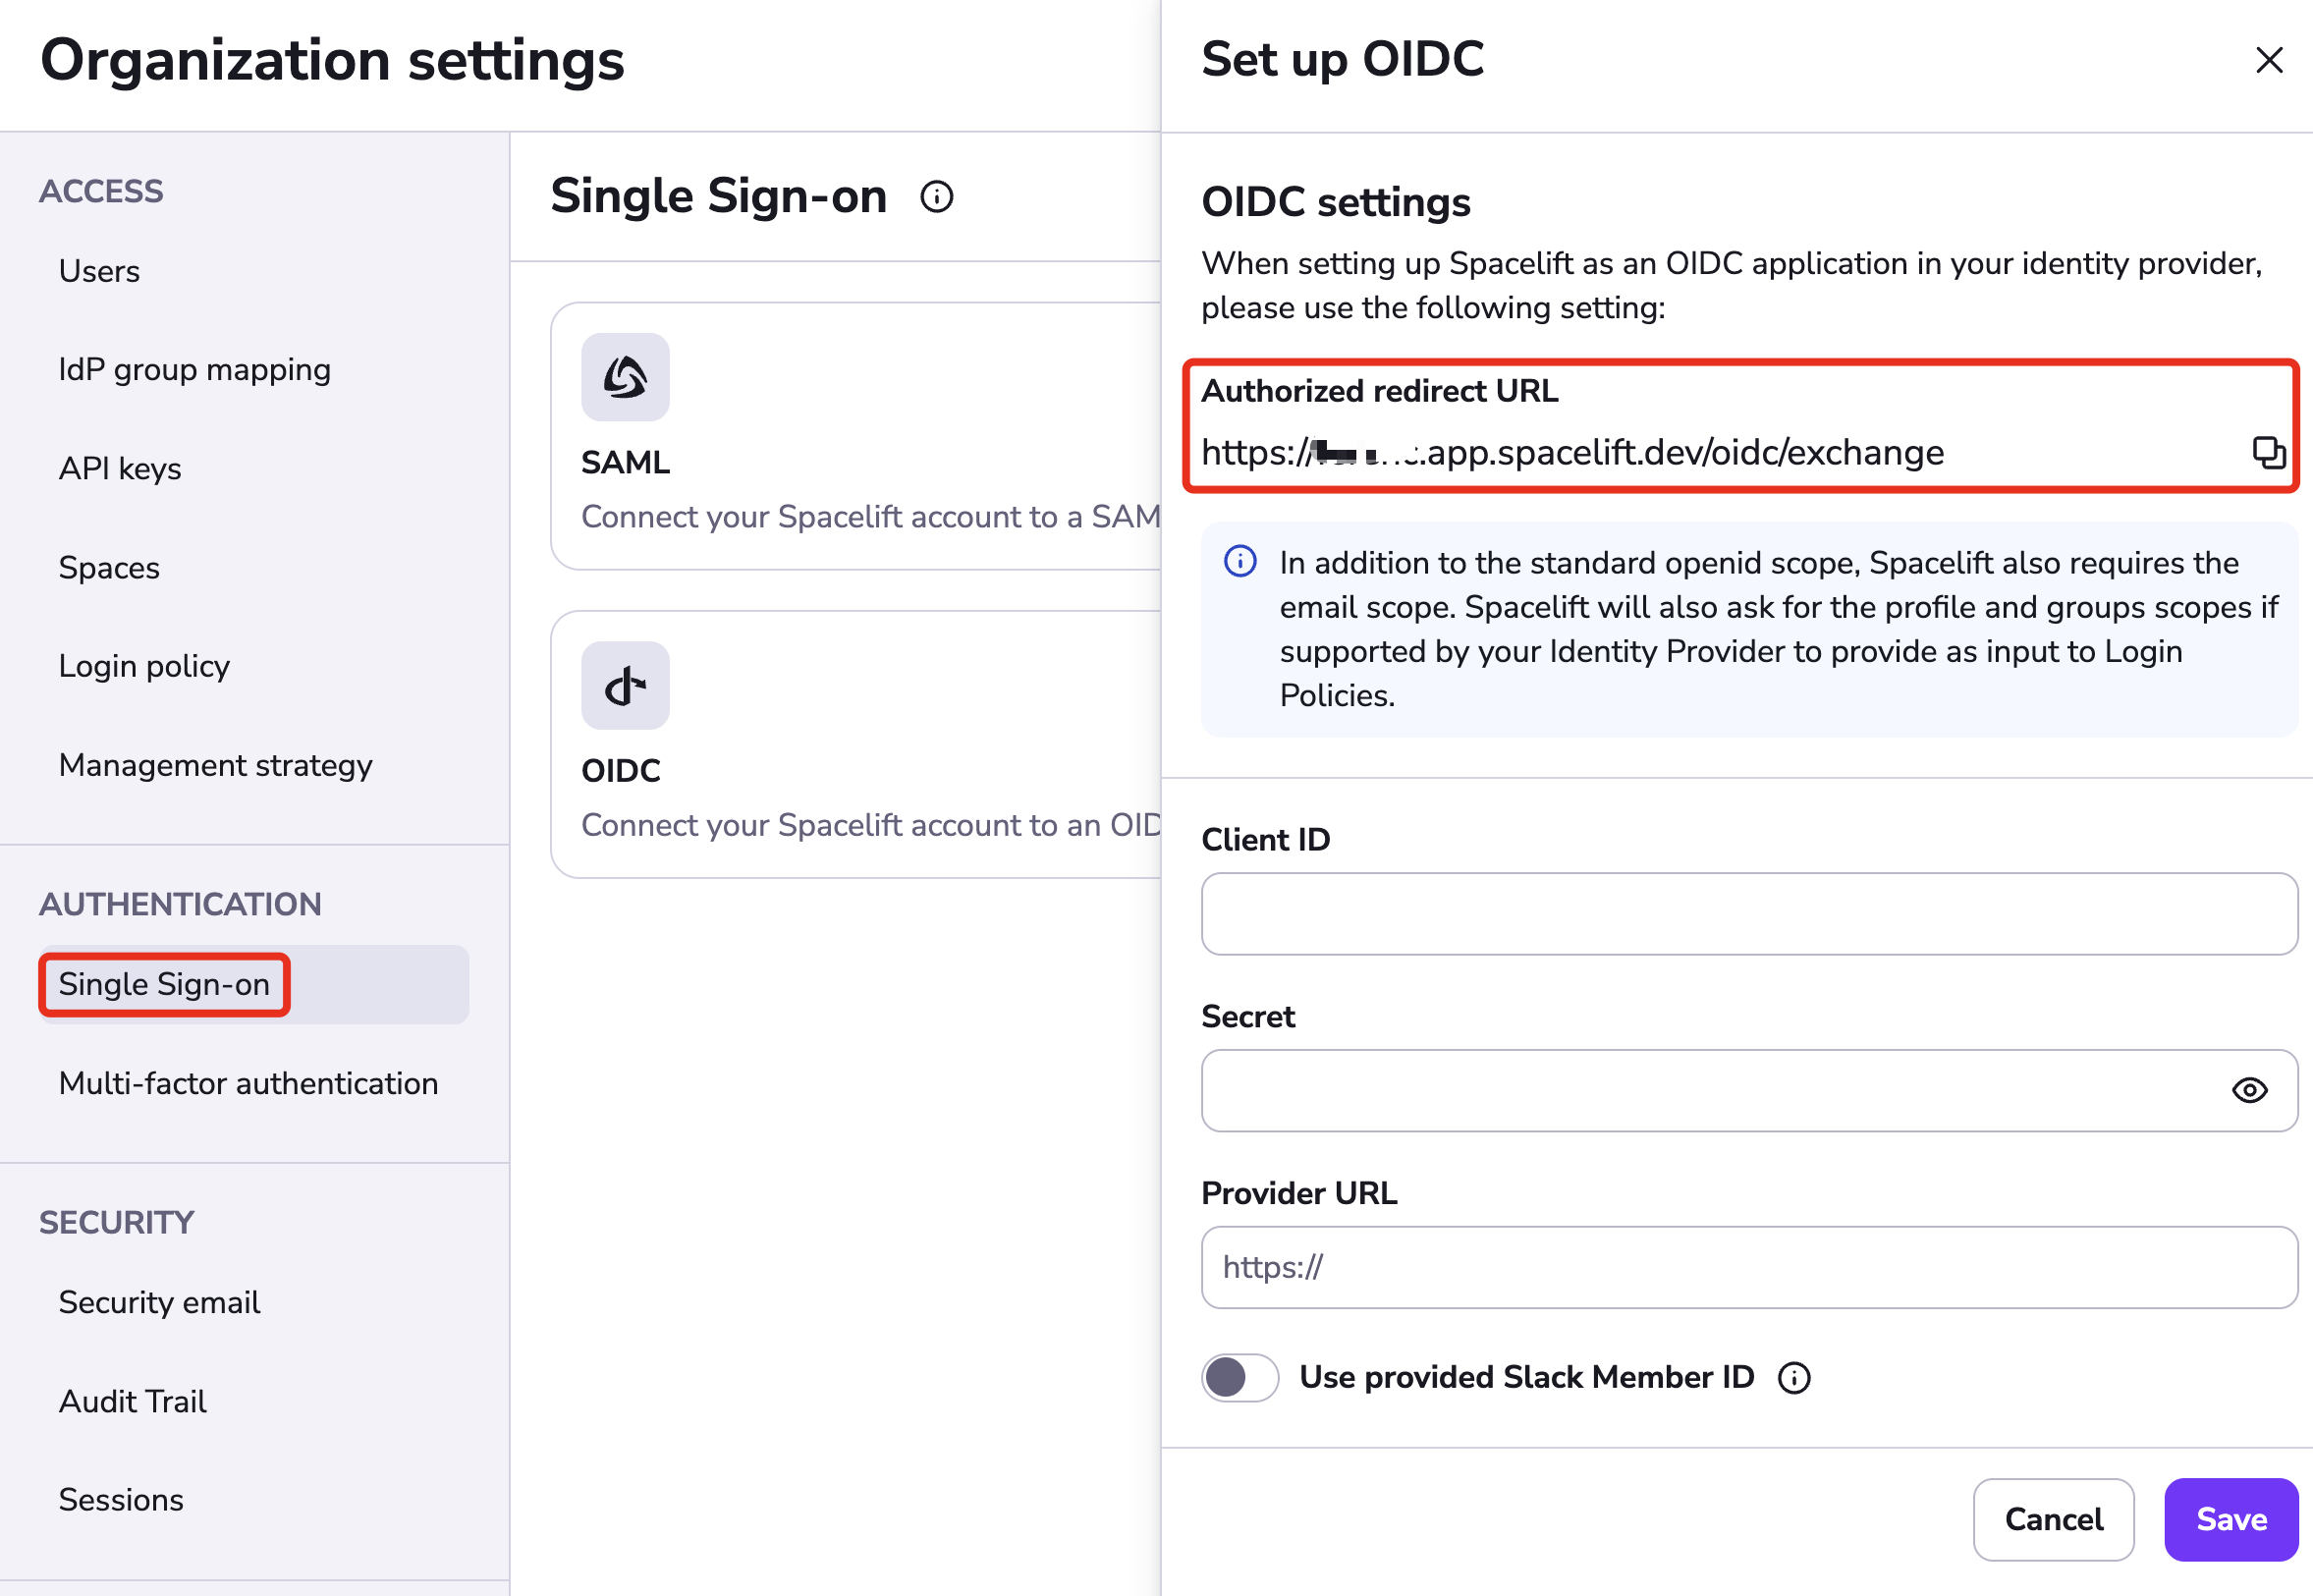
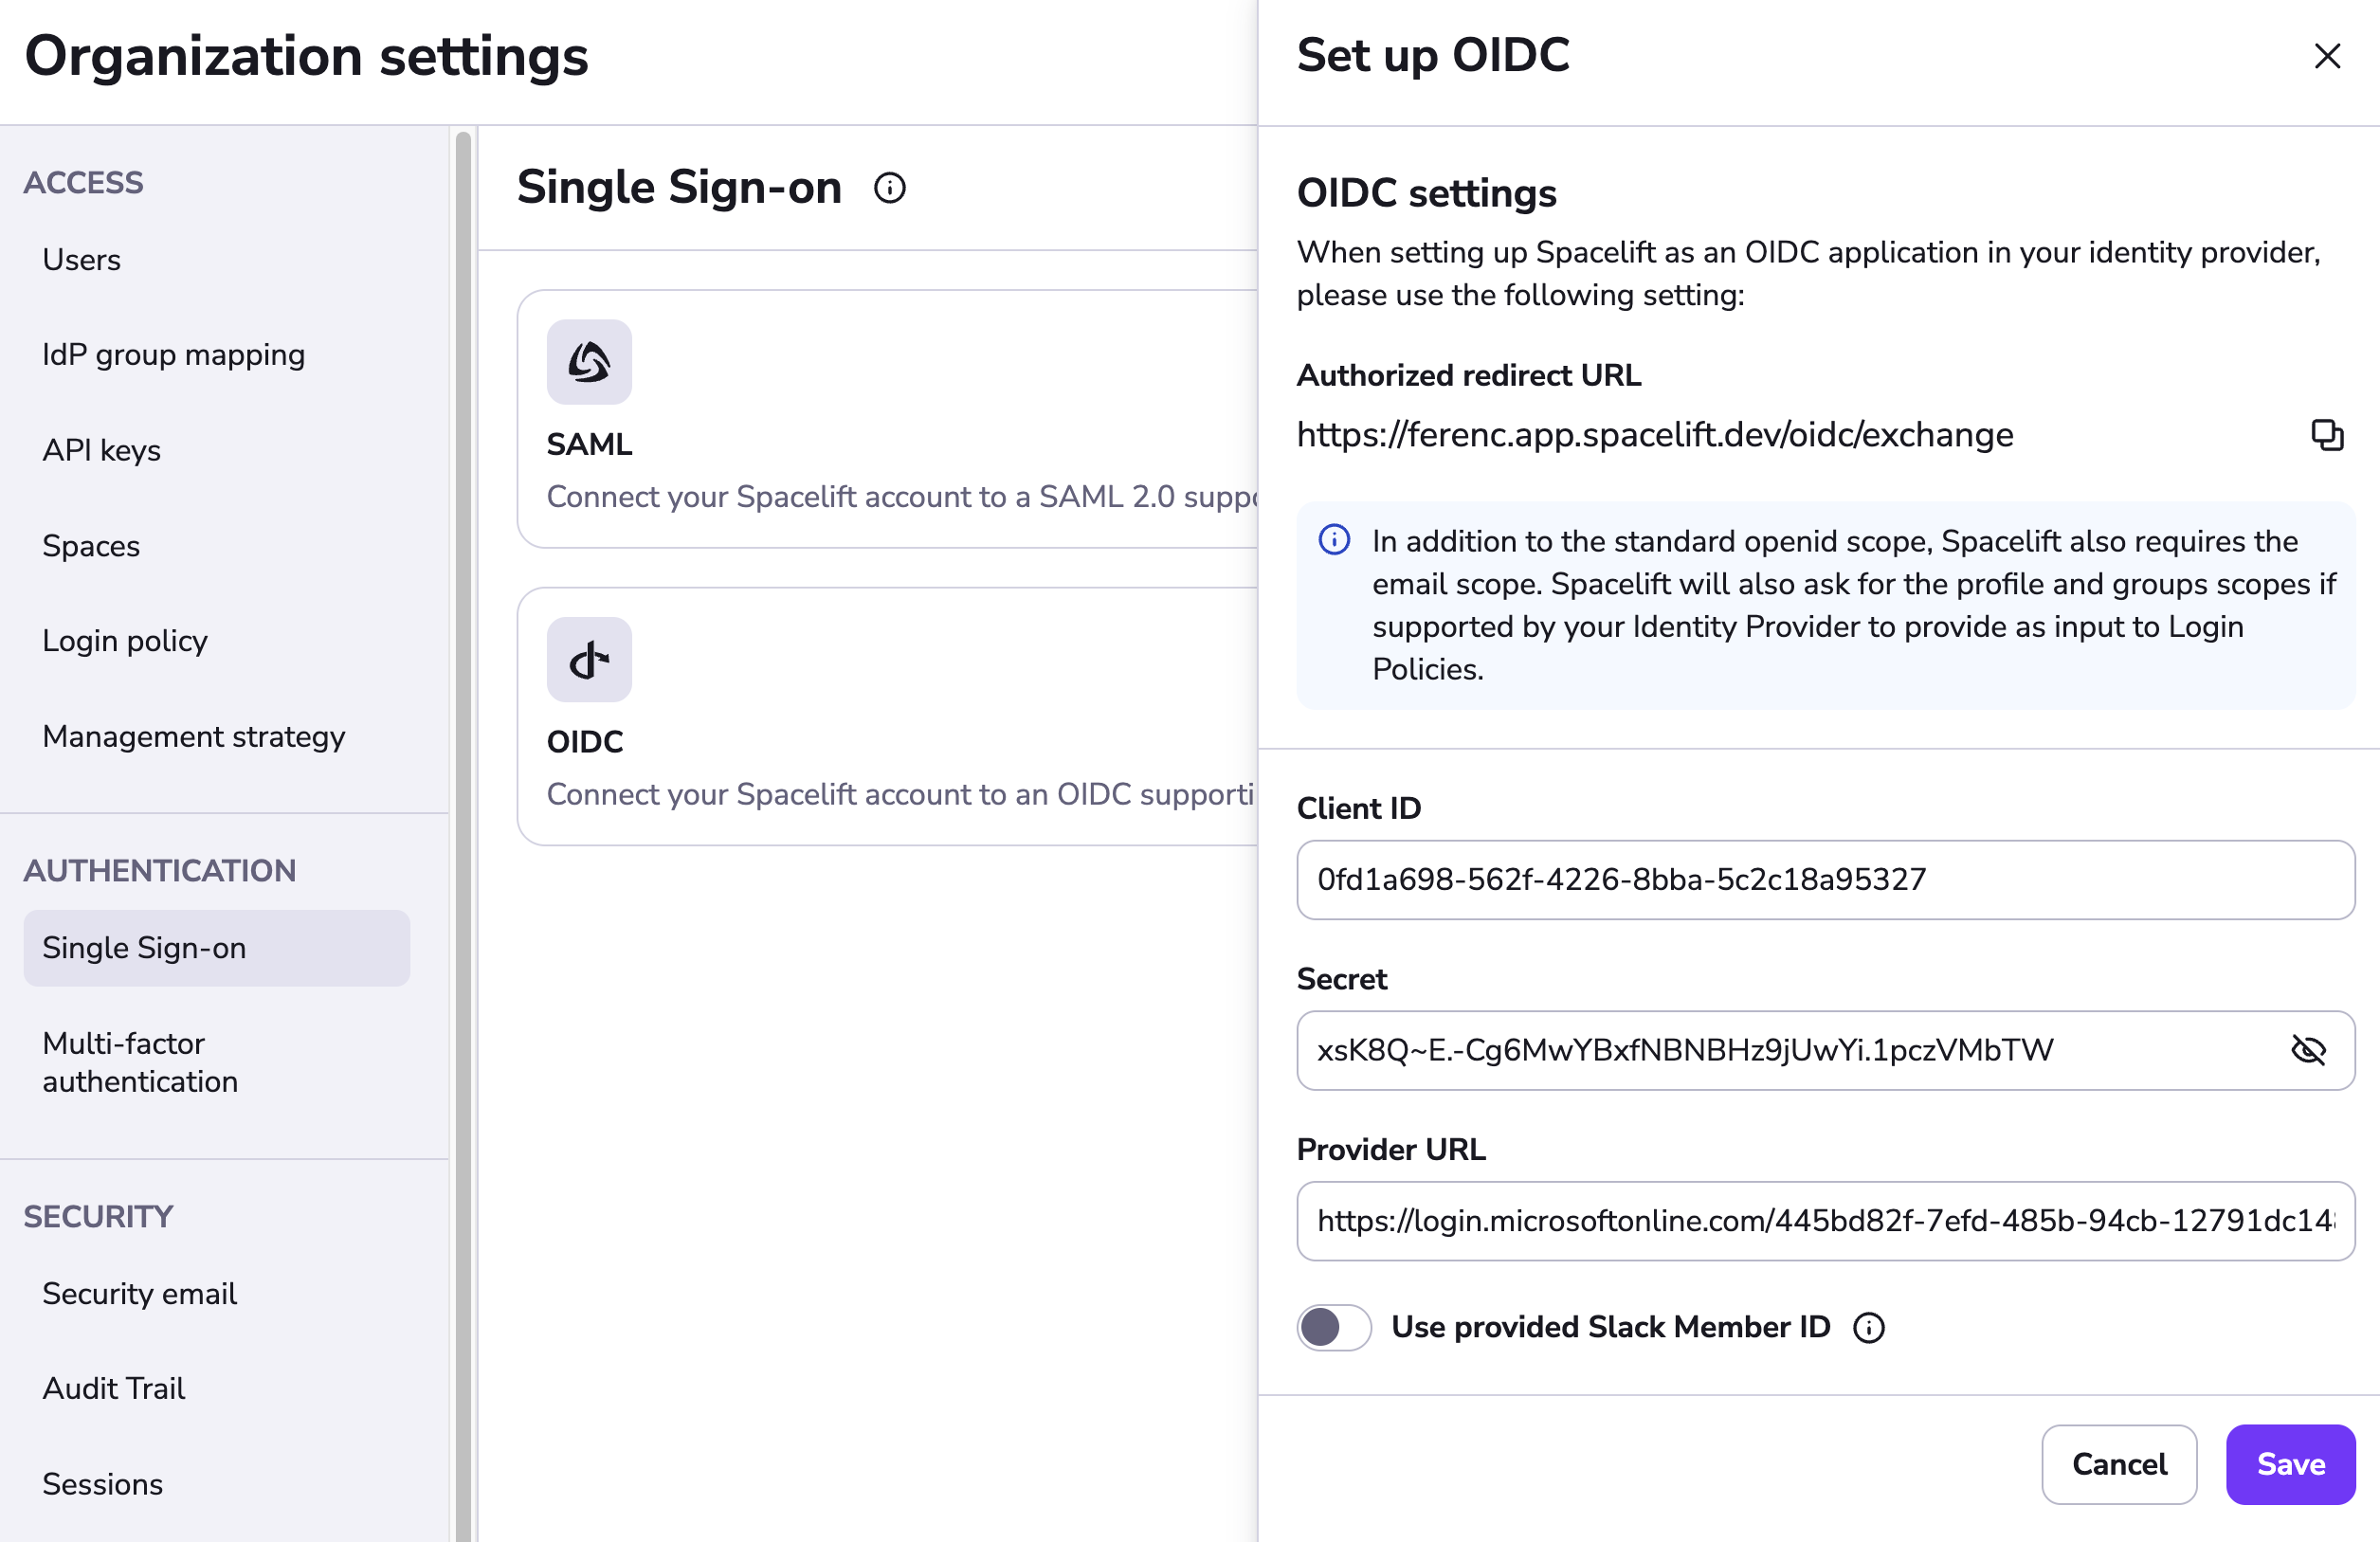
Set Up OIDC»
Select Single Sign-On under Authorization. Click Set up under the OIDC section.
The drawer that opens contains the Authorized redirect URL, which you will need to copy for your login provider. The input fields will be filled later with information from your provider.
US Spacelift instances»
If your account is in the US region, your URL will look something like https://<account_name>.app.us.spacelift.io. Ensure the correct URL is reflected in Azure.
Azure: Navigate to Microsoft Entra ID»
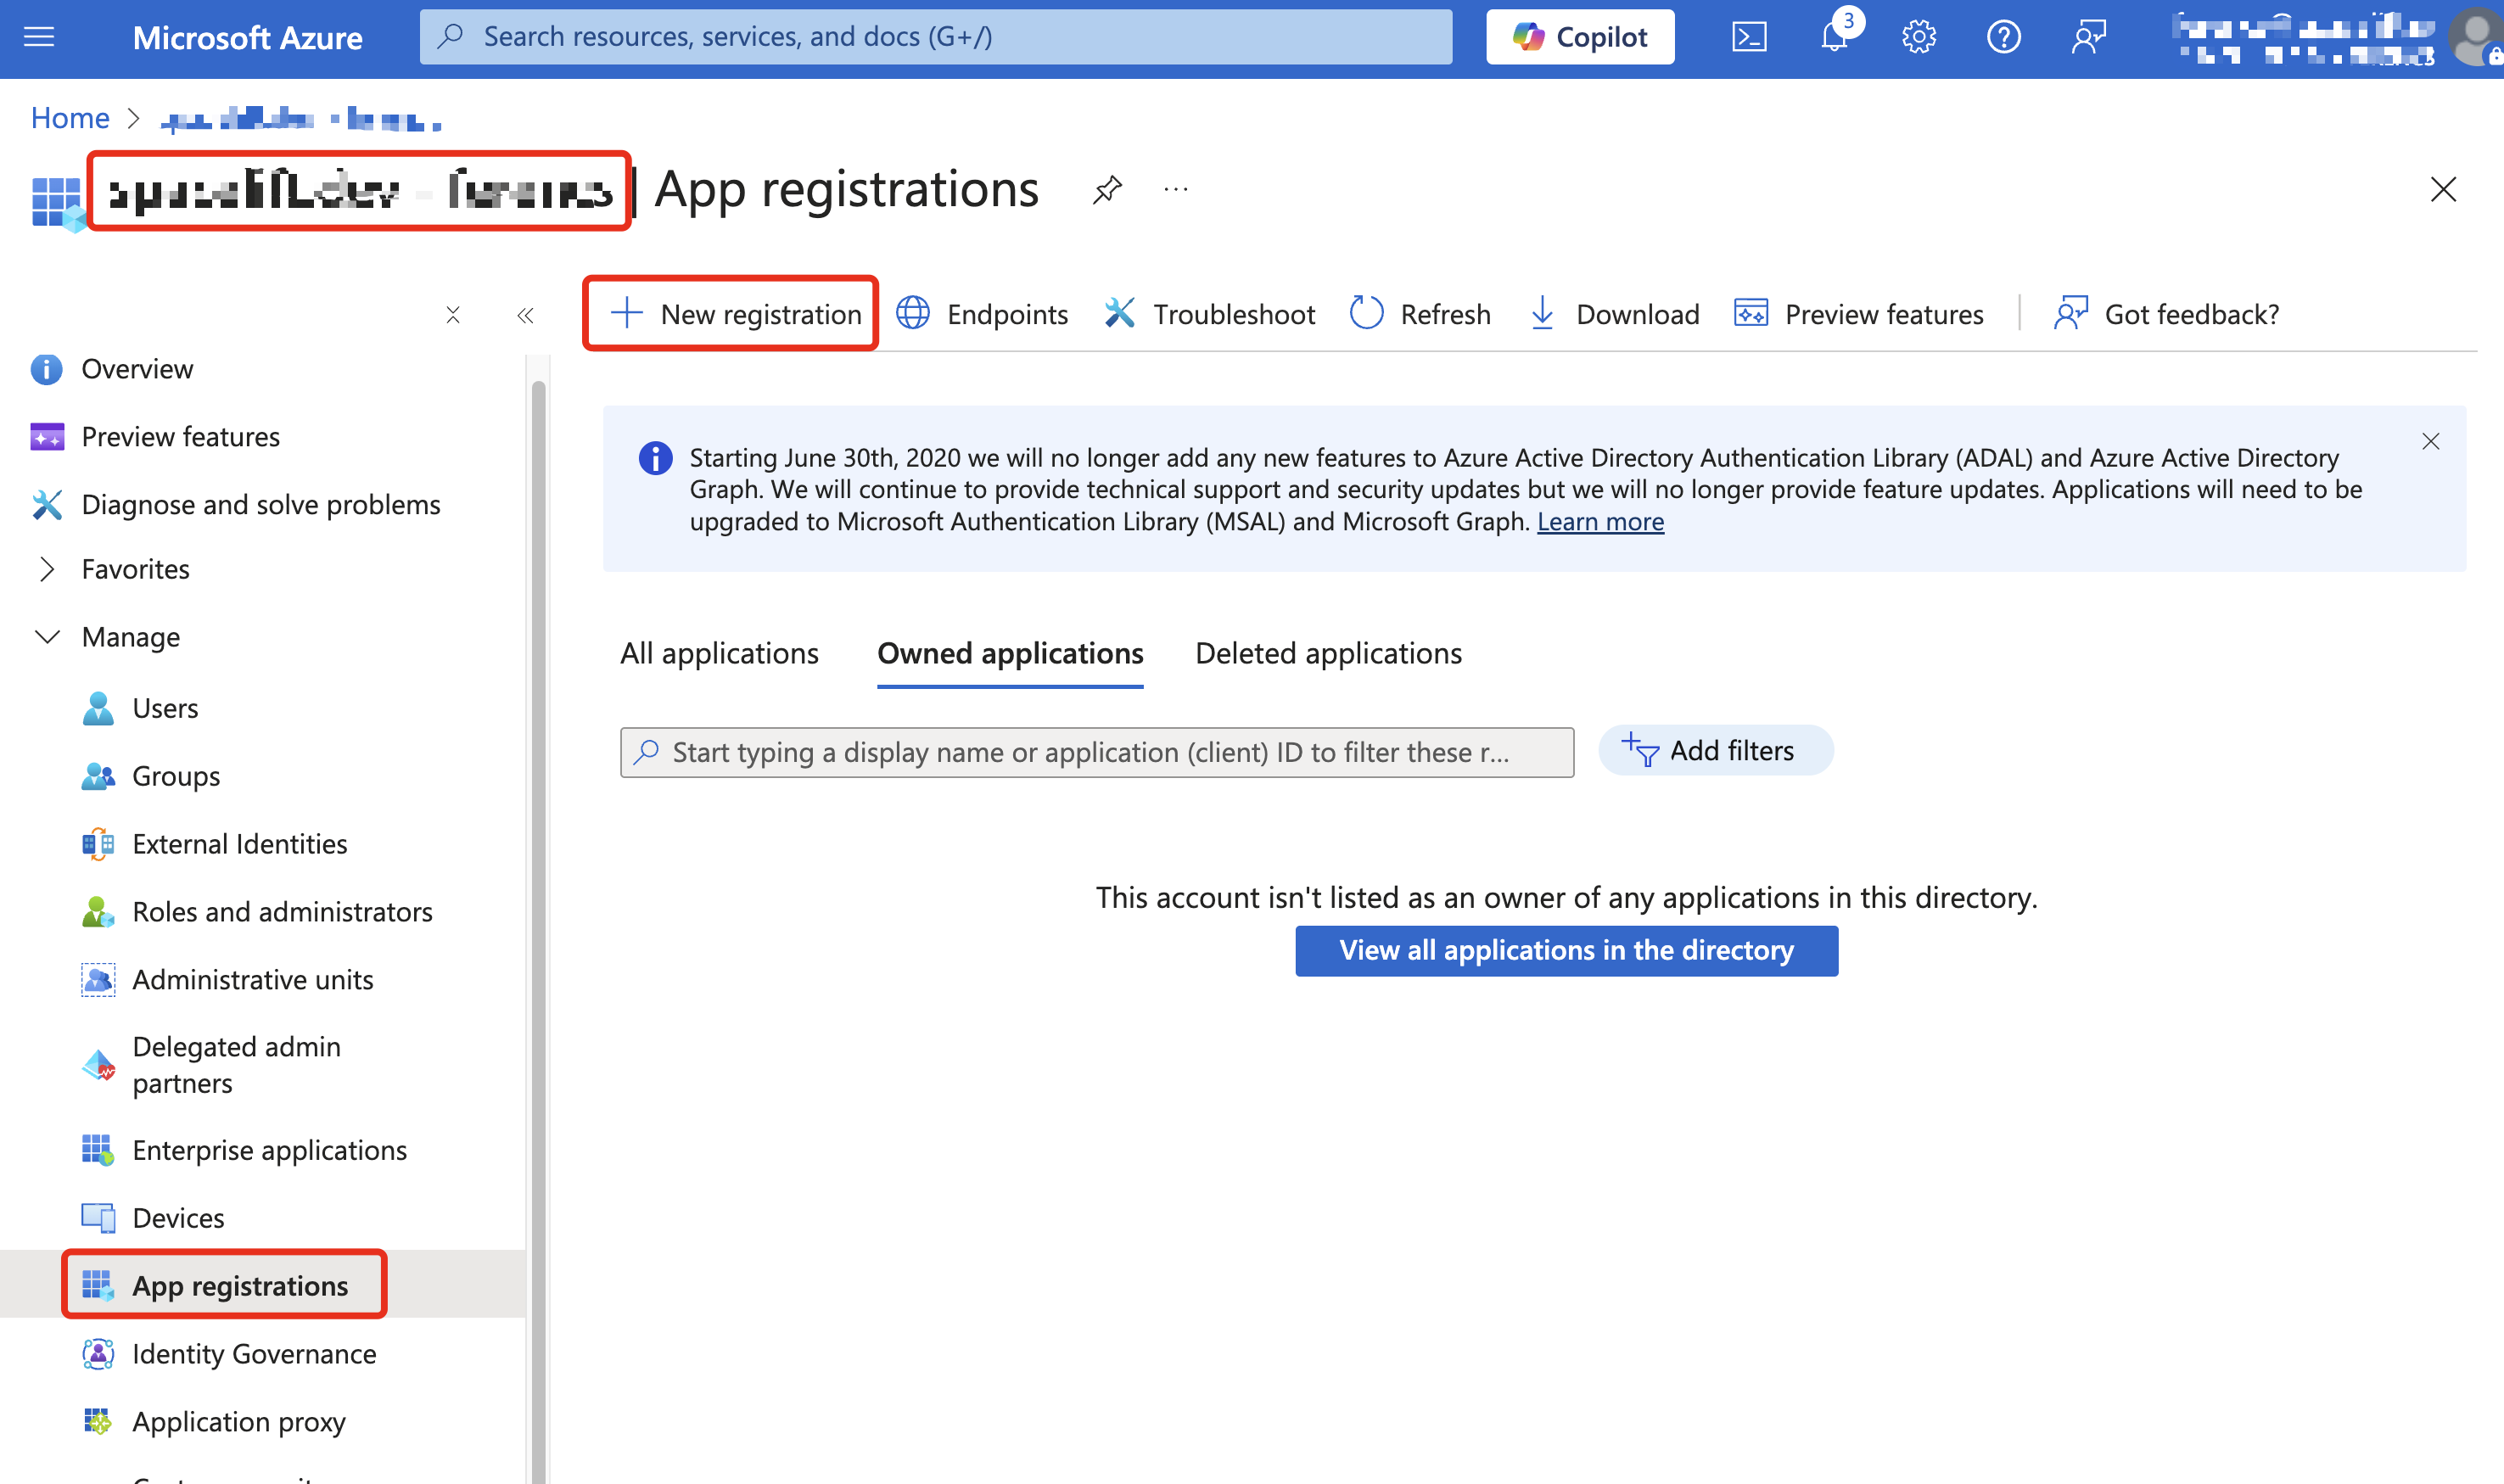
In Microsoft Entra ID, make sure you are in the directory where you want to set up the application. Select App registrations from the left-side panel, then click New registration.
Azure: Register the Application»
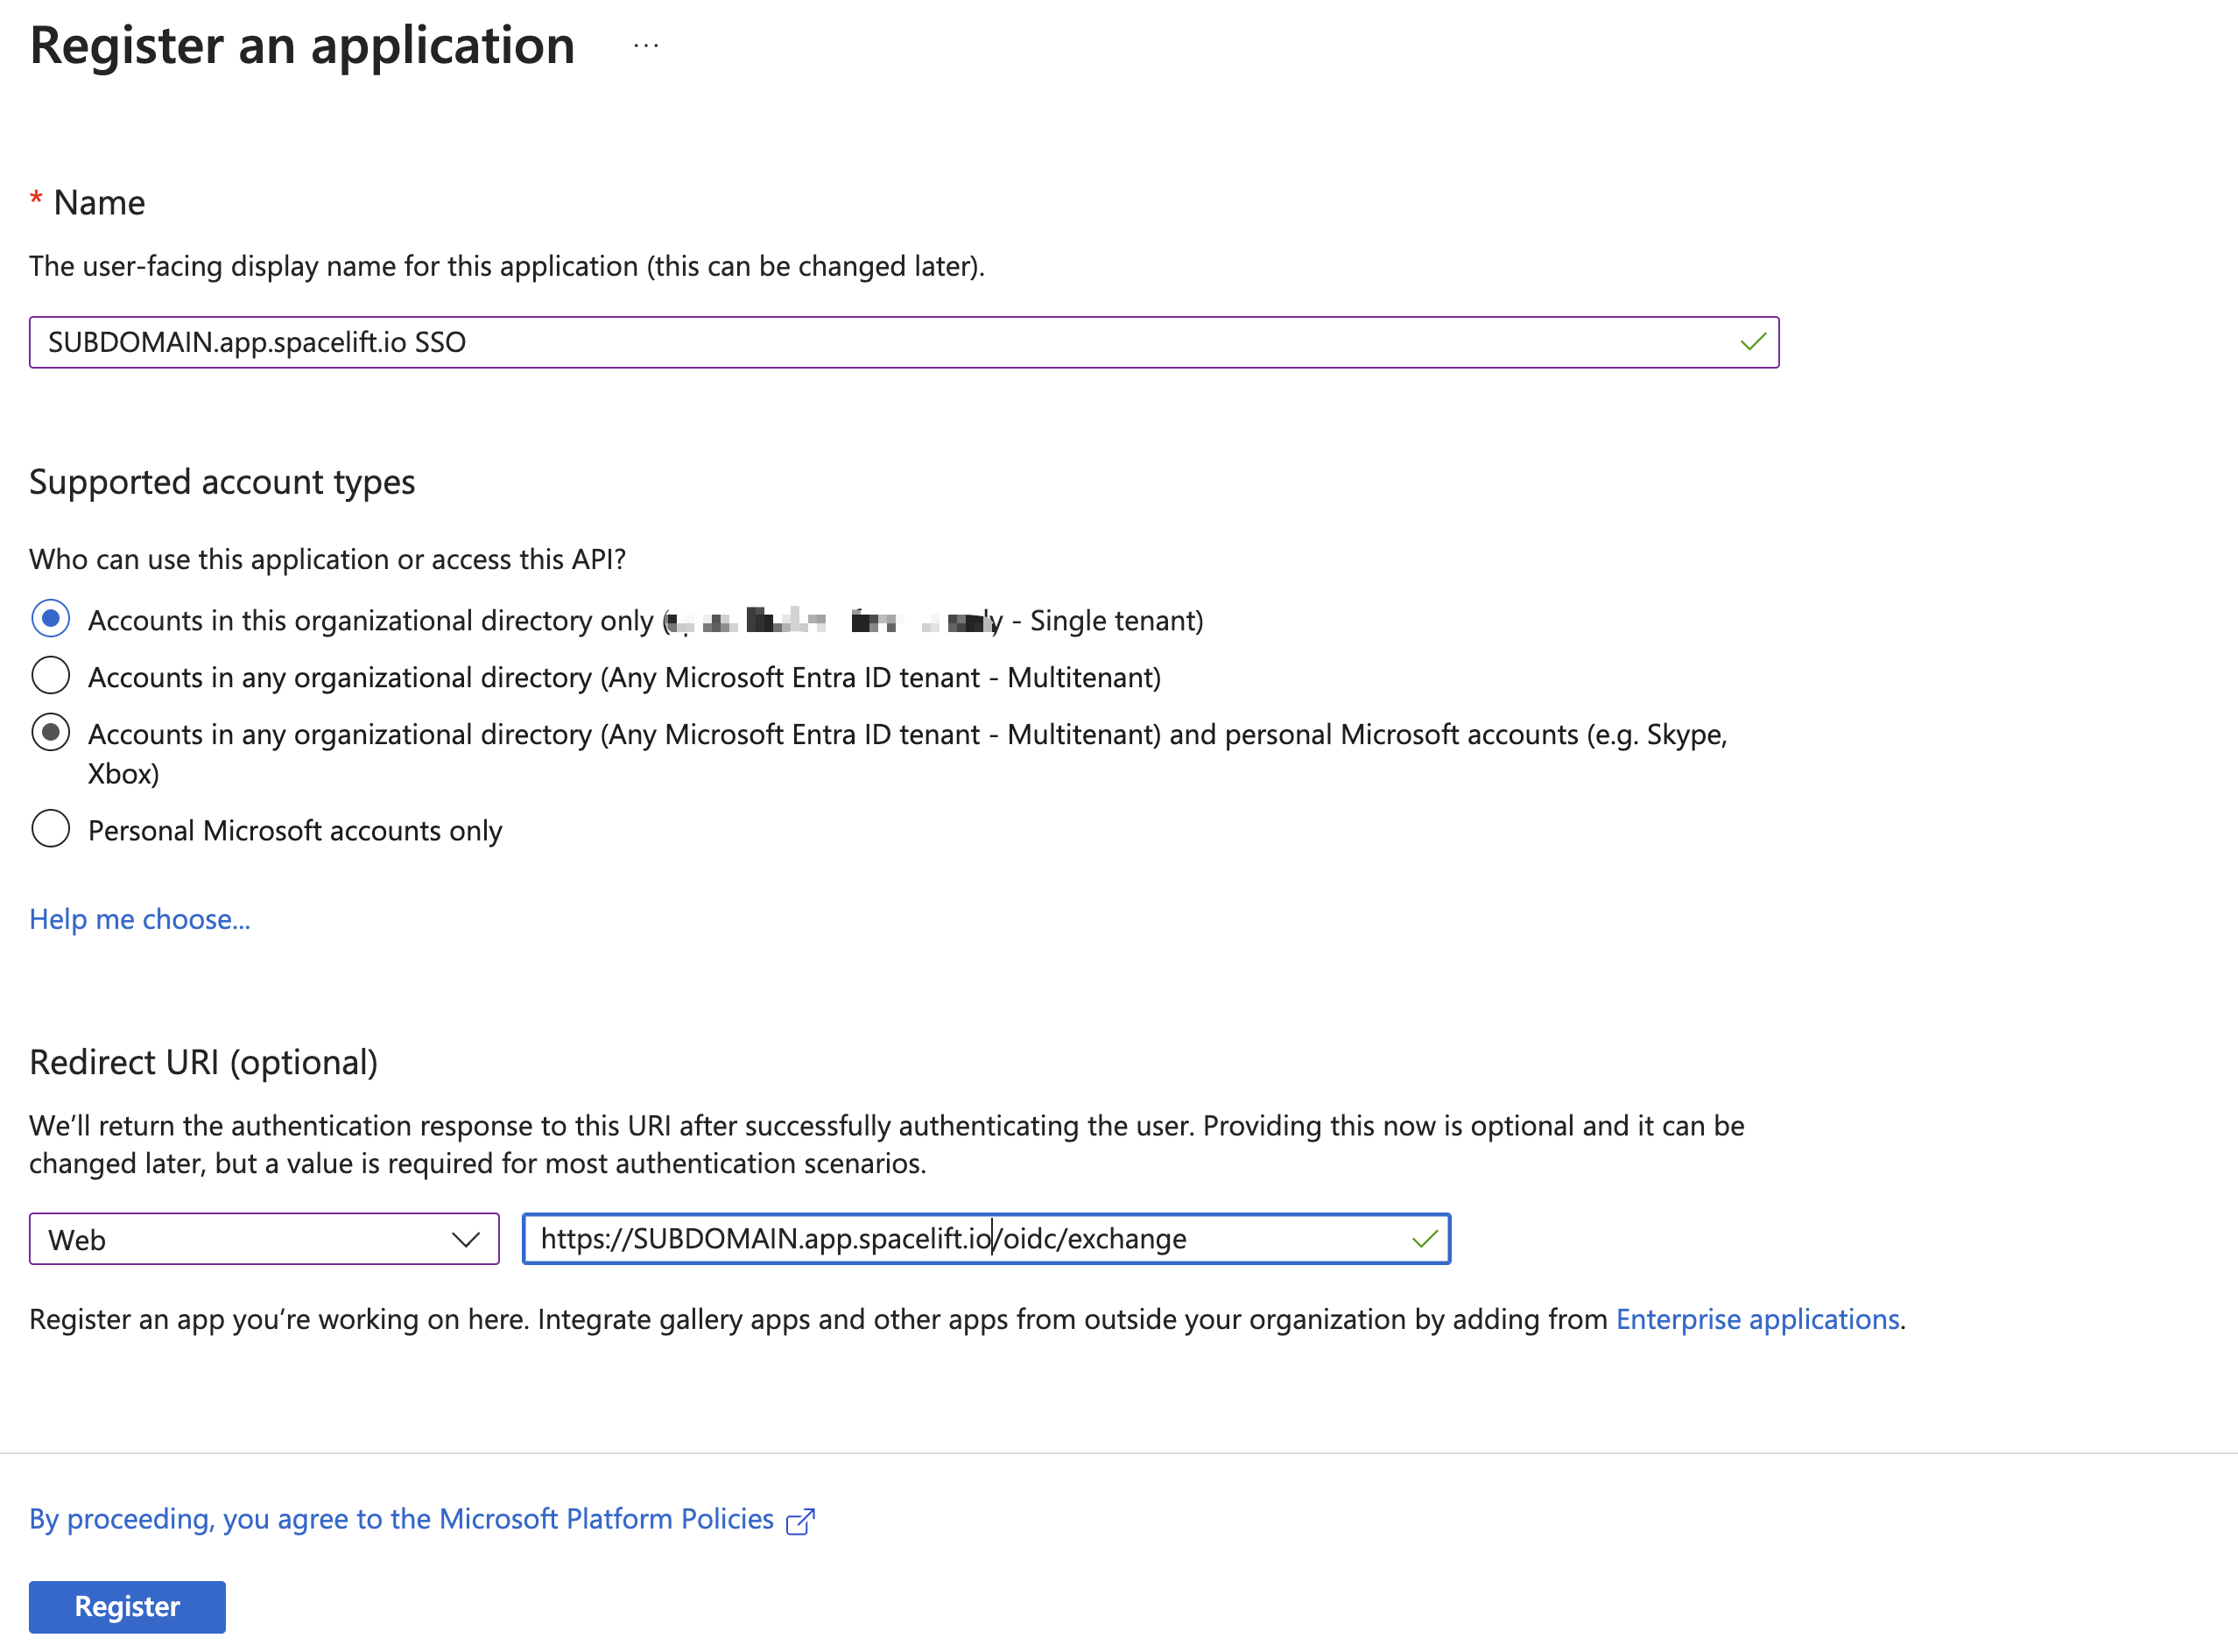
The application name is for your reference only — pick something that fits your organization. For supported account types, choose either single-tenant or multi-tenant, depending on your organization's setup. Select "Web" as the type for the redirect URL, and paste the Authorized redirect URL you copied from Spacelift.
Click Register.
Azure: Add UPN Claim»
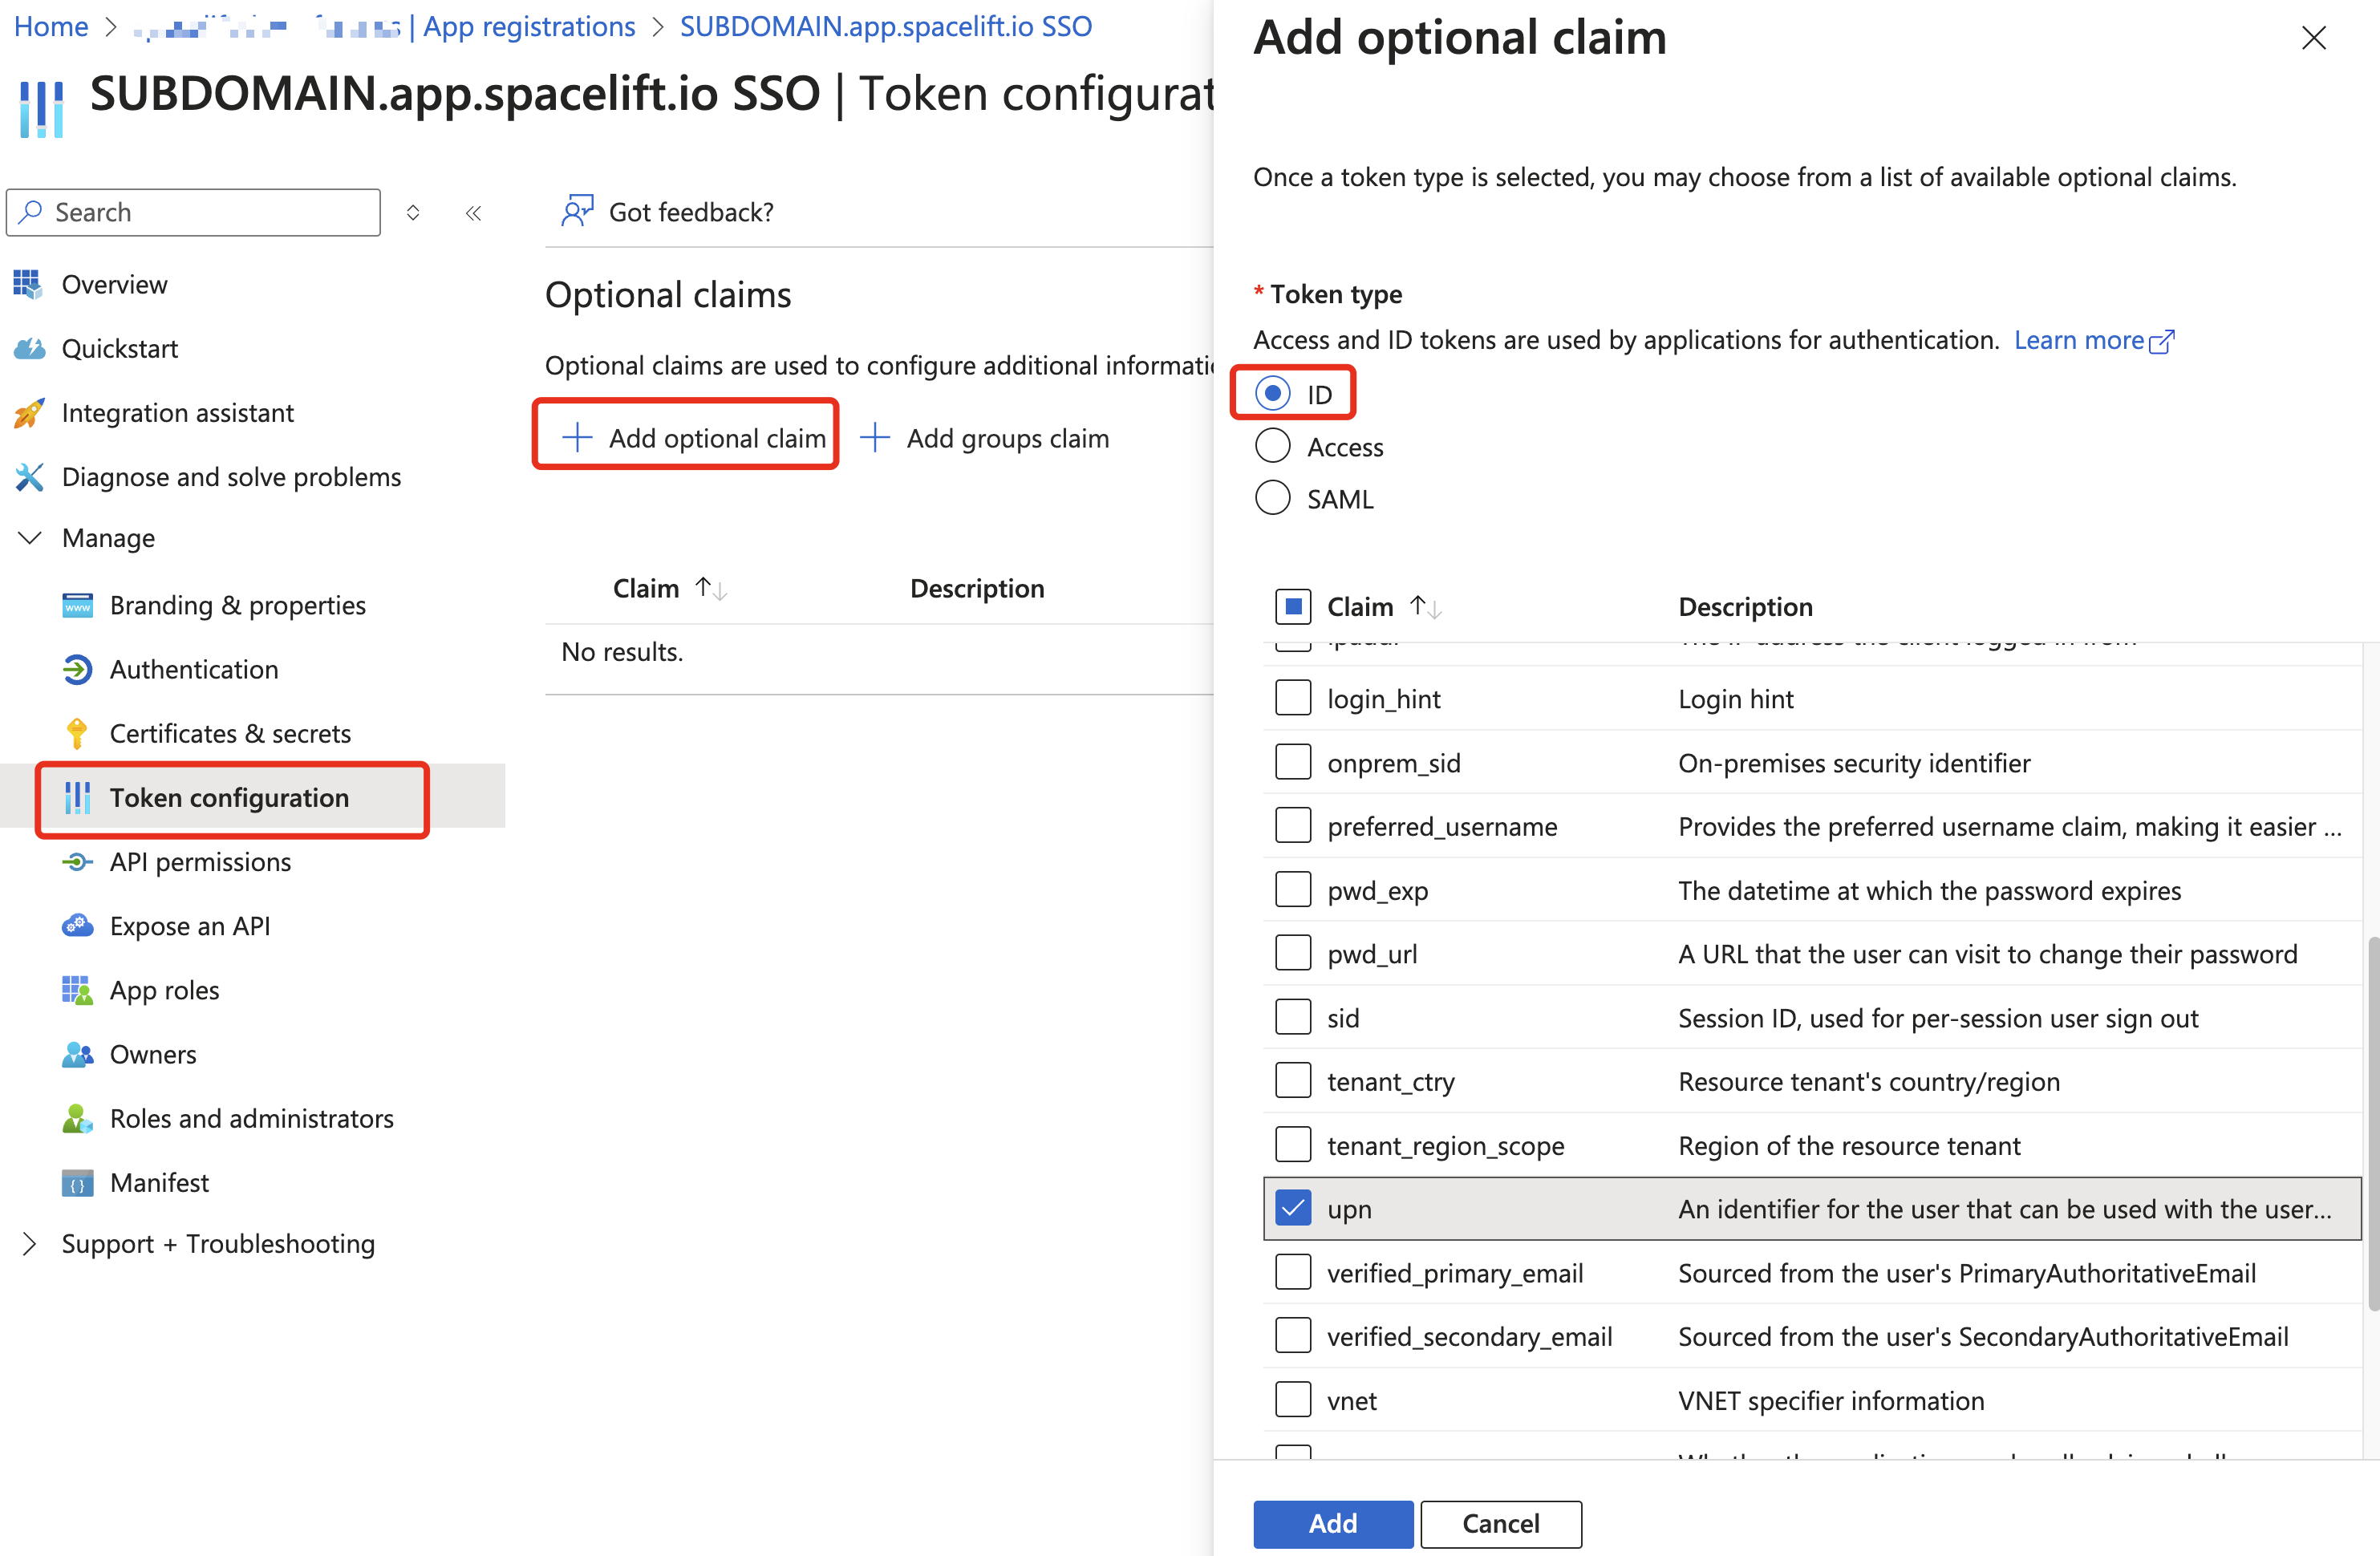
Under the newly created application, go to Token configuration and add the upn optional claim to the ID token.
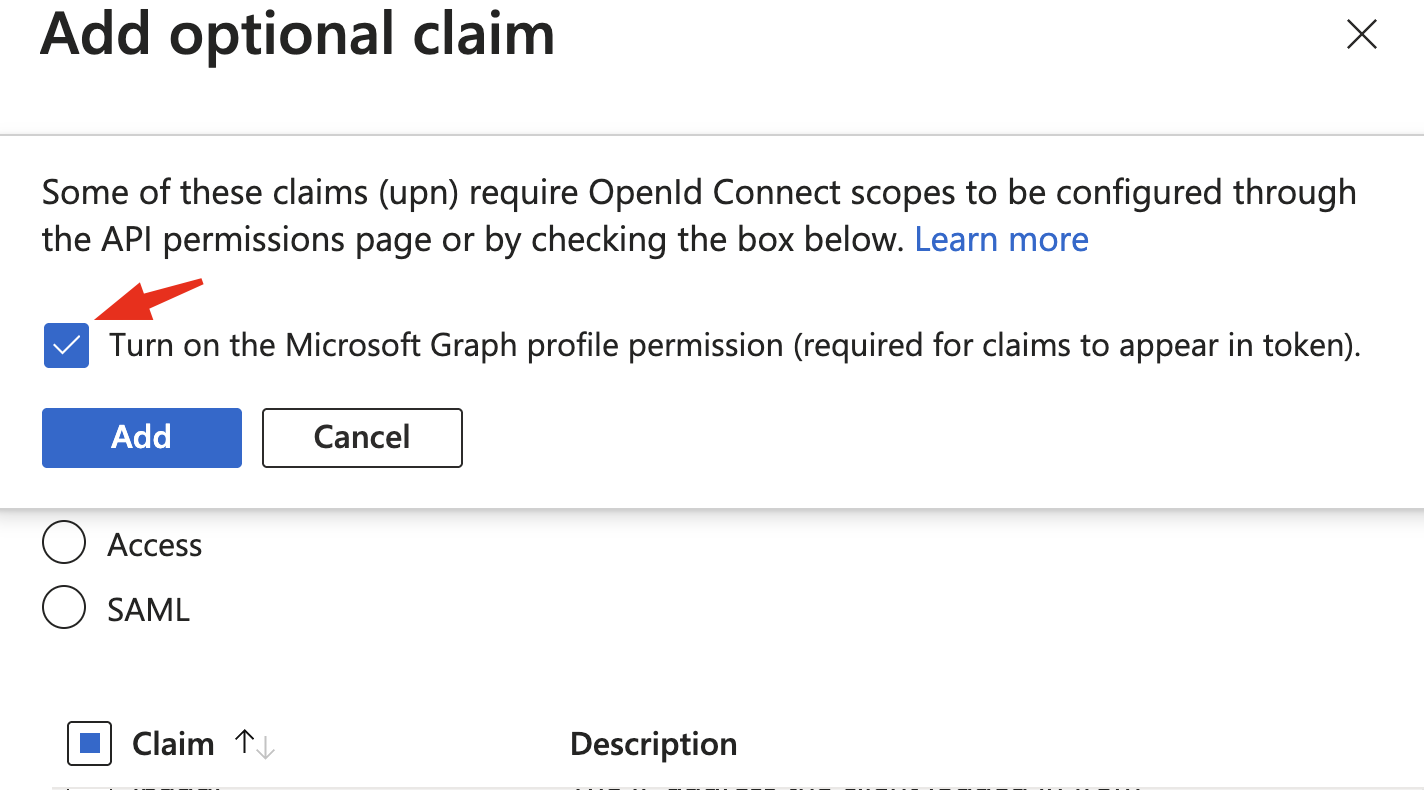
Click the Add button and make sure the Turn on the Microsoft Graph profile permission checkbox is selected in the popup.
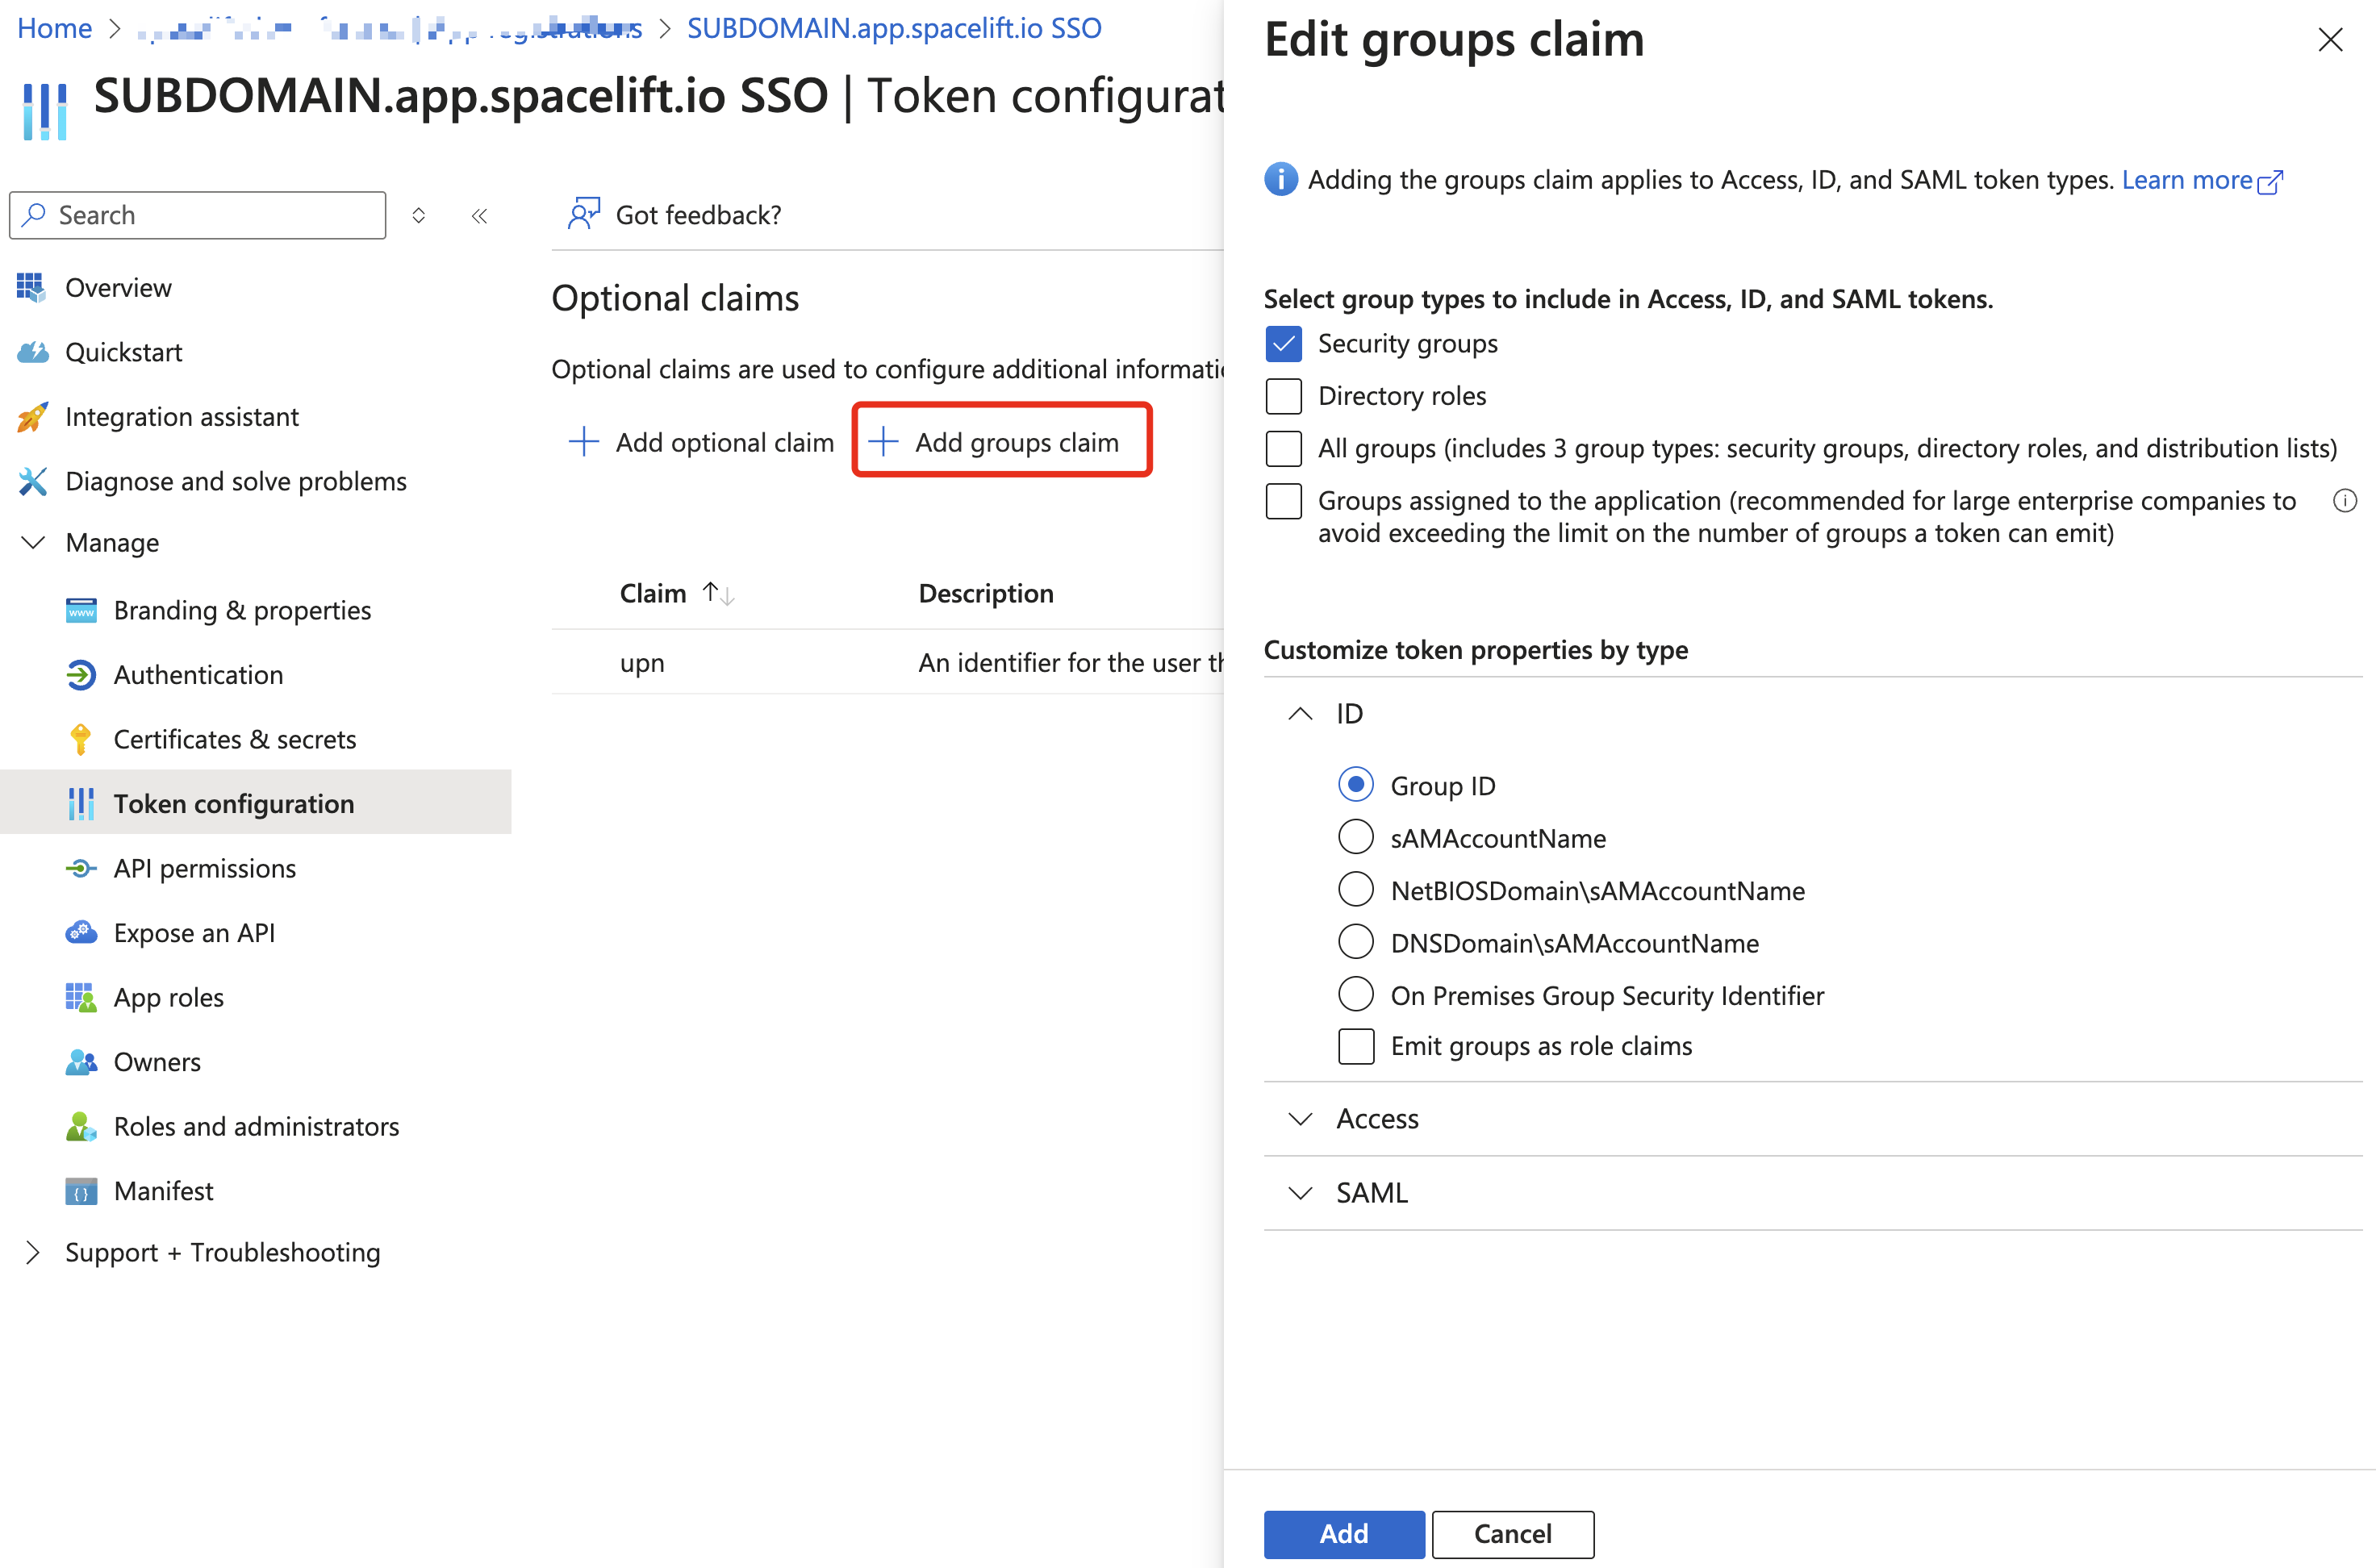
Azure: Add Groups Claim»
This step is not strictly required, but you will likely want to send user group information to Spacelift.
This allows you to assign permissions to user groups in Spacelift using the IdP Group Mapping feature.
To enable this, add the groups optional claim to the ID token. Most likely, you will want to choose Security or Groups assigned to the application.
Warning
The number of groups in the ID token cannot exceed 200 (Azure limit related to HTTP header size). You may want to use Application Groups to avoid hitting the limit. That requires a paid Microsoft Entra ID plan and will be discussed later.
Info
To use Spacelift's IdP Group Mapping feature, navigate to Spacelift > Organization Settings > IdP Group Mapping and select Map IdP group. Microsoft Entra ID sends Group IDs to Spacelift, instead of group names. When setting up your group mapping, ensure you map the Group IDs, not the group names. You can add a human-readable name in the description field for easier identification.

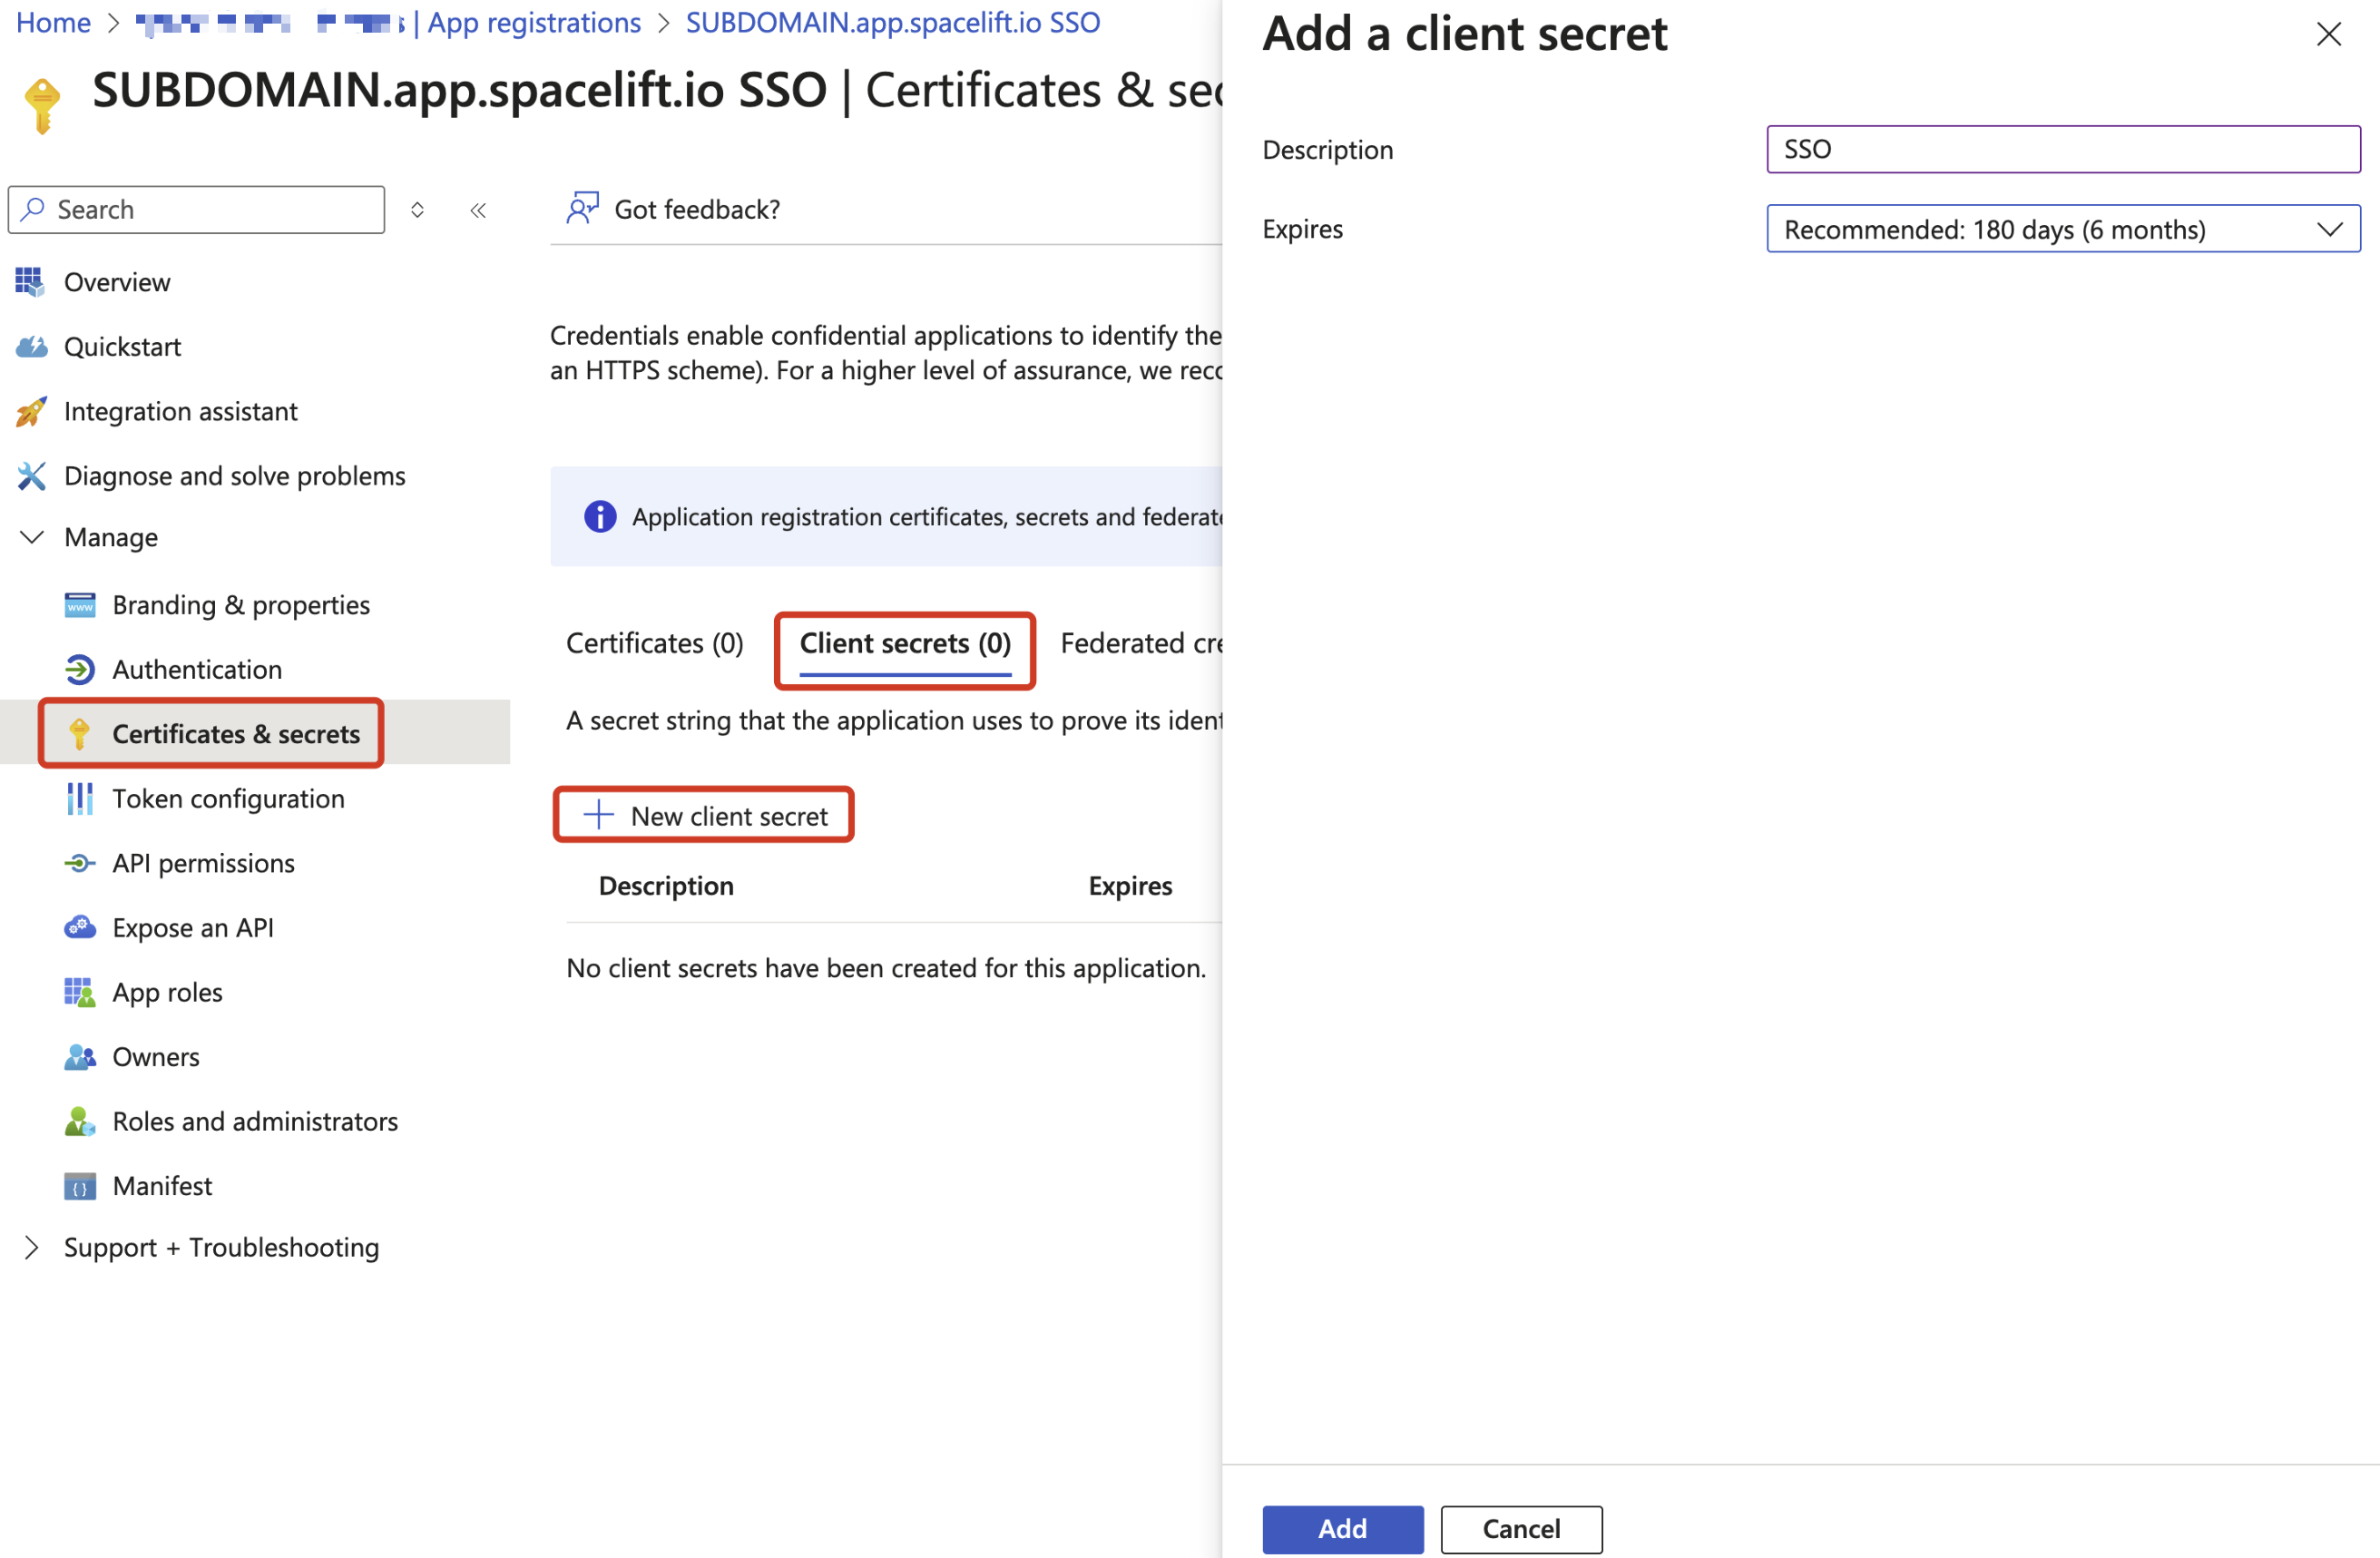
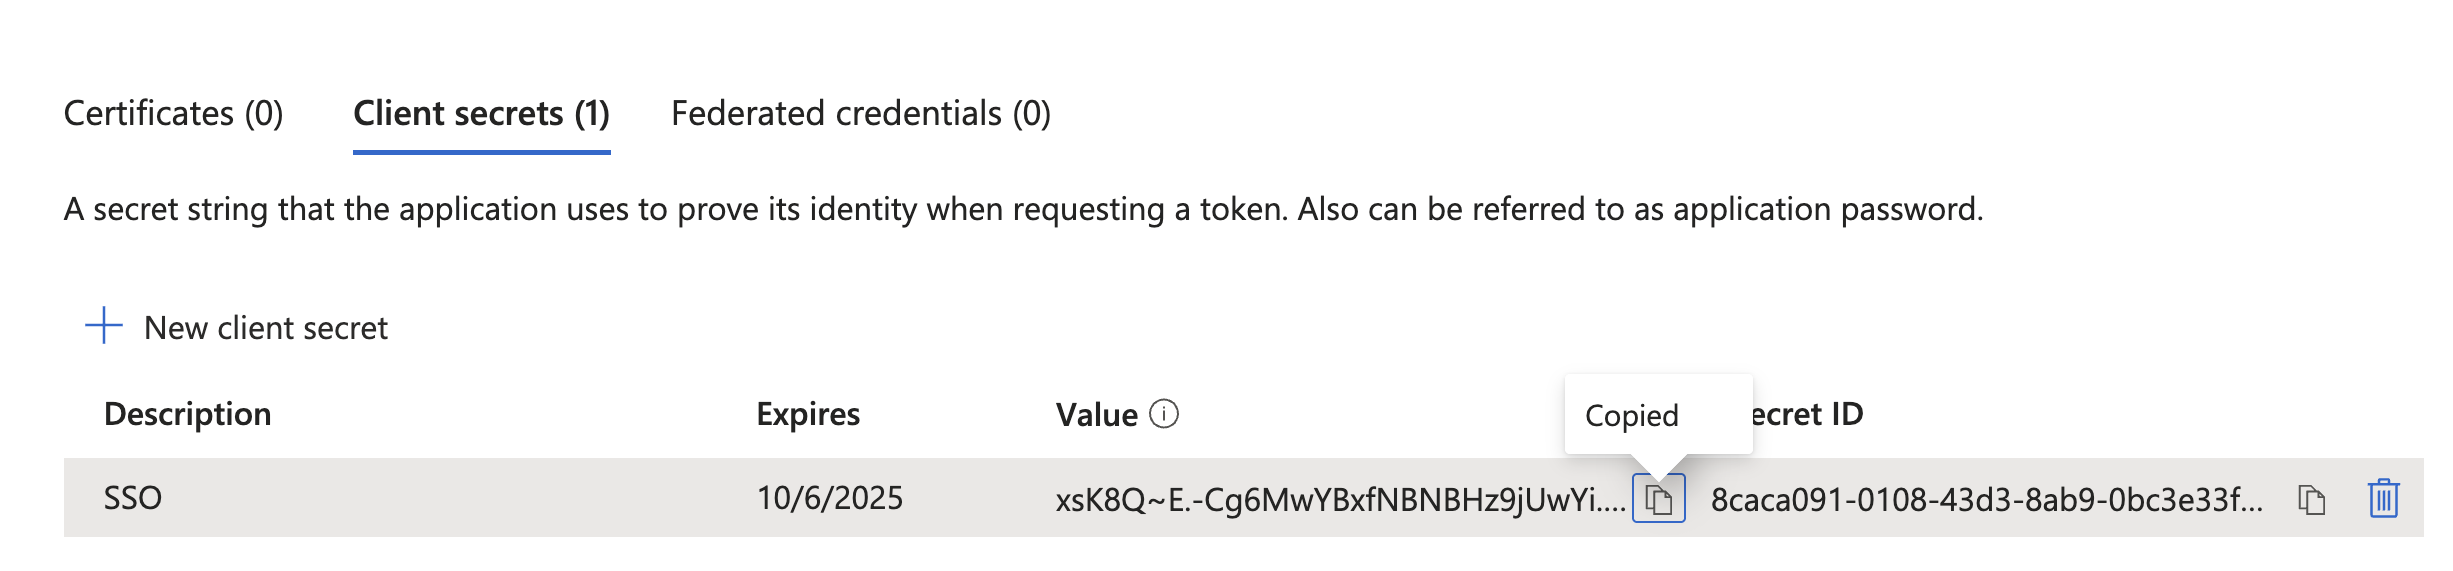
Azure: Configure Application Credentials»
Create a new Client secret and copy it into Spacelift's OIDC setup panel, within the Secret input.
Warning
You will need to generate a new client secret before it expires.
Info
Don't click Save in Spacelift just yet. We still need to get the Client ID and Provider URL for your application.
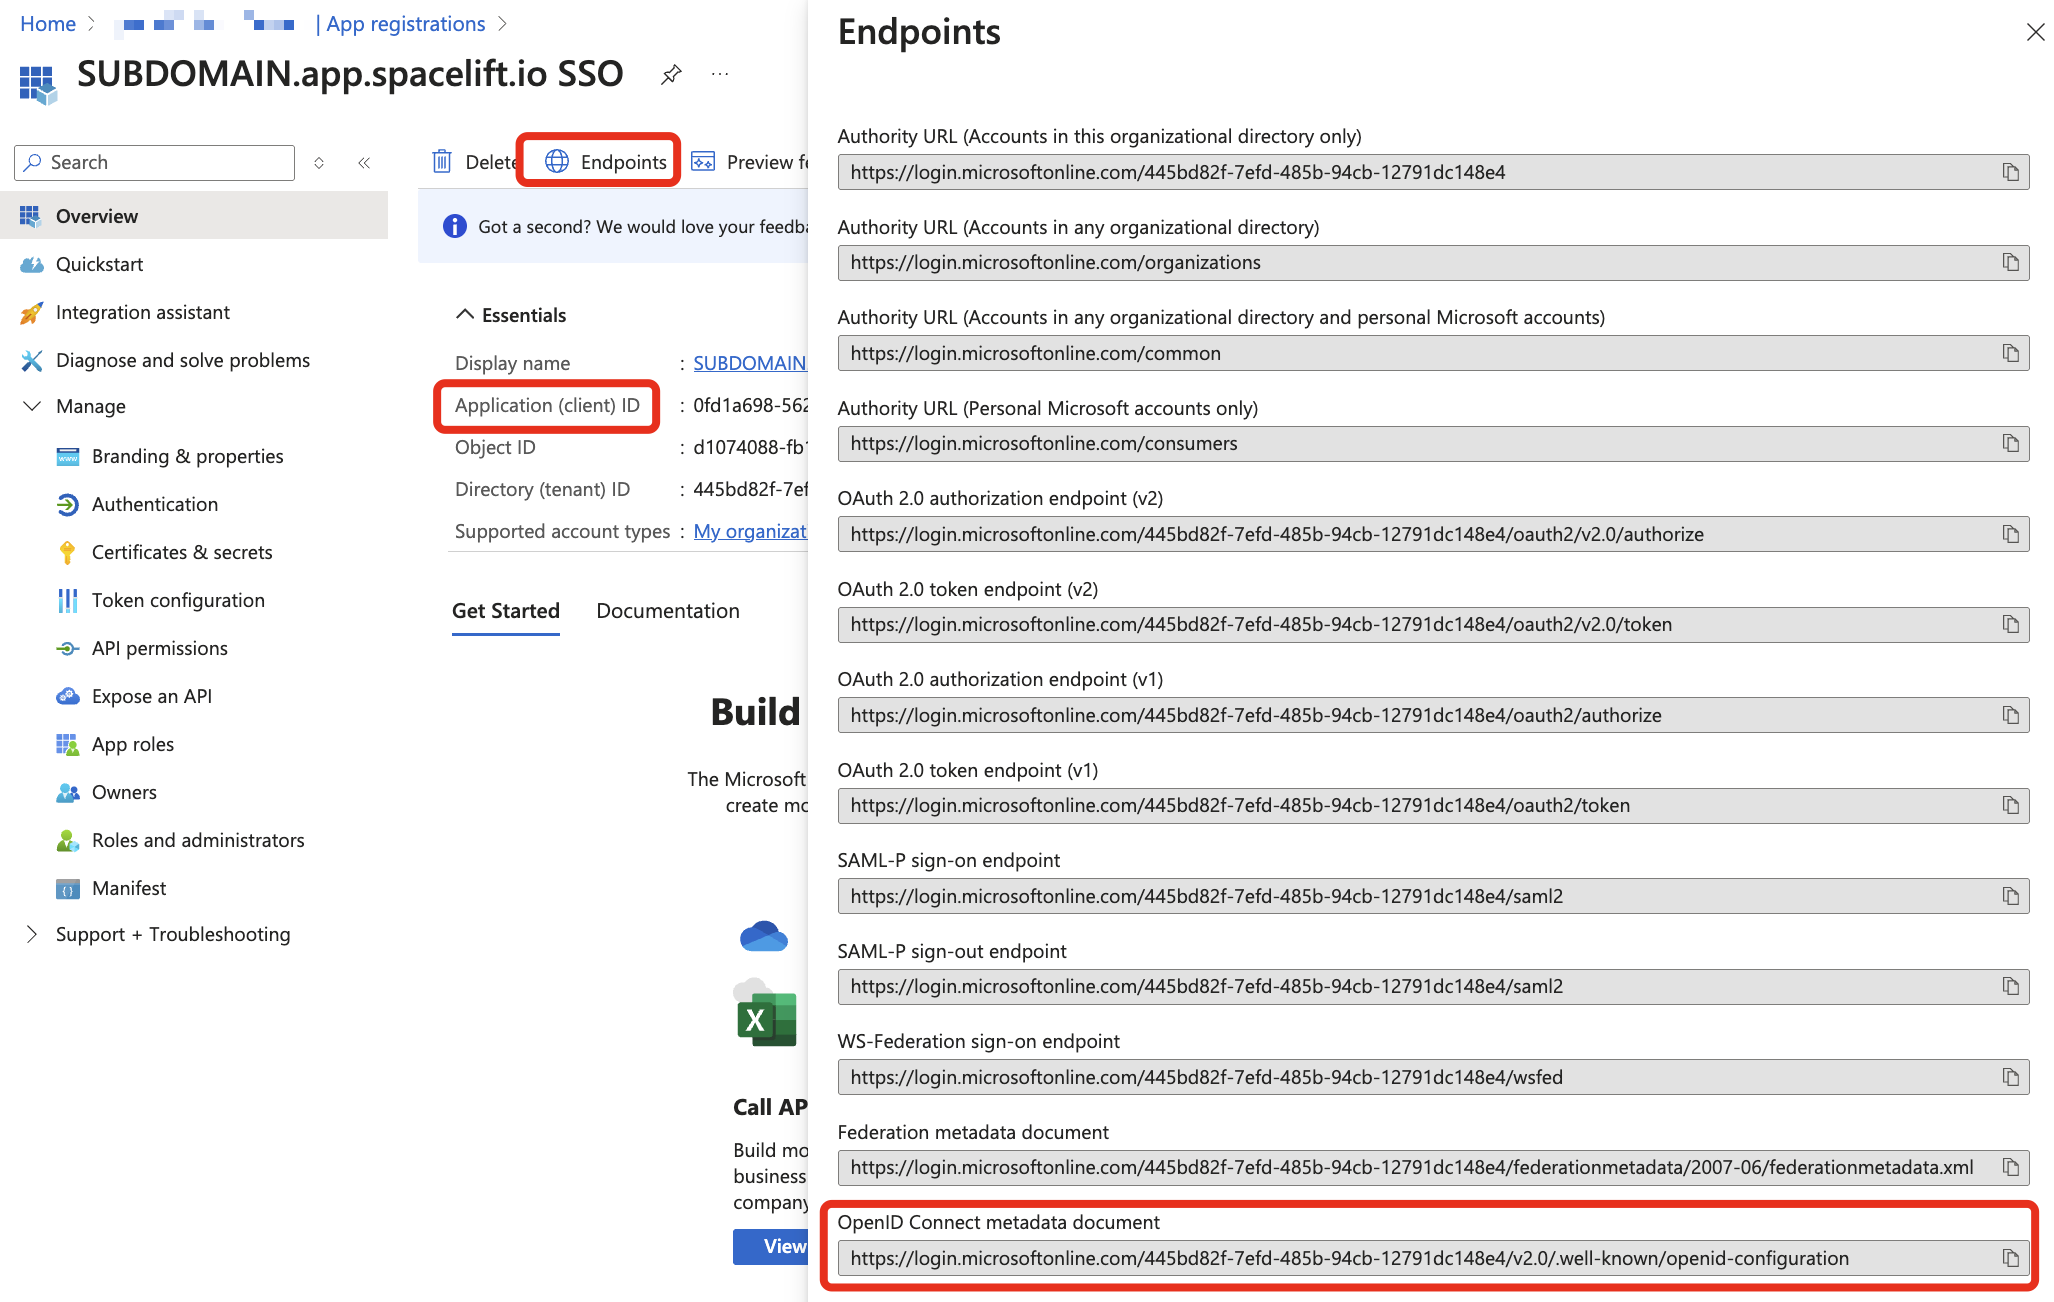
Azure: Client ID and Provider URL»
To complete your configuration, you need two more pieces of information. You can find both in the application's Overview section.
- Copy the Application (client) ID into the Client ID field in Spacelift.
- Under Endpoints, copy the OpenID Connect metadata document URL into the Provider URL field.
Your Spacelift OIDC configuration should now look similar to the example below. Click Save to continue — this will redirect you to perform the first login. If the login succeeds, SSO will become active.
If you selected Application Groups for the groups claim, consider completing the next optional section. Otherwise, you are done.
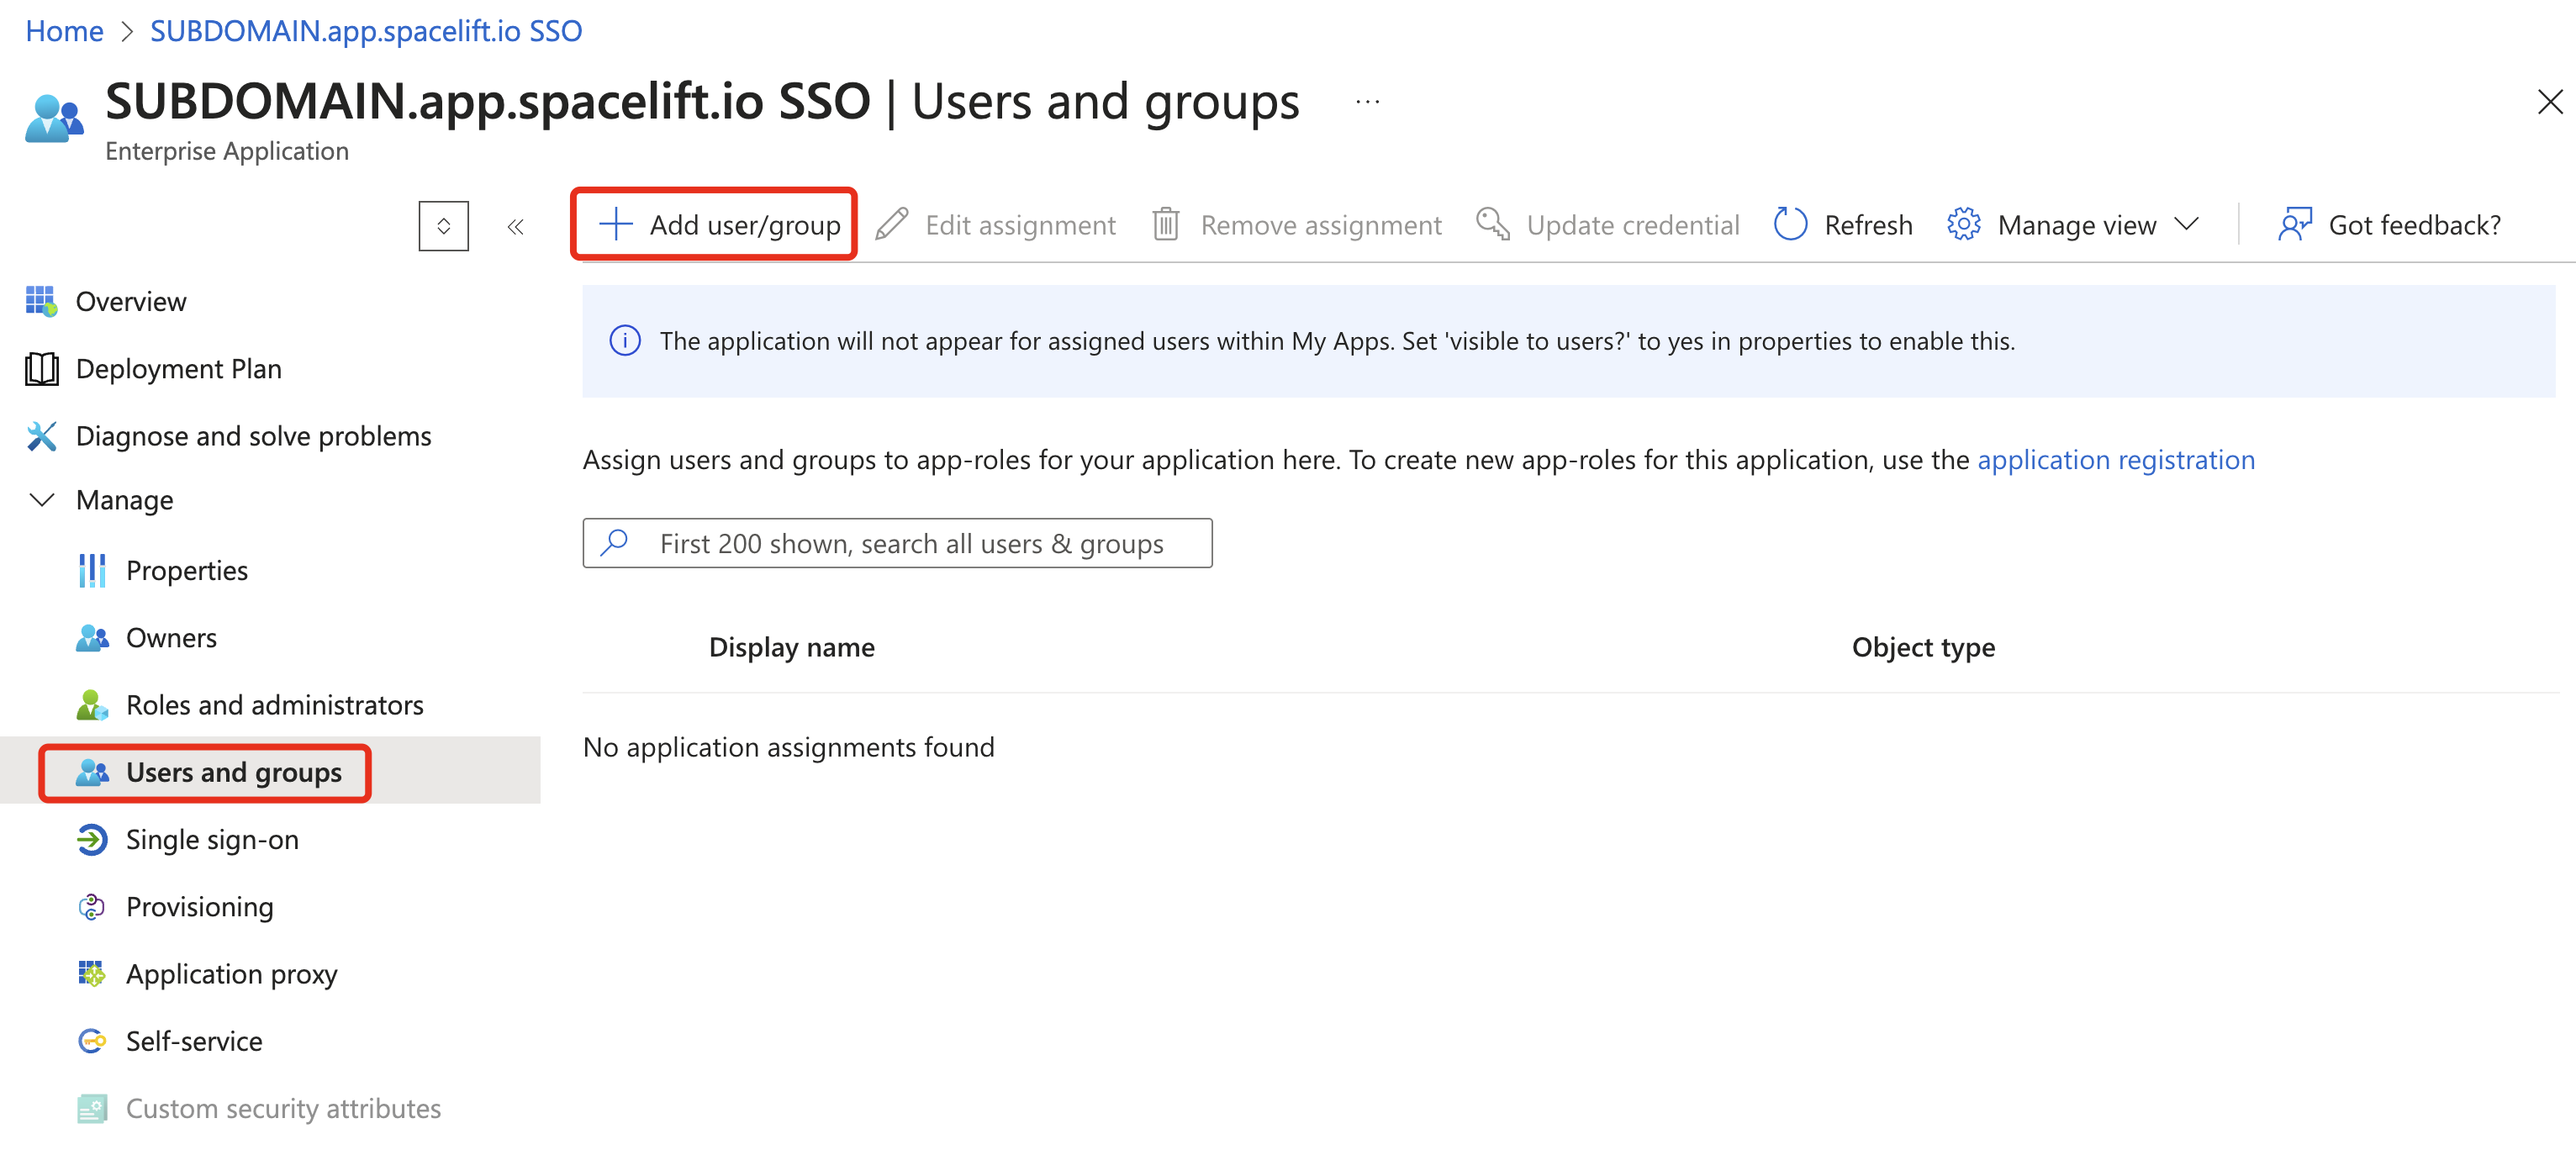
Azure: Assign Application Groups (optional)»
If you are part of a large organization where users may belong to more than 200 groups, the group list will not fit into the ID token. Fortunately, Microsoft Entra ID provides an option to assign ("bind") groups to an application.
If you previously configured the groups claim to include only assigned application groups, all that remains is to complete the group assignment.
The ID token will then contain only the intersection of the user's groups and the application's assigned groups. This way, you have the option to send only relevant groups to Spacelift.
Go to the Enterprise Applications service in the Azure portal and find your application. From there, complete the group assignment.