Bitbucket Datacenter/Server»
Spacelift supports Bitbucket Data Center (on-premise) as the code source for your stacks and modules.
You can set up multiple Space-level and one default Bitbucket Data Center integration per account.
Create the Bitbucket Data Center integration»
Initial setup»
- On the Source control tab, click Set up integration, then choose Bitbucket Data Center on the dropdown.
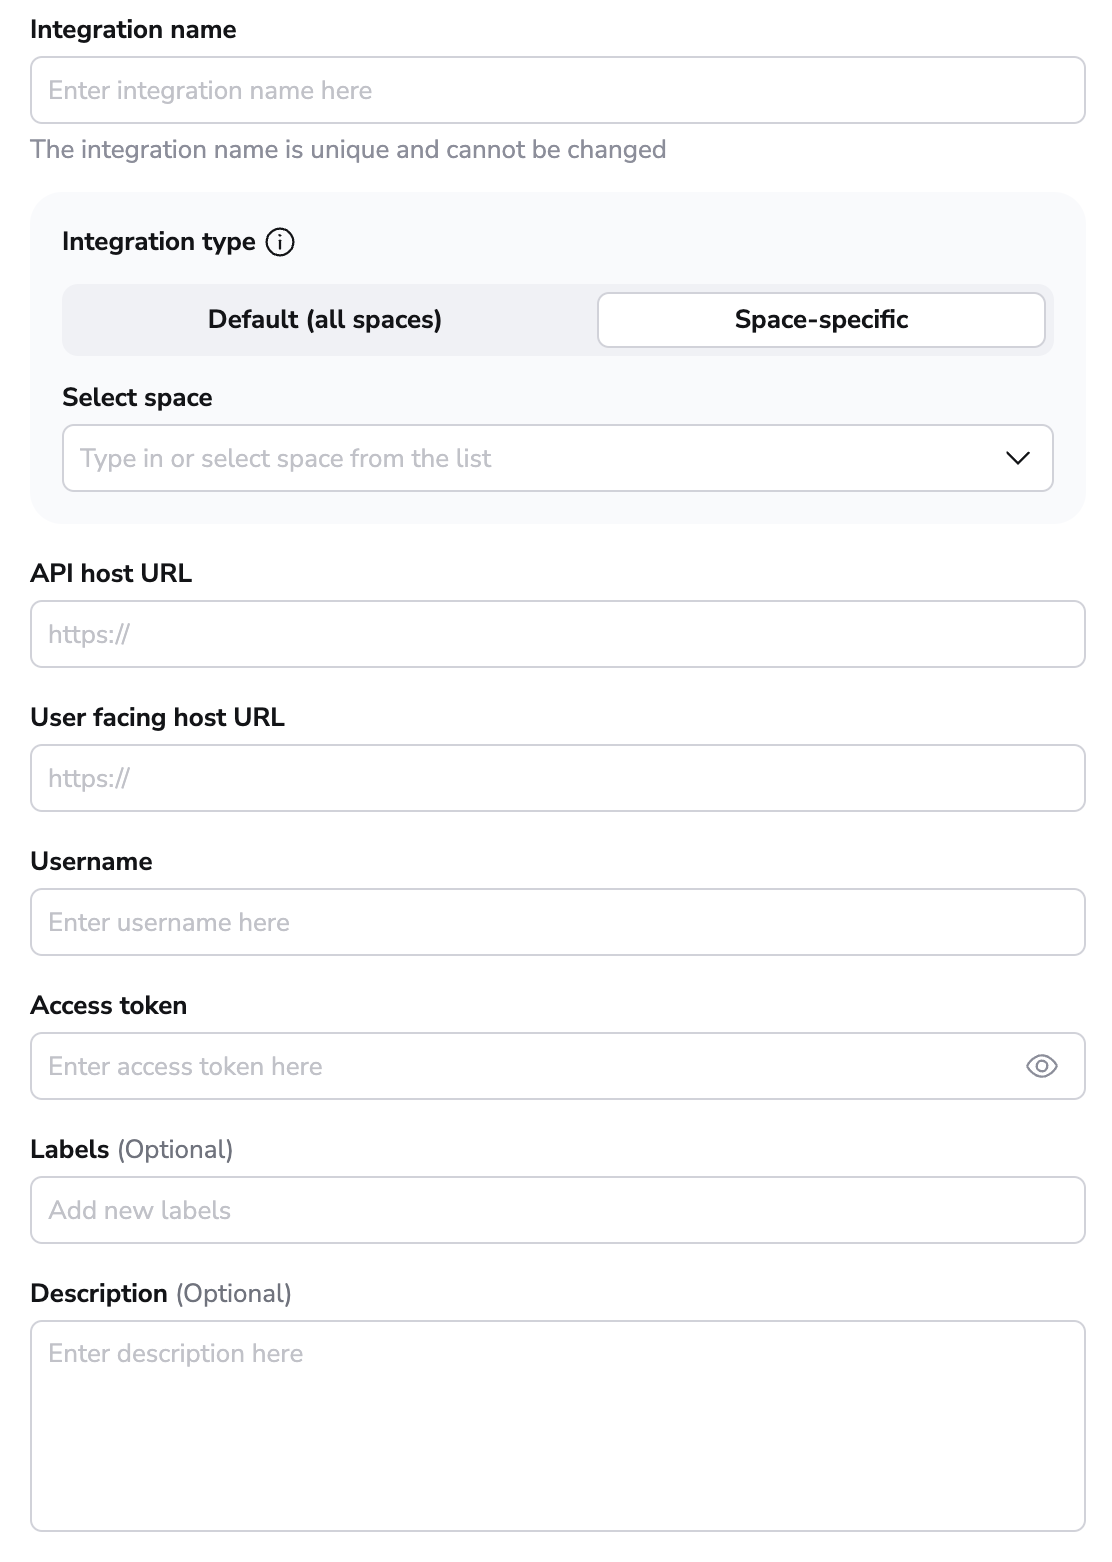
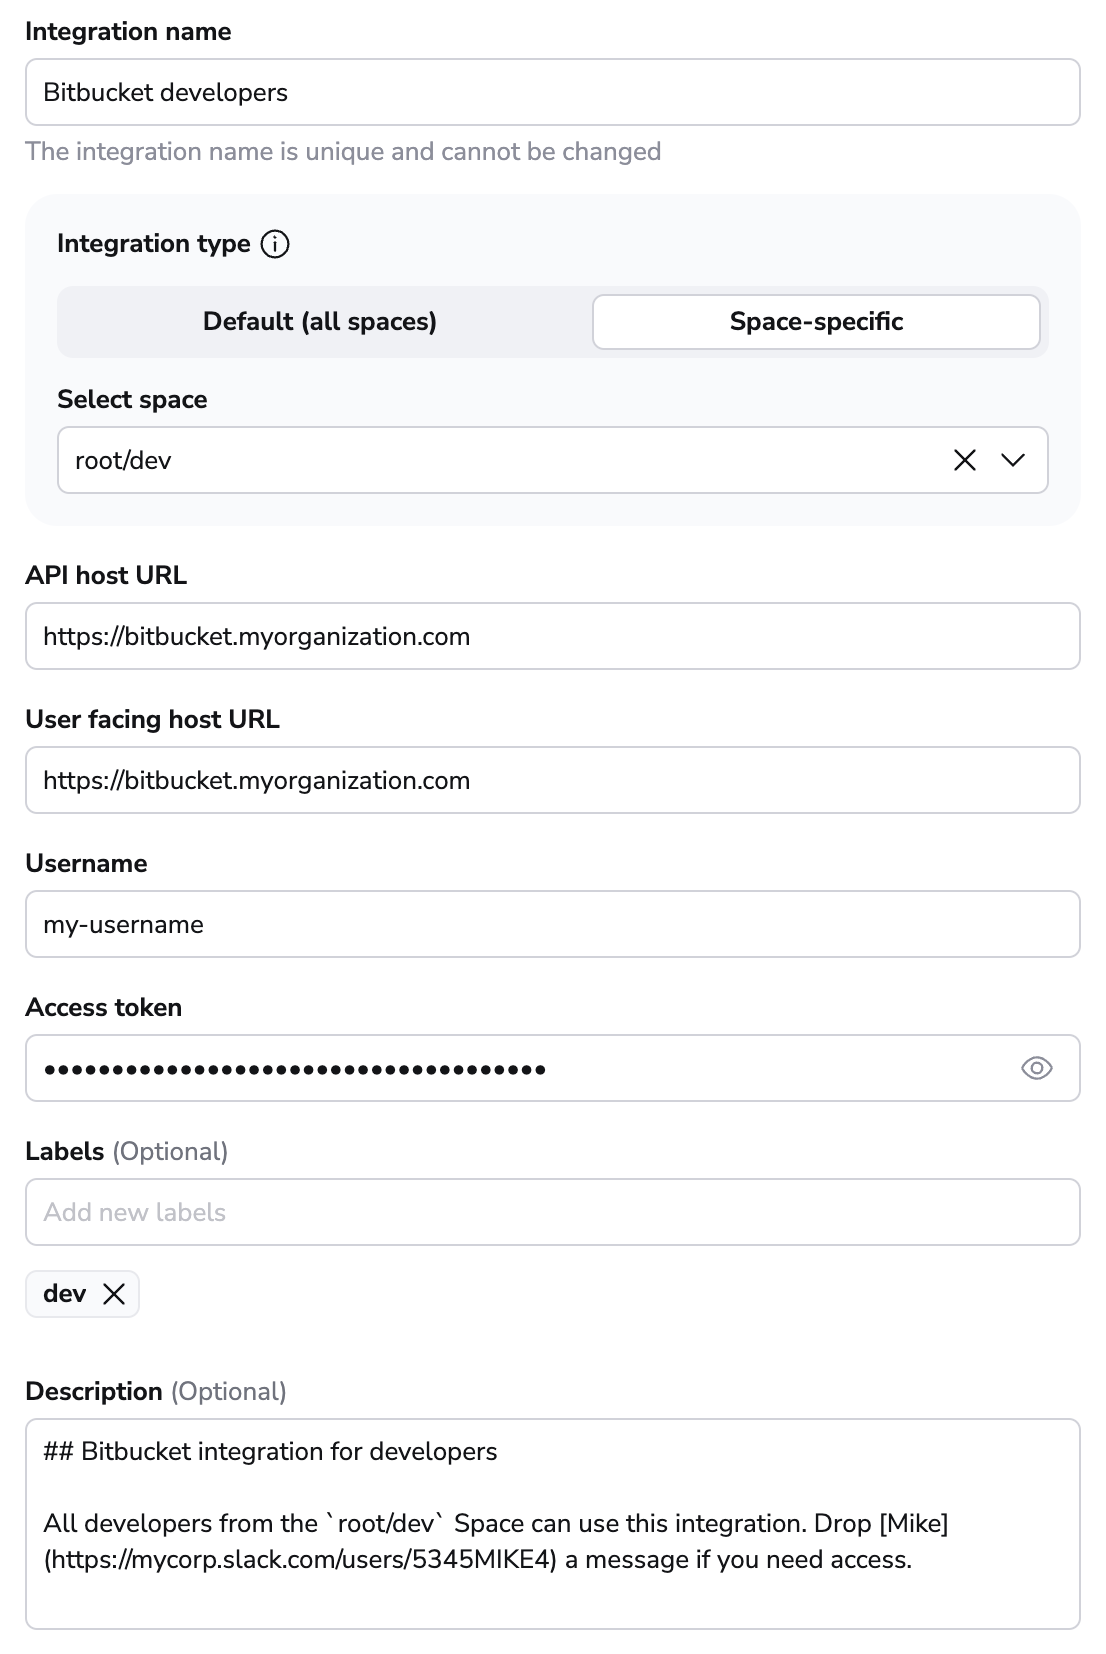
- Integration name: Enter a name for your integration. It cannot be changed later because the Spacelift webhook endpoint is generated based on this name.
- Integration type: Default (all spaces) or Space-specific. Each Spacelift account can only support one default integration per VCS provider, which is available to all stacks and modules in the same Space as the integration.
Create an access token»
You will need to create an access token in Bitbucket to use with Spacelift. The token requires the following access:
- Read access to any projects Spacelift needs to be able to access.
- Read access to the repositories within those projects.
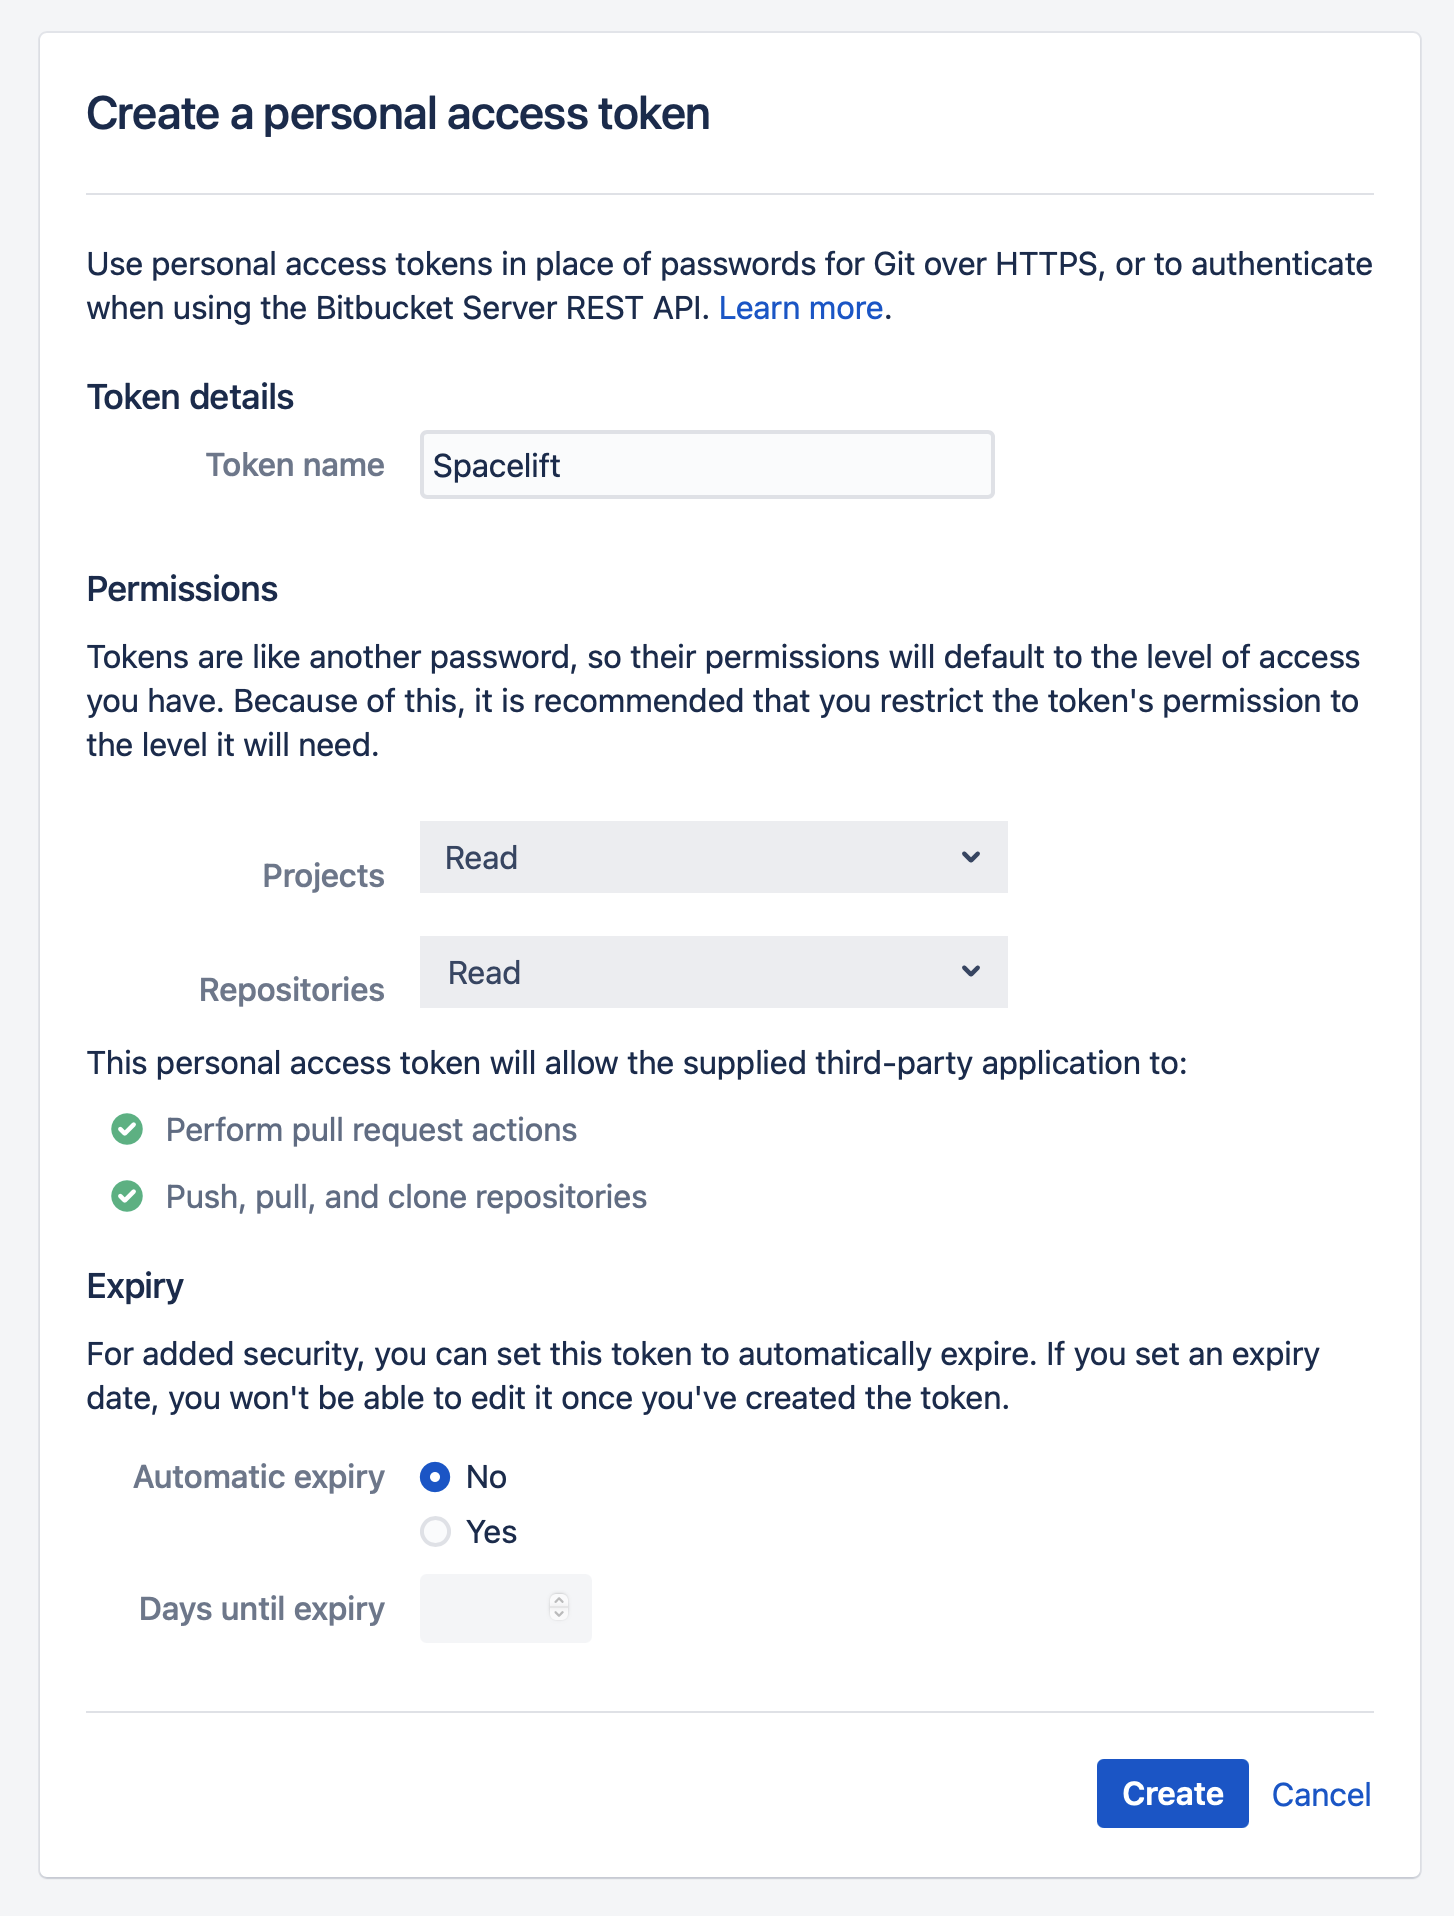
- Navigate to Manage account > Personal access tokens.
- Click Create.
- Name: Enter a descriptive name for the token.
- Permissions > Projects: Select Read.
- Permissions > Repositories: Select Read.
- Automated expiry: Select No.
- Click Create.
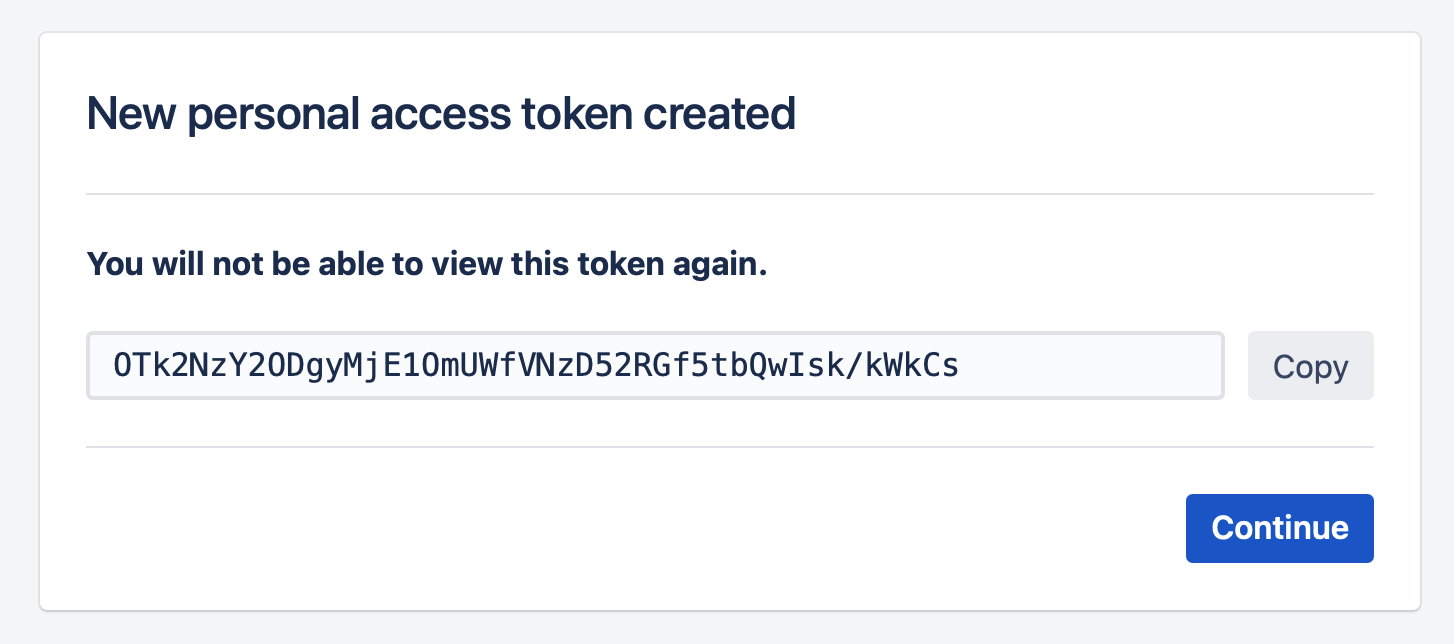
- Copy the token details to finish the integration in Spacelift.
Copy details into Spacelift»
Now that your Bitbucket Data Center access token has been created, return to the integration configuration screen in Spacelift.
- API host URL: Enter the URL of your Bitbucket server. This will likely use a format like:
https://bitbucket.<myorganization>.com - User facing host URL: Enter the URL that will be shown to the user and displayed in the Spacelift UI. This will be the same as the API host URL unless you are using VCS Agents, in which case it should be
private://<vcs-agent-pool-name>. - Username: Enter the username for the Bitbucket account where you created the access token.
- Access token: Enter the access token that Spacelift will use to access your Bitbucket.
- Labels: Organize integrations by assigning labels to them.
- Description: A markdown-formatted free-form text field to describe the integration.
- Use Git checkout: Toggle that defines if integration should use git checkout to download source code, otherwise source code will be downloaded as archive through API. This is required for sparse checkout to work.
- Click Set up to save your integration settings.
Set up webhooks»
For every Bitbucket Data Center repository being used in Spacelift stacks or modules, you will need to set up a webhook to notify Spacelift about project changes.
Note
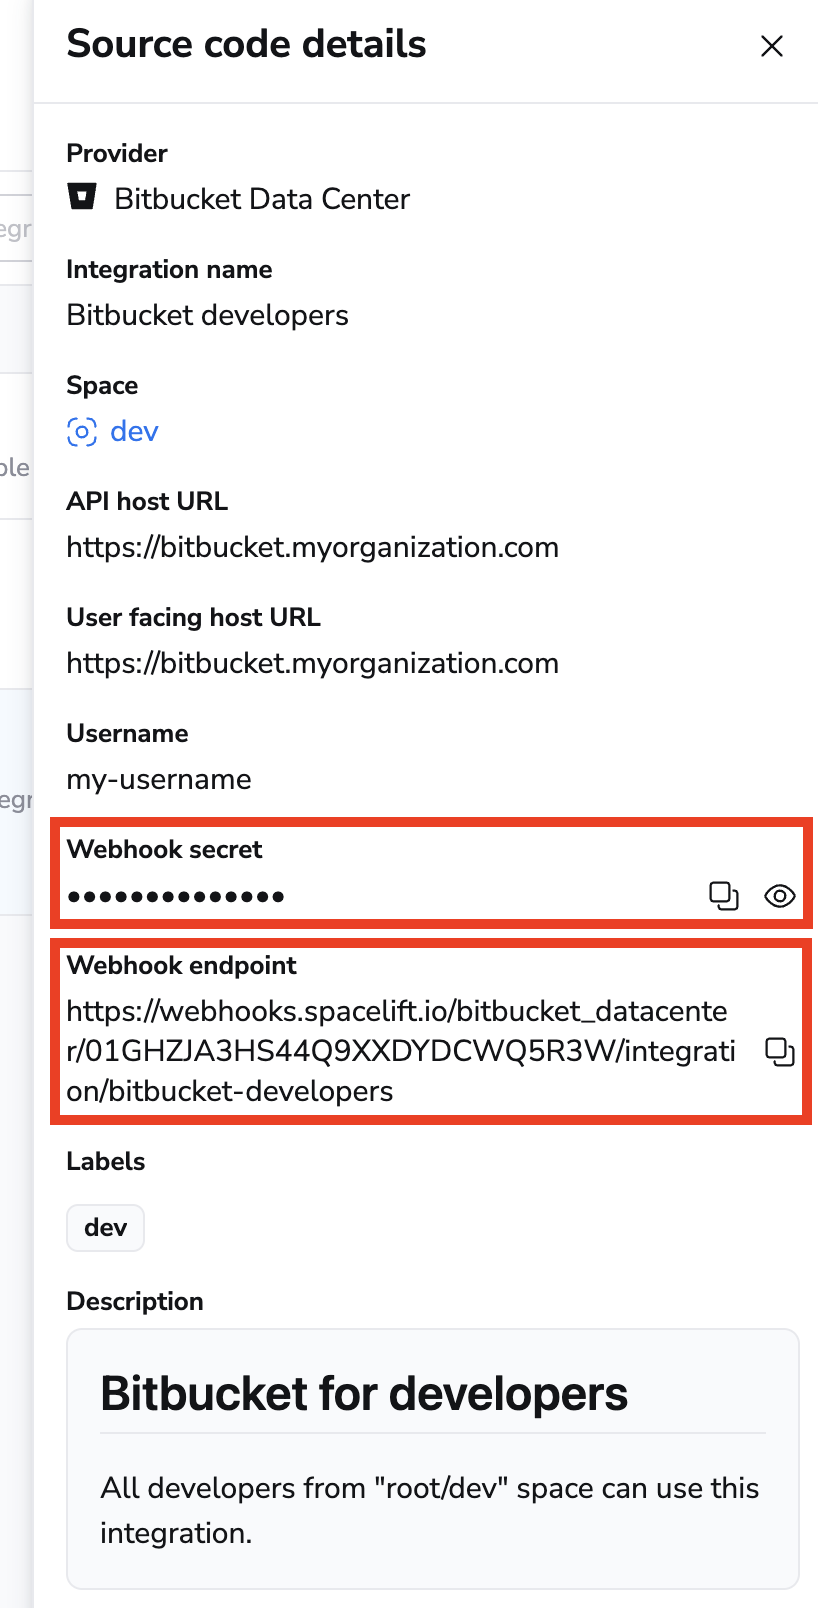
Default integrations are visible to all users of the account, but only root Space admins can see their details.
Space-level integrations will be listed to users with read access to the integration Space. Integration details, however, contain sensitive information (such as the webhook secret) and are only visible to those with admin access.
- On the Source code page, click the three dots next to the integration name.
- Click See details to find the webhook endpoint and webhook secret.
Configure webhooks in Bitbucket Data Center»
For each repository you want to use with Spacelift, you now need to add webhooks in Bitbucket Data Center.
- In Bitbucket Data Center, select the repository you are connecting to Spacelift.
- Navigate to Repository settings > Webhooks.
- Click Add webhook.
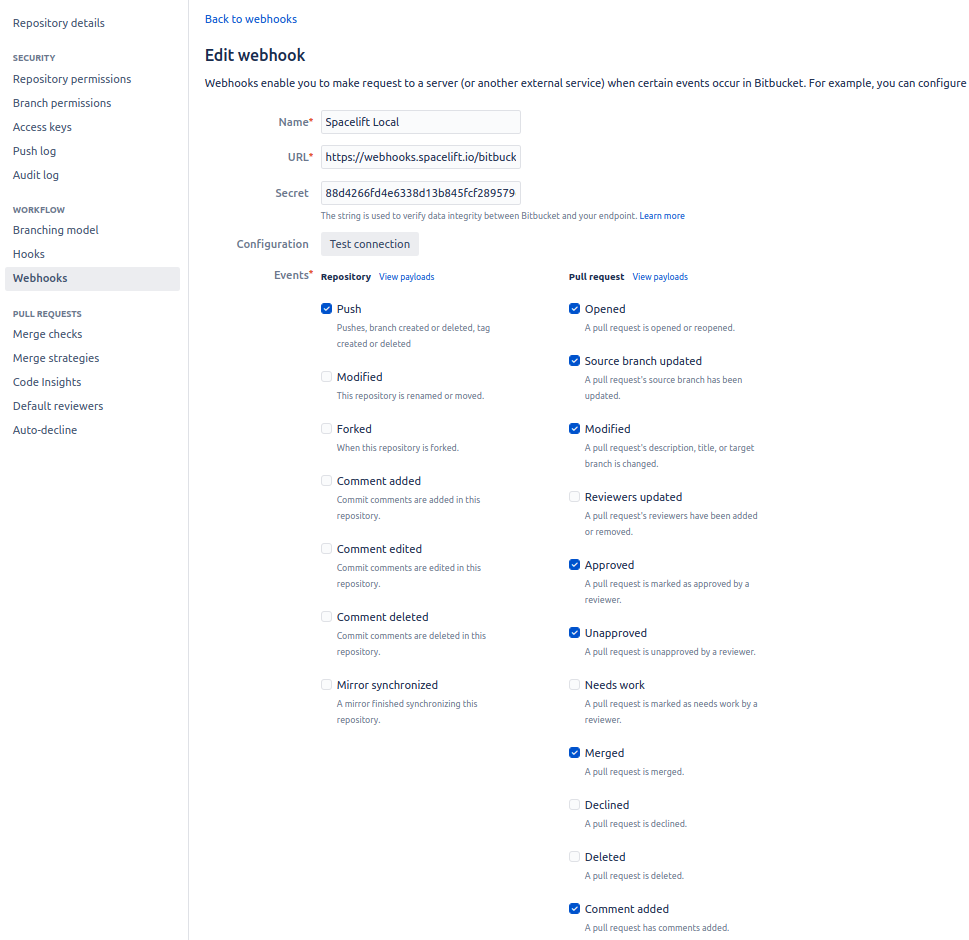
- Title: Enter a name for the webhook.
- URL: Paste the webhook endpoint from Spacelift.
- Secret: Paste the webhook secret from Spacelift.
- Status: Check Active.
- Triggers:
- Under Repository, check Push.
- Under Pull Request, check:
- Opened
- Source branch updated
- Modified
- Approved
- Unapproved
- Merged
- Comment added
- Click Save.
Warning
Don't forget to enter a secret when configuring your webhook. Bitbucket will allow you to create your webhook with no secret specified, but any webhook requests to Spacelift will fail without one configured.
Install Pull Request Commit Links app»
Finally, you should install the Pull Request Commit Links app to be able to use this API. The app is installed automatically when you go to the commit's details and click Pull requests.

Use the integration»
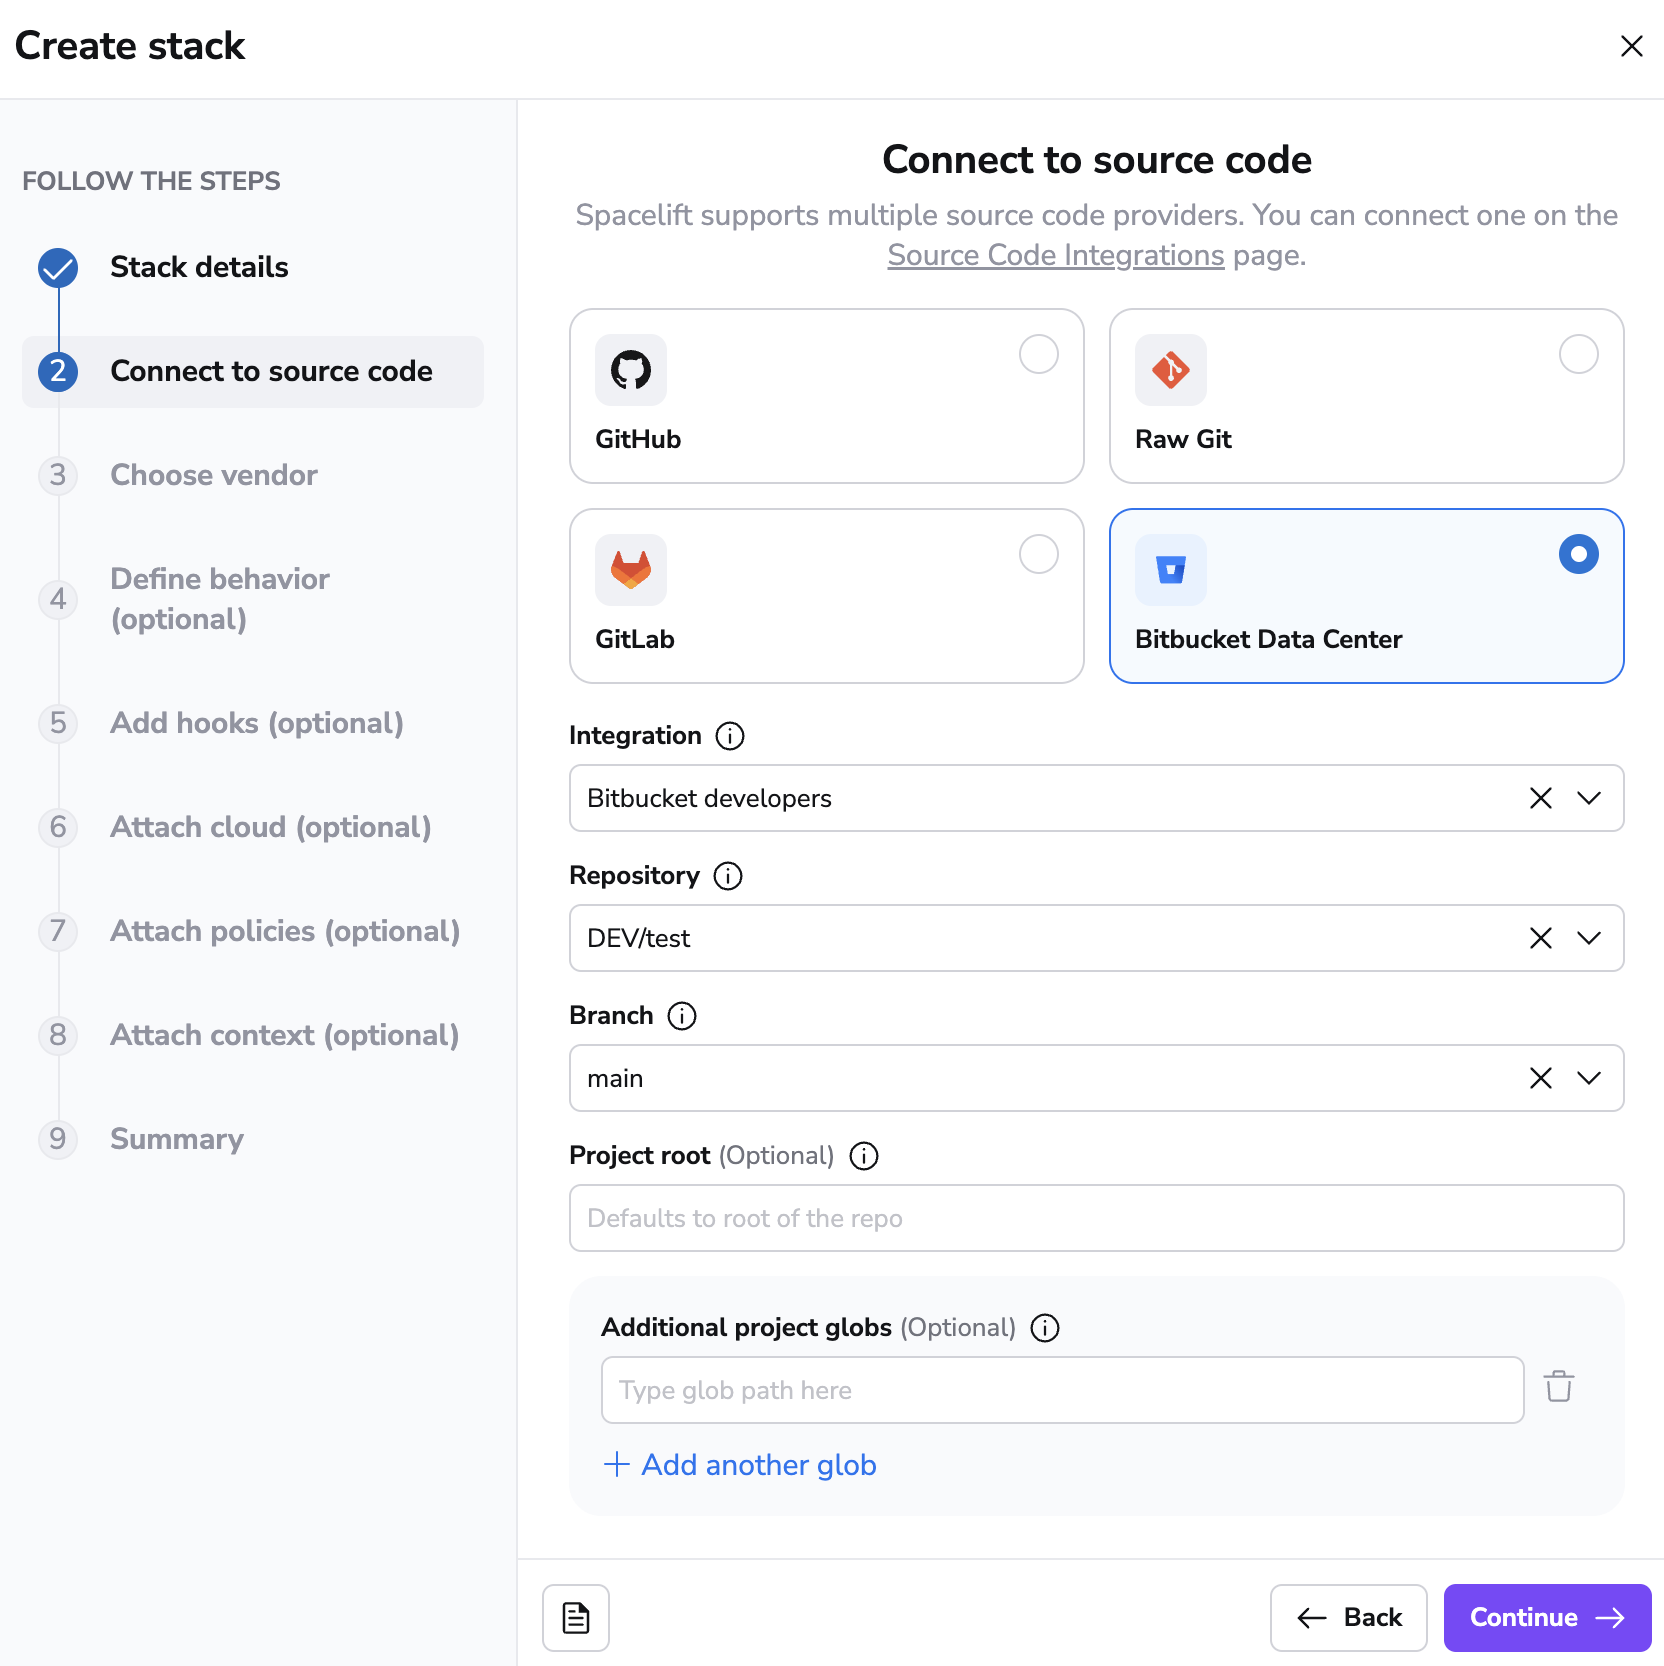
When creating a stack, you will now be able to choose the Bitbucket Data Center provider and a repository inside of it:
Using Spacelift checks to protect branches»
You can use commit statuses to protect your branches tracked by Spacelift stacks by ensuring that proposed runs succeed before merging their Pull Requests.
Aggregated checks»
Info
This feature is only available to Business plan and above. Please check out our pricing page for more information.
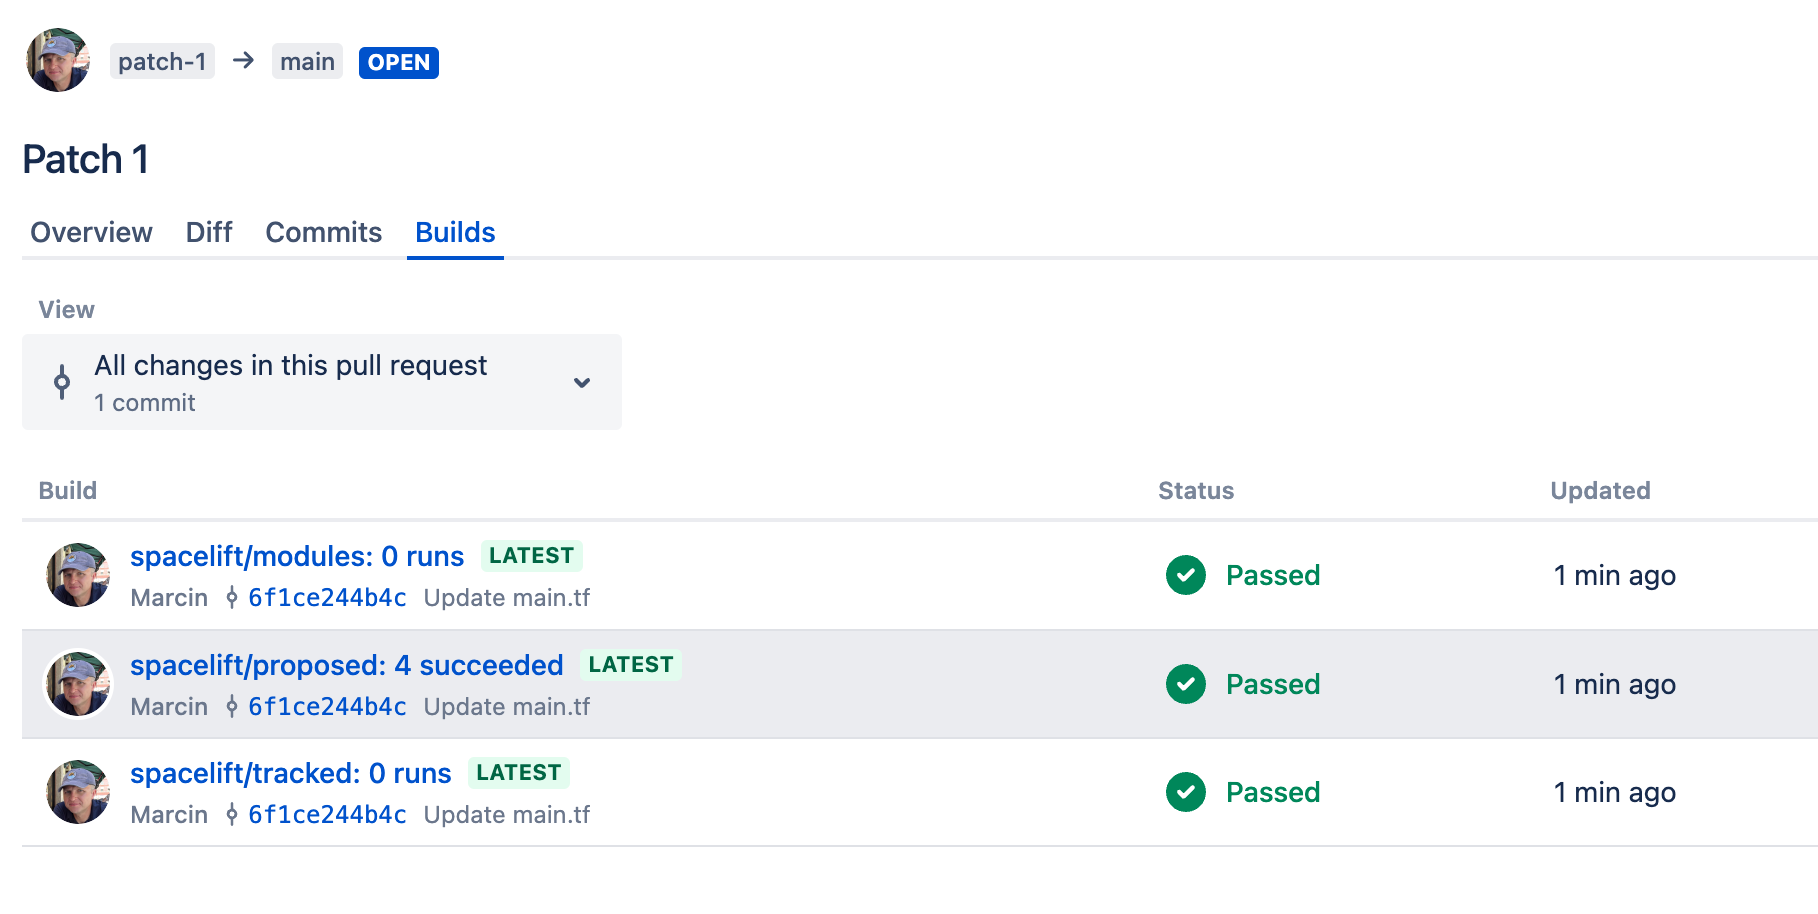
If you have multiple stacks tracking the same repository, you can enable the Aggregate VCS checks feature in the integration's settings. This will group all the checks from the same commit into a predefined set of checks, making it easier to see the overall status of the commit.
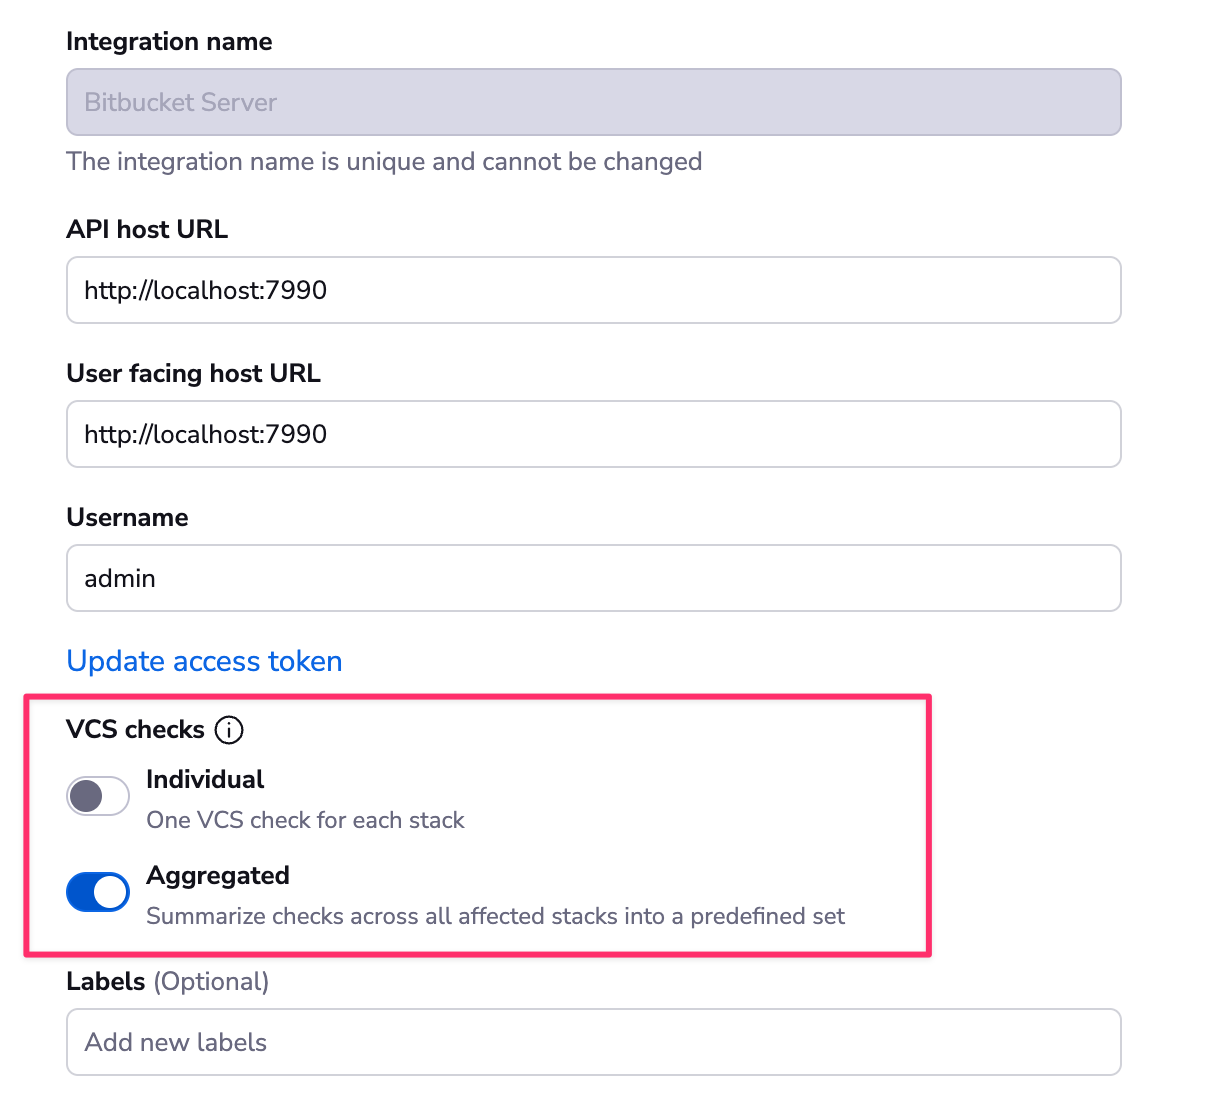
When the aggregated option is enabled, Spacelift will post the following checks:
- spacelift/tracked: Groups all checks from tracked runs
- spacelift/proposed: Groups all checks from proposed runs
- spacelift/modules: Groups all checks from module runs
The summary should look like this:
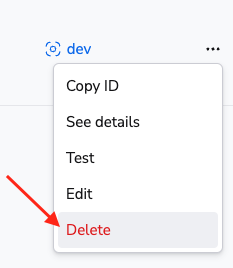
Delete the integration»
If you no longer need the integration, you can delete it by clicking the 3 dots next to the integration name on the Source code page, and then clicking Delete. You need admin access to the integration Space to be able to delete it.
Warning
You can delete integrations while stacks are still using them, which will have consequences.
Consequences»
When a stack has a detached integration, it will no longer be able to receive webhooks from Bitbucket Data Center and you won't be able to trigger runs manually either.
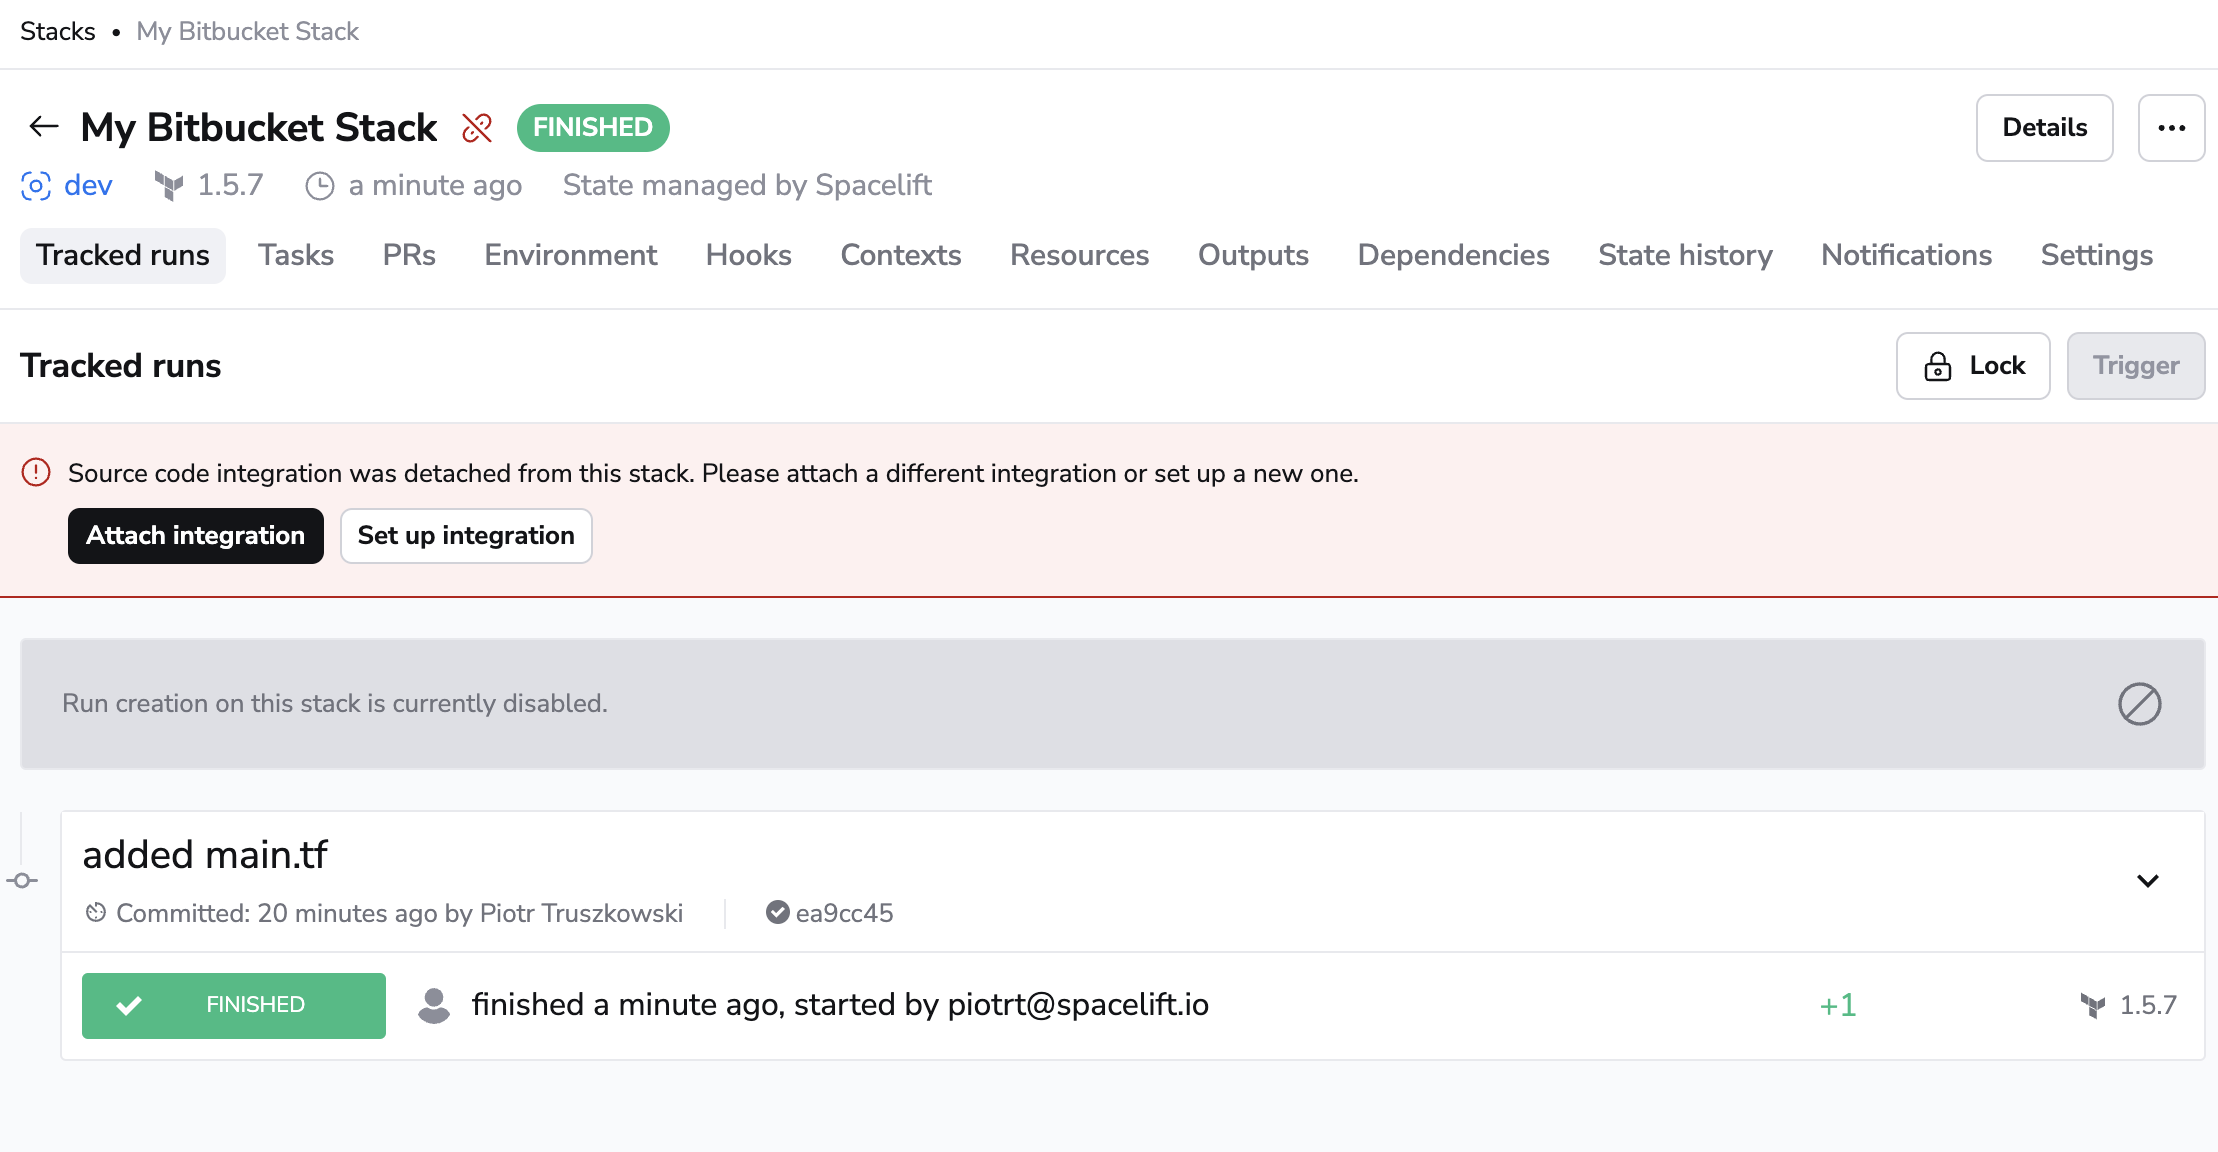
To fix the issue, click the stack name on the Stacks tab, navigate to the Settings tab, and choose a new integration.
Tip
You can save a little time if you create the new integration with the exact same name as the old one. This way, the webhook URL will remain the same and you won't have to update it in Bitbucket Data Center. You will still need to update the webhook secret though.