Quick Start»
There are four key steps to get Spacelift up and running:
Once these steps have been completed, you can start your first stack run.
Trigger your first run»
Assuming your repository contains your infrastructure (or you're using our provided Terraform starter repository), you can use Spacelift to start runs.
Tip
If you are using the Terraform starter repository, and you did not sign up for your Spacelift account with GitHub, you may need to add the environment variable TF_VAR_github_app_namespace with the value as your organization name or GitHub handle. You can do this under the Environment tab in the stack.

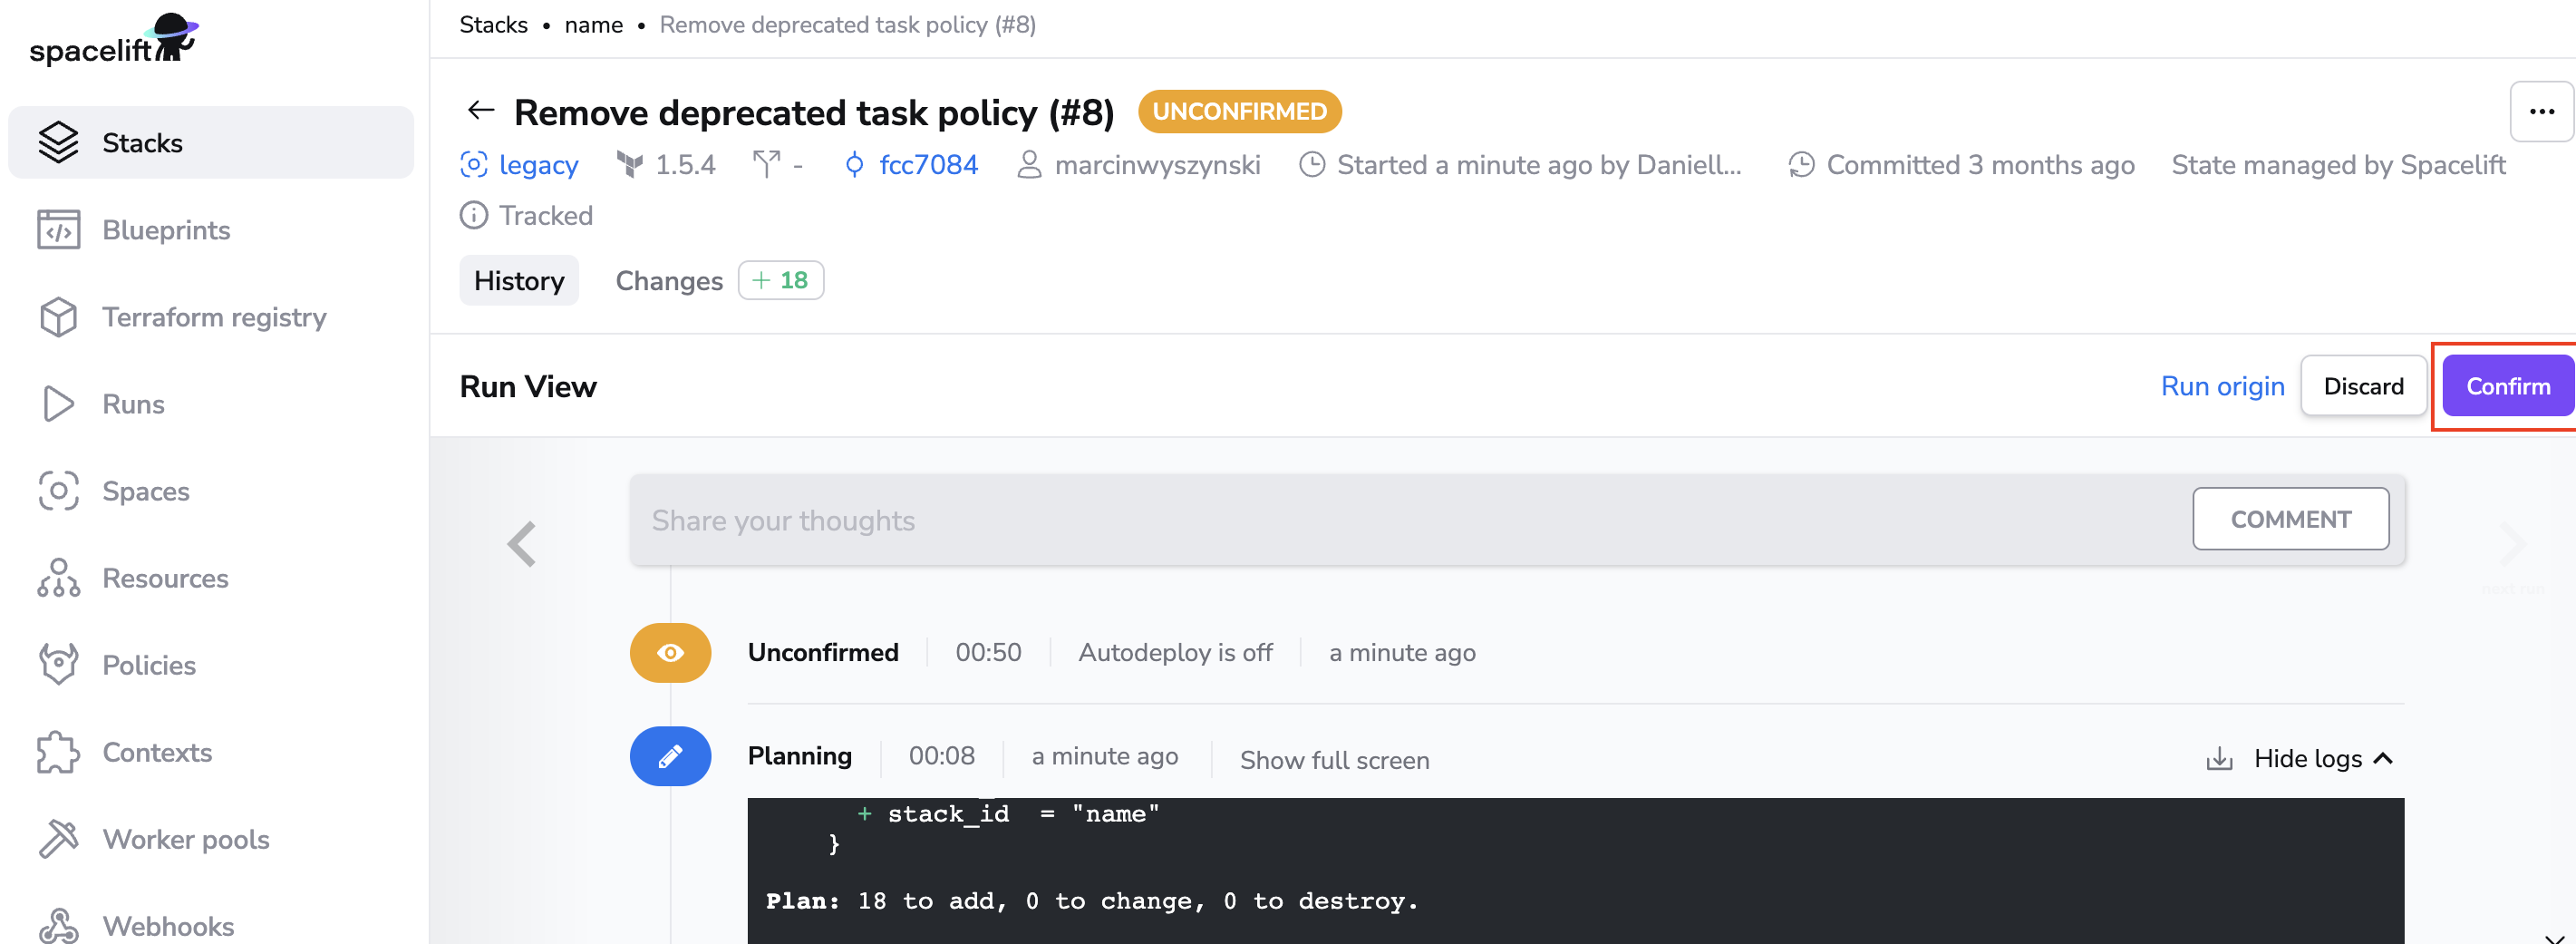
- Navigate to the Stacks tab.
- Click the name of the stack you want to run.
- Click Trigger to start a Spacelift run. This will check the source code and run any commands on it, and you will be taken to the run view.
- Click Confirm to apply your changes.
- Wait for the run to finish.
Your output will look different based on your code repository and the resources it creates. If you used the starter repository, you should have a new stack in your account called Managed stack that can demonstrate the effectiveness of our plan policies. Play with it and see if you can fix the purposeful plan issue.