Slack»
At Spacelift, we're using Slack for internal communication. And we know that other tech companies do the same, so we've created a first-class integration that we ourselves enjoy using.
Here are examples of messages the Spacelift application sends to Slack:


Configuring a Slack app»
In a Self-Hosted installation, you need to create your own Slack app to allow Spacelift to integrate with your Slack workspace. This Slack app provides credentials needed by Spacelift to communicate with Slack, and also contains configuration information like the webhooks URL that Slack should send requests to.
There are two options for configuring the Slack app:
- Via environment variables.
- Dynamically via the Spacelift frontend.
This section walks you through the steps to create and configure the Slack app dynamically via the Spacelift frontend. If you want to configure it via the environment please see our configuration reference.
Create Slack app»
To start the process, go to Integrations > Slack, and choose the Set up option next to the Slack integration:
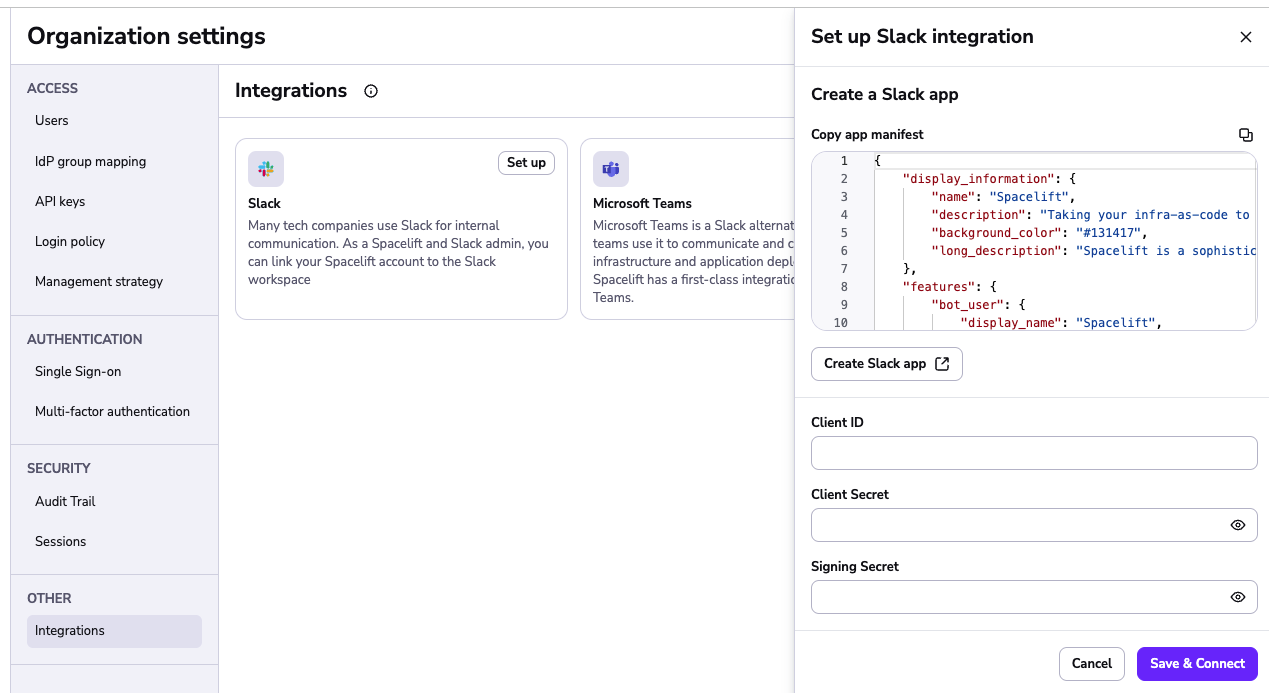
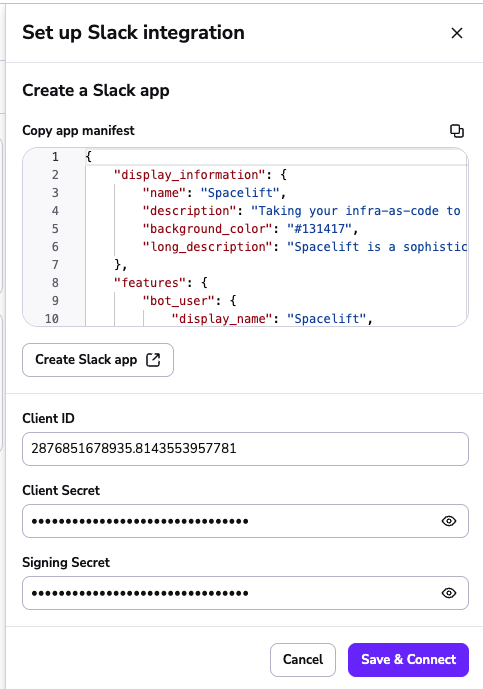
The side bar is split into two sections. The top section contains the manifest you should use when creating your Slack app, and the bottom section contains fields to enter the credentials for your Slack app.
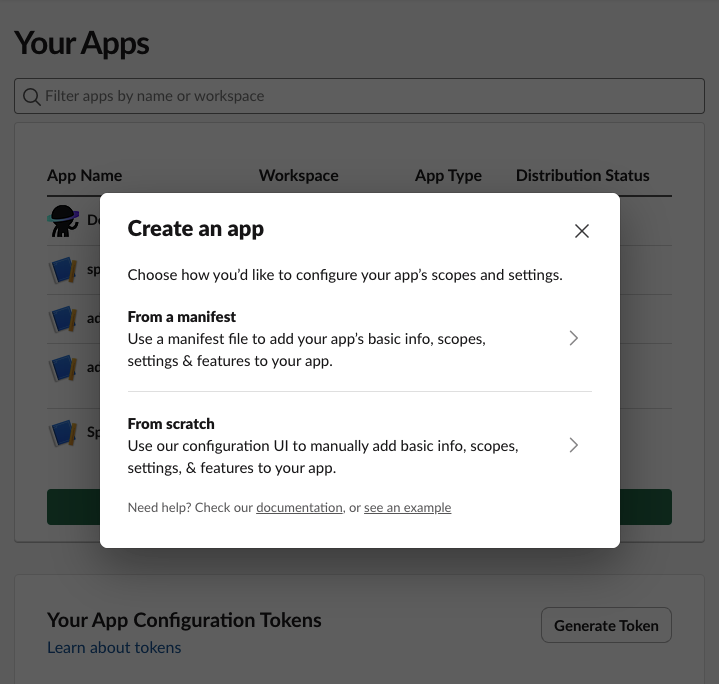
Copy the app manifest then click on the Create Slack app button. This will take you to Slack and start the app creation process. Choose the From a manifest option when the dialog appears:
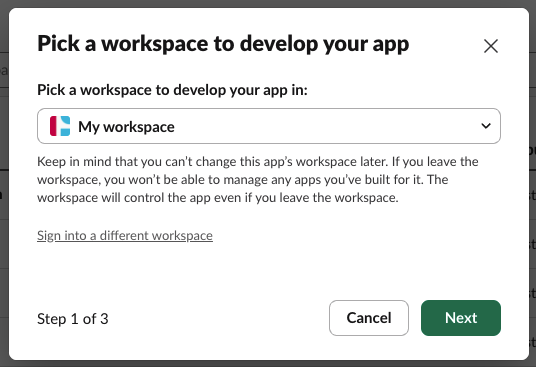
On the next step, choose the Slack workspace you want to connect Spacelift to:
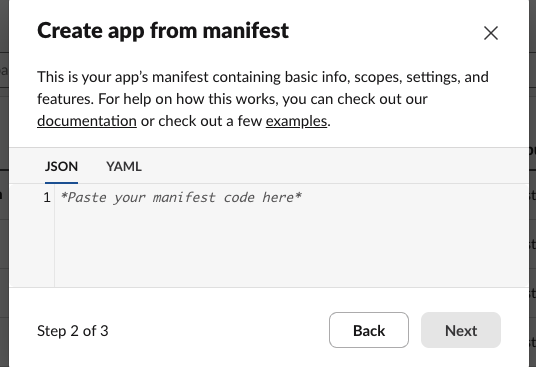
Next, paste the manifest that your copied from the Spacelift frontend:
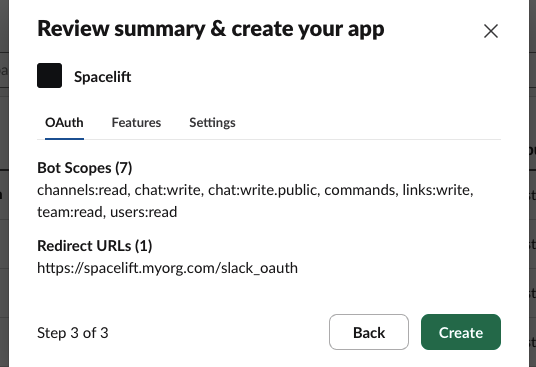
Finally, click Create on the summary page to create your app:
Add Slack app details to Spacelift»
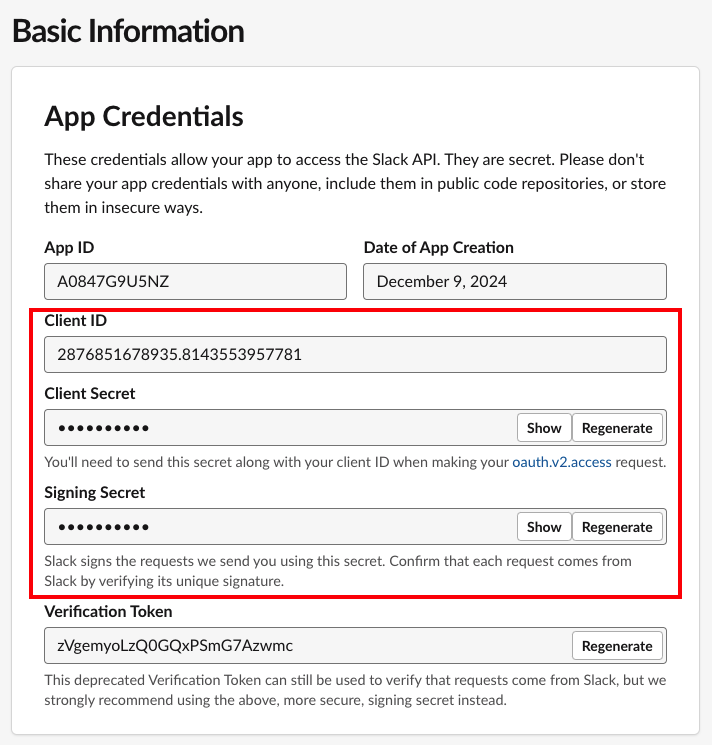
Once your app has been created, go to its Basic Information configuration section and find the Client ID, Client Secret and Signing Secret:
Enter these details into Spacelift and click the Save & Connect button to continue:
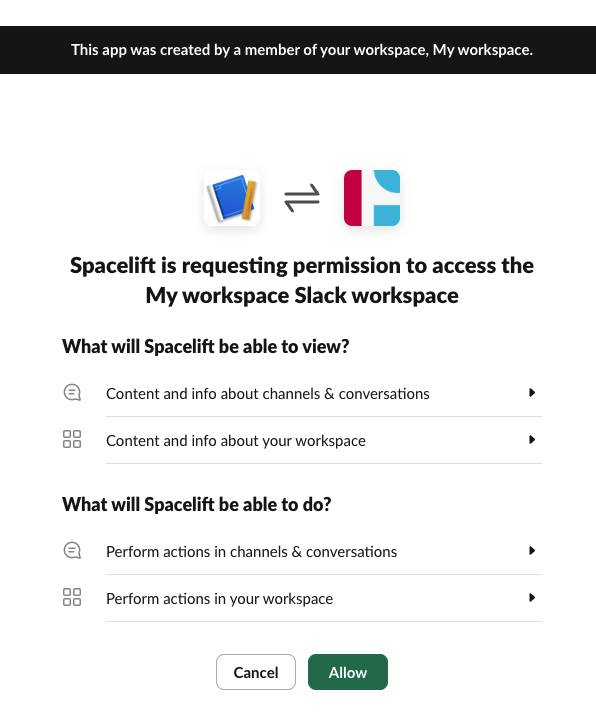
You will now be redirected to Slack, and asked to grant the app you just created access to your Slack workspace. Click on Allow to continue:
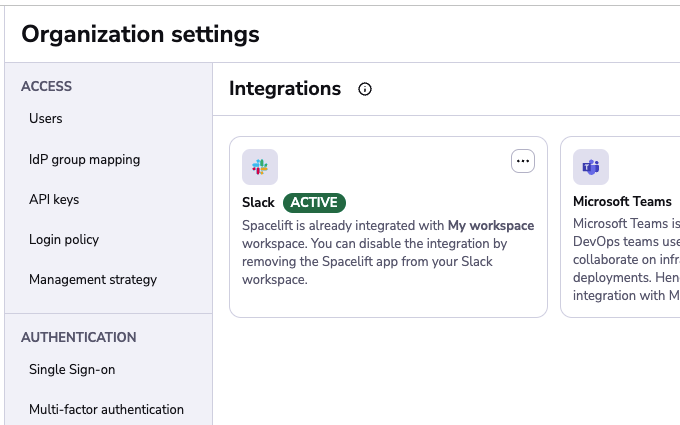
You should now be redirected to Spacelift, and the status of your integration should be marked as active:
At this point you can skip the next section and go straight to finding out how to manage access to Stacks.
Connecting your Spacelift account to the Slack workspace»
As a Spacelift and Slack admin, you can connect your Spacelift account to the Slack workspace via the Integrations > Slack page:
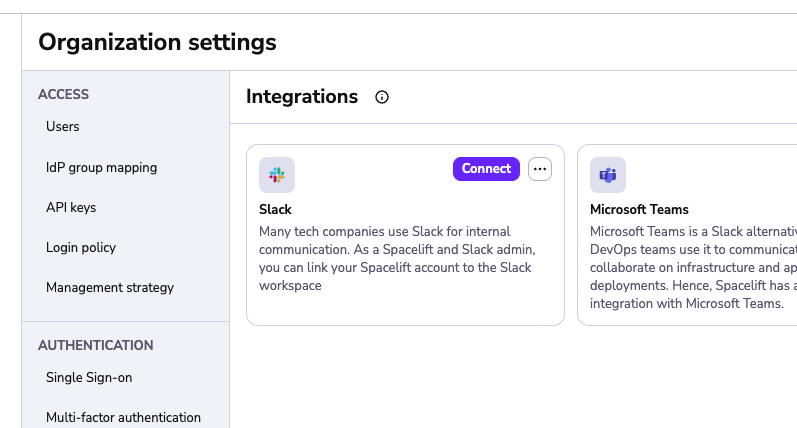
When you click on Connect, it performs an OAuth2 exchange which installs Slack Spacelift app in your workspace.
Once the connection is complete, the Slack integration should be marked as active:
Receiving notifications»
You will not receive a deluge of notifications when you connect Spacelift to Slack.
Spacelift notifications through Slack are set up on a per-stack basis with notification policies. When notification policies are configured, allow requests coming from Slack to access Spacelift stacks.
Disconnecting Slack»
To disconnect the Slack integration from your Spacelift account, you need to remove the Spacelift app from your Slack workspace. Follow these steps from Slack's help documentation.
Third-party and Slack-built apps»
- From your desktop, click your workspace name in the sidebar.
- Select Tools & settings from the menu, then click Manage apps to open the Slack Marketplace.
- From the left sidebar, select Installed apps.
- Find and select the Spacelift app, then click App details.
- From the app page, click on the Configuration tab.
For more details, see Slack's official documentation: Remove apps and customized integrations from your workspace
Managing access to Stacks with policies»
Our integration for Slack allows users in the Slack workspace to interact with stacks by adding the ability to change their run state or view changes that are planned or were applied.
Similar to regular requests to our HTTP APIs, requests and actions coming from Slack are subject to the policy-based access validation. If you haven't had a chance to review the policy and Spaces documentation yet, please do it now before proceeding any further - you're risking a chance of getting lost.
Available actions»
Currently, we allow:
- Confirming and discarding tracked runs.
- Viewing planned and actual changes.
Both of these actions require specific permissions to be configured using the login policy. Confirming or discarding runs requires Write level permissions while viewing changes requires Read level permissions. The documentation sections about policies below describe how to setup and manage these permissions.
Info
The default login policy decision for Slack requests is to deny all access.
Login policy»
Using login policies is the preferred way to control access for the Slack integration. Using them you can control who can access stacks which are in a specific Space.
They allow for granular space access control using the provided policy data such as Slack workspace details, Slack team information and user which interacted with the message data. Using the Login policy you can define rules which would allow to have Read or Write level permissions for certain actions.
Login policies also don't need to be attached to a specific stack in order to work but are instead evaluated during every stack mutation or read attempt from the integration.
Warning
It's important to know that if you have multiple login policies, failing to evaluate one of them or
having at least one of them result in a deny decision after the evaluation is done, will result in the
overall decision being a deny all.
Here is an example of data which the login policy receives when evaluating stack access for the integration:
1 2 3 4 5 6 7 8 9 10 11 12 13 14 15 16 17 18 19 20 21 22 23 24 25 26 27 28 29 30 31 32 33 34 35 36 37 38 39 40 41 42 43 44 45 46 47 48 49 50 | |
Info
The slack object in the policy input data is built using Slack provided data. For example, "team" is the term that is used by Space for a workspace - so it is kept as this in the input data for the sake of clarity and consistency with their API. See their official documentation for always up-to-date and full explanation of the slack object fields.
Using the above data we can write policies which only allow for a specific user or Slack team to access specific spaces in which your stacks reside.
For example here is a policy which would allow anyone from a specific Slack team to alter stacks in a particular space:
1 2 3 4 5 6 7 8 9 10 11 12 13 14 15 16 17 | |