Azure DevOps»
Spacelift supports using Azure DevOps as the source of code for your stacks and modules.
Setting up the integration»
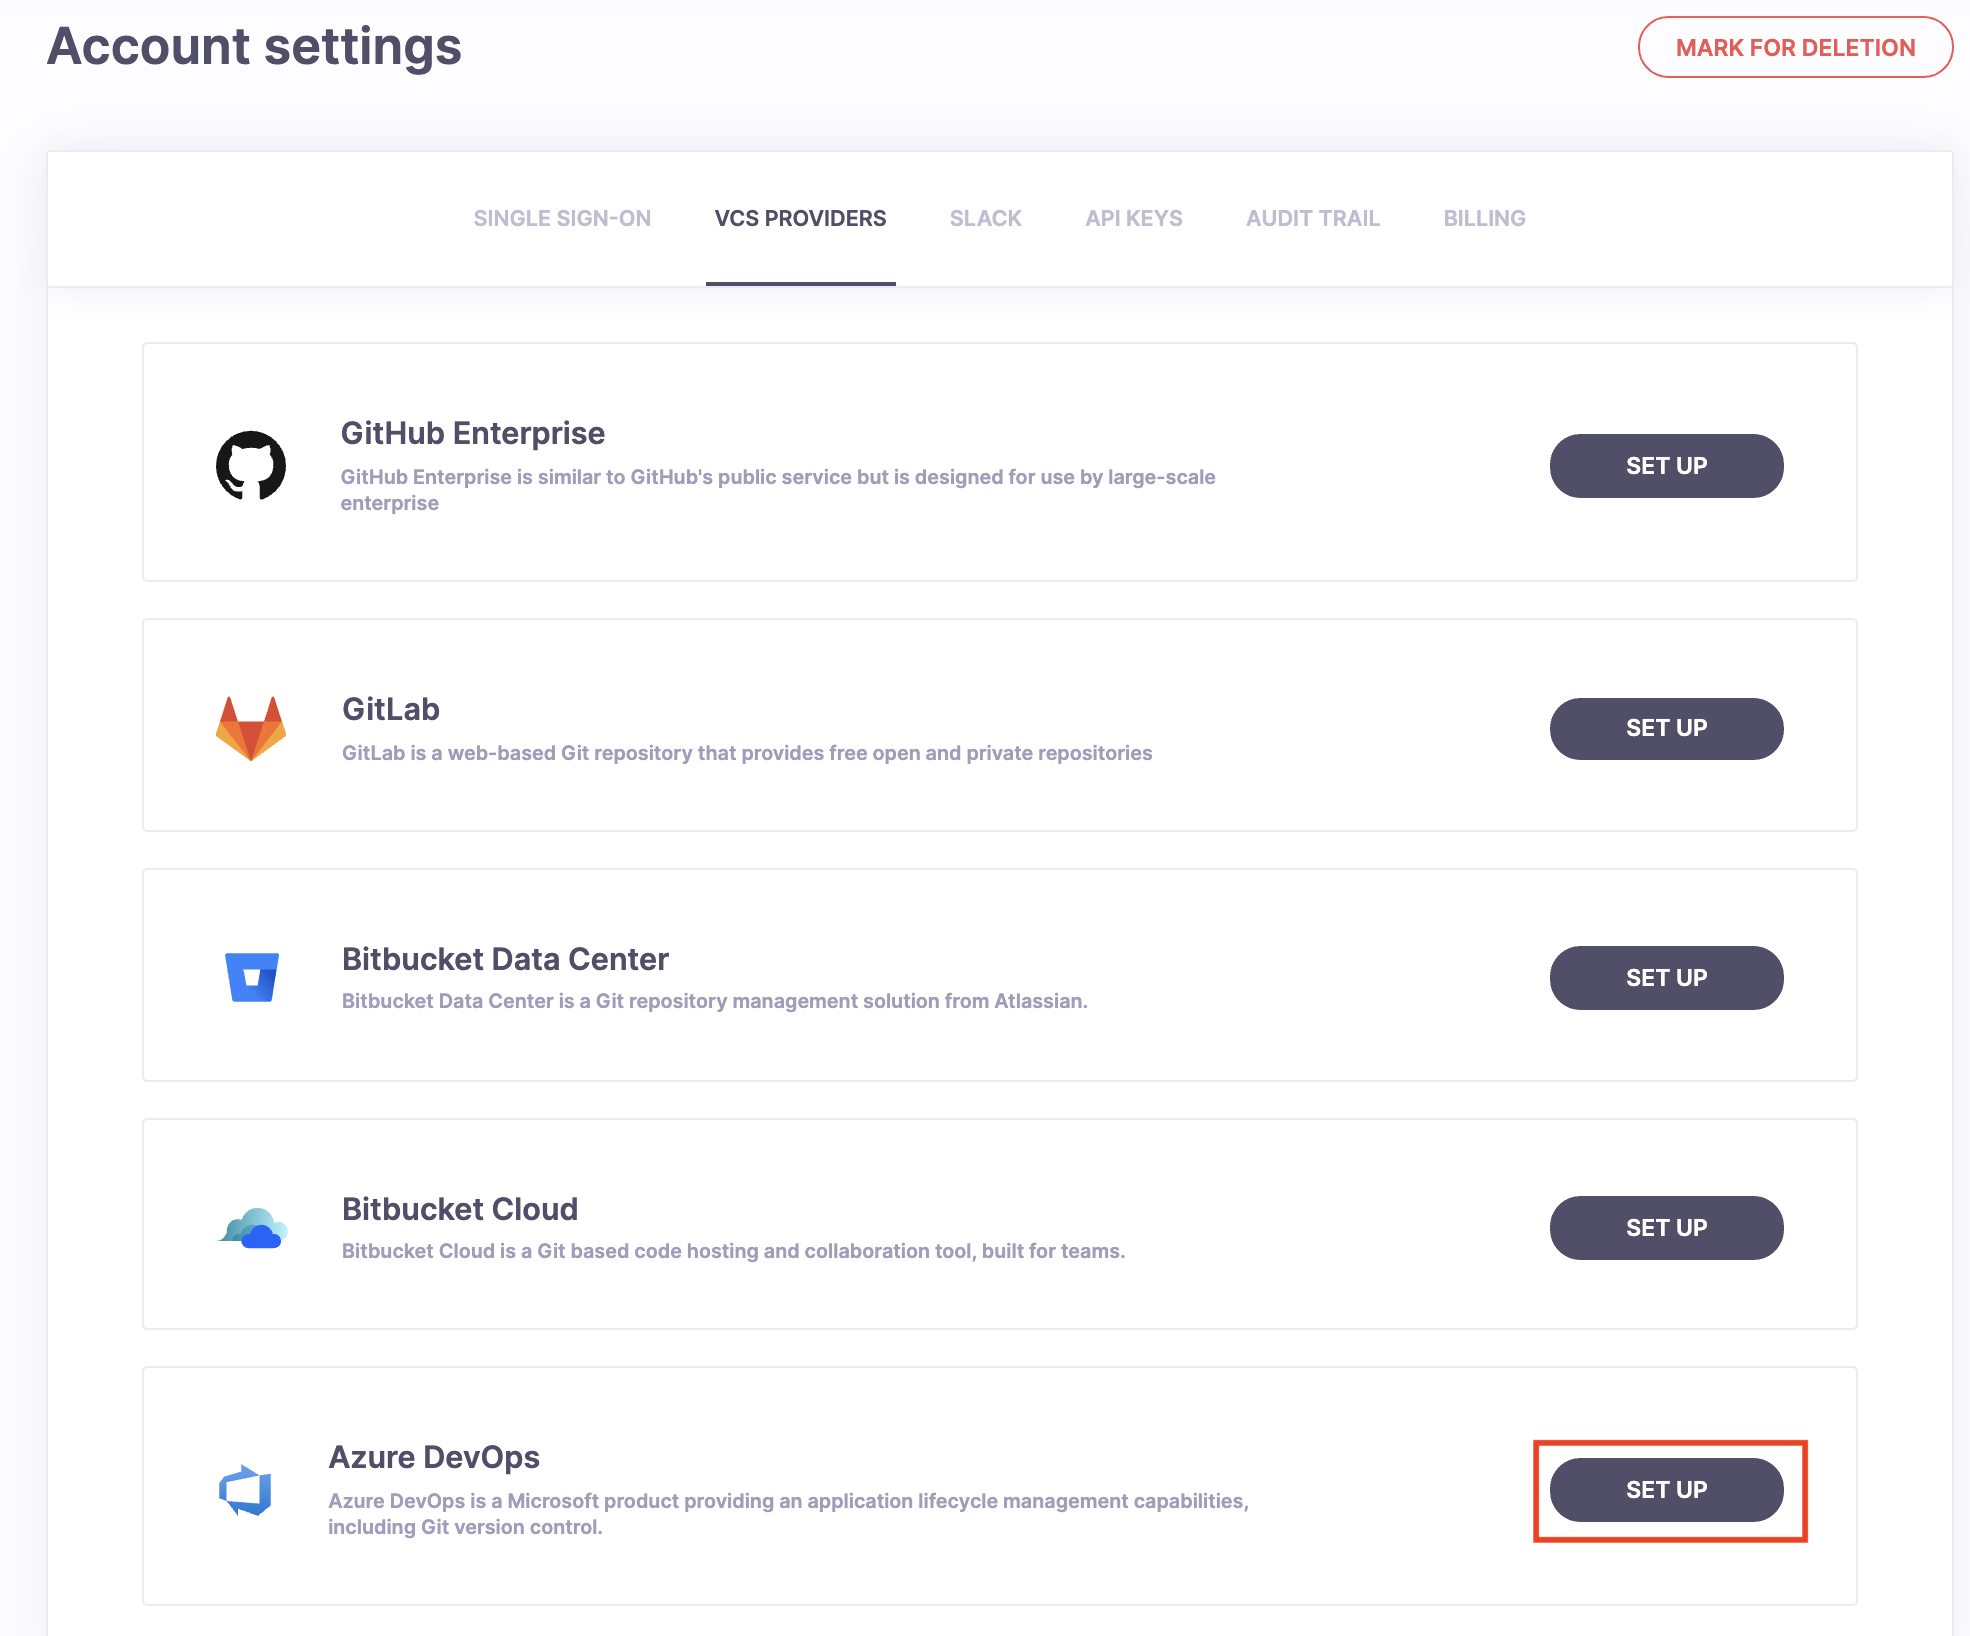
In order to set up the integration from the Spacelift side, please navigate to the VCS providers section of the admin Settings page, find the Azure DevOps integration and click the Set up button:
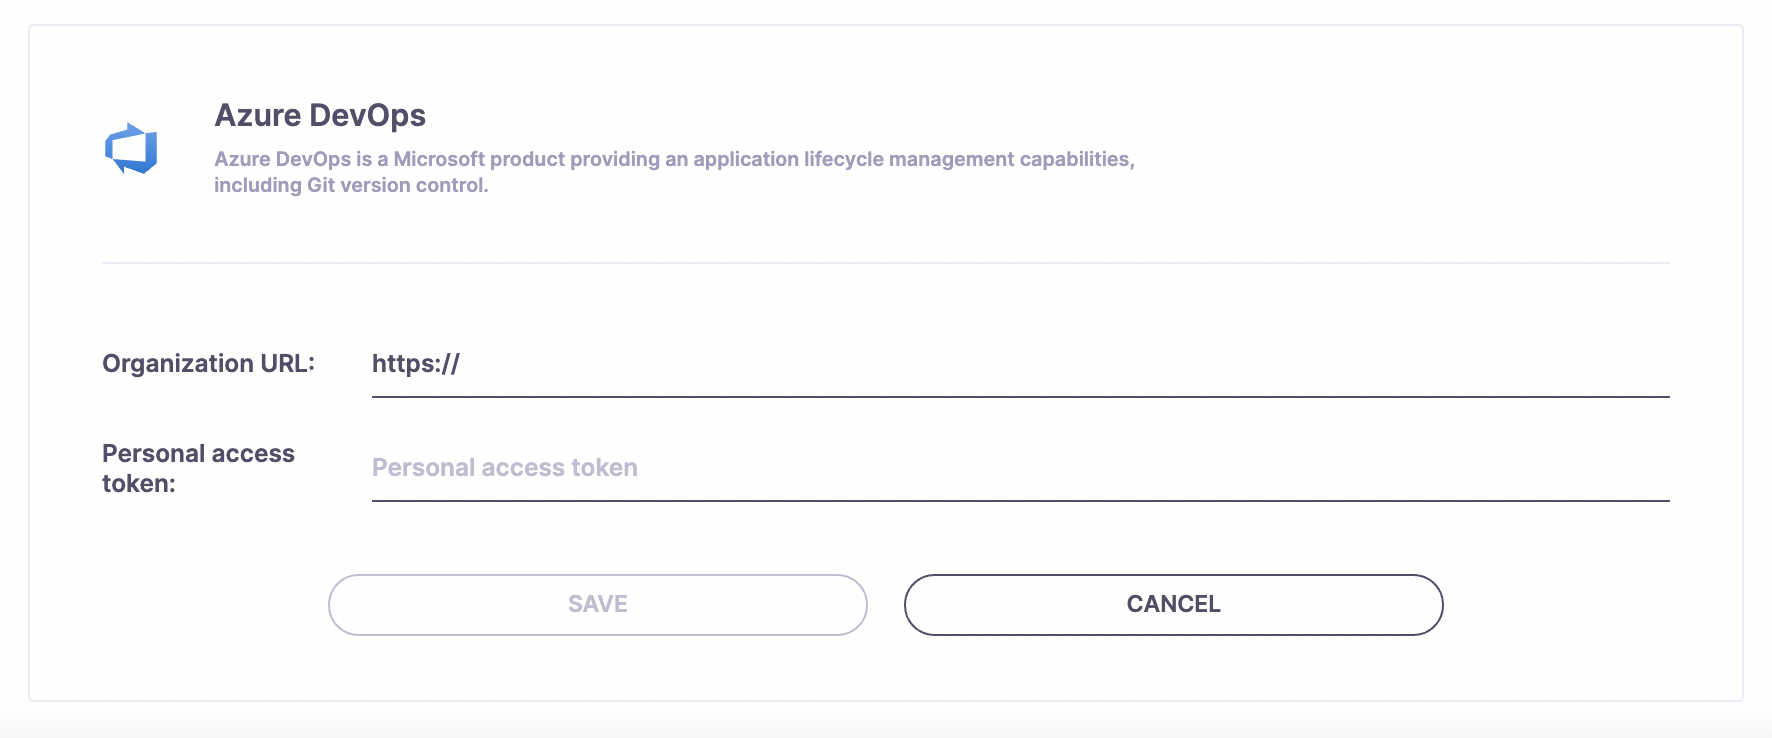
This should open a form like this one:
Finding your Organization URL»
Now you'll have to fill in the Organization URL, which is the main URL of your Azure DevOps organization.

Info
The Azure DevOps Organization URL usually has the following format:
https://dev.azure.com/{my-organization-name}
Depending on when your Azure DevOps organization was created, it may use a different format, for example:
https://{my-organization-name}.visualstudio.com
You can find out more about Azure DevOps URLs here.
Creating a Personal Access Token»
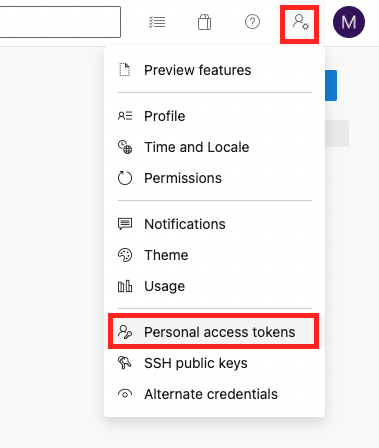
In order to create a Personal access token you need to:
1. Go to User settings -> Personal access tokens (in the top right section of the Azure DevOps page)
2. On the Personal Access Tokens page click + New Token

3. Create a new personal access token. There, you will need to set the name of your token, expiration and scope. For Spacelift give it Code (Source code, repositories, pull requests and notifications) Read & write access.

4. Once the token is created, put it into the Personal access token field on the Spacelift Azure DevOps setup form.

Creating the Integration»
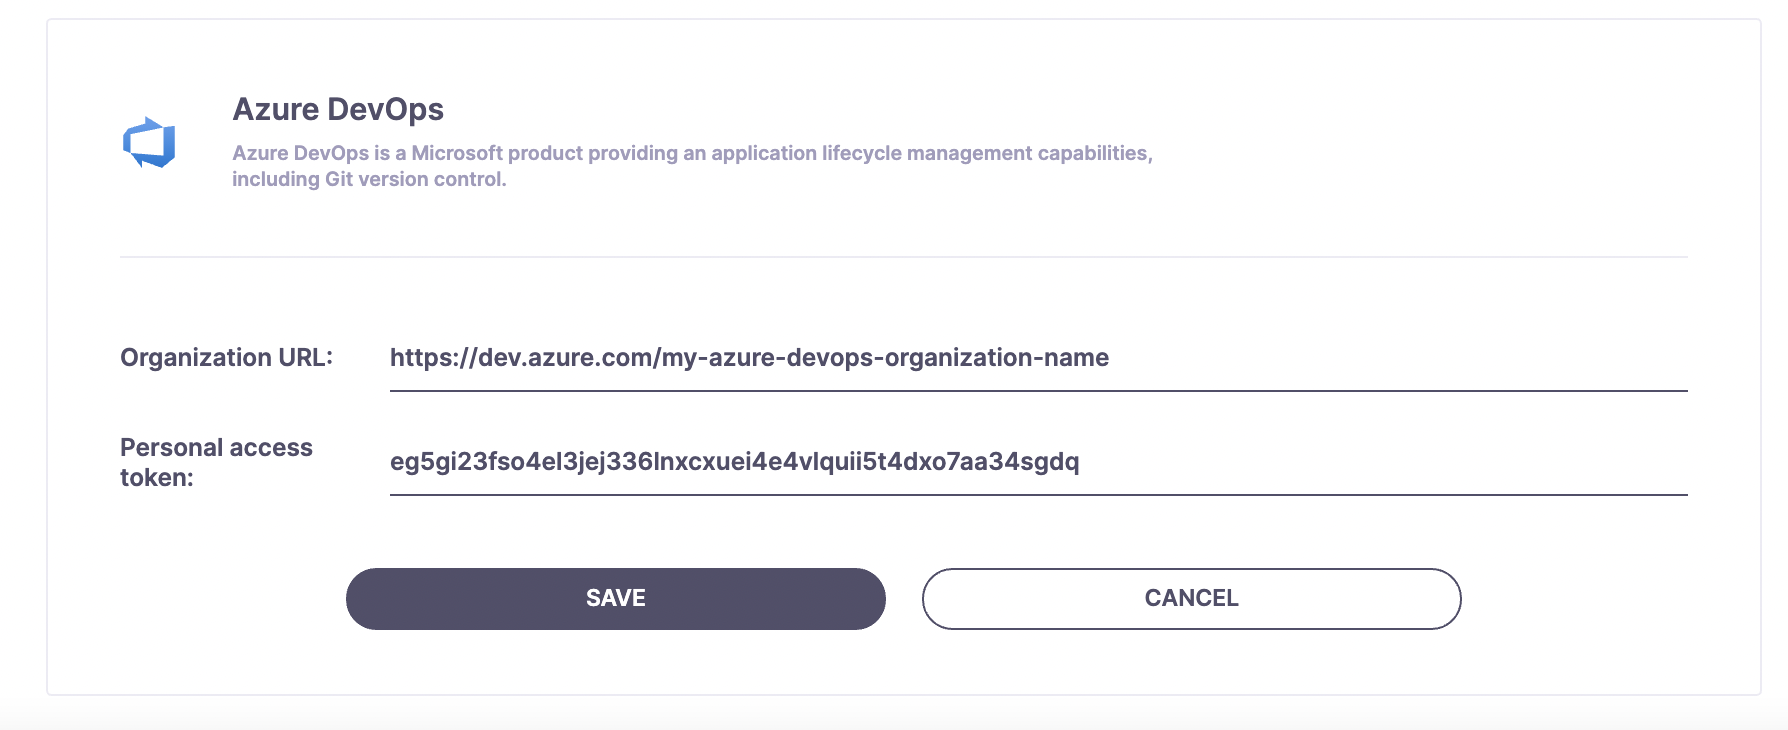
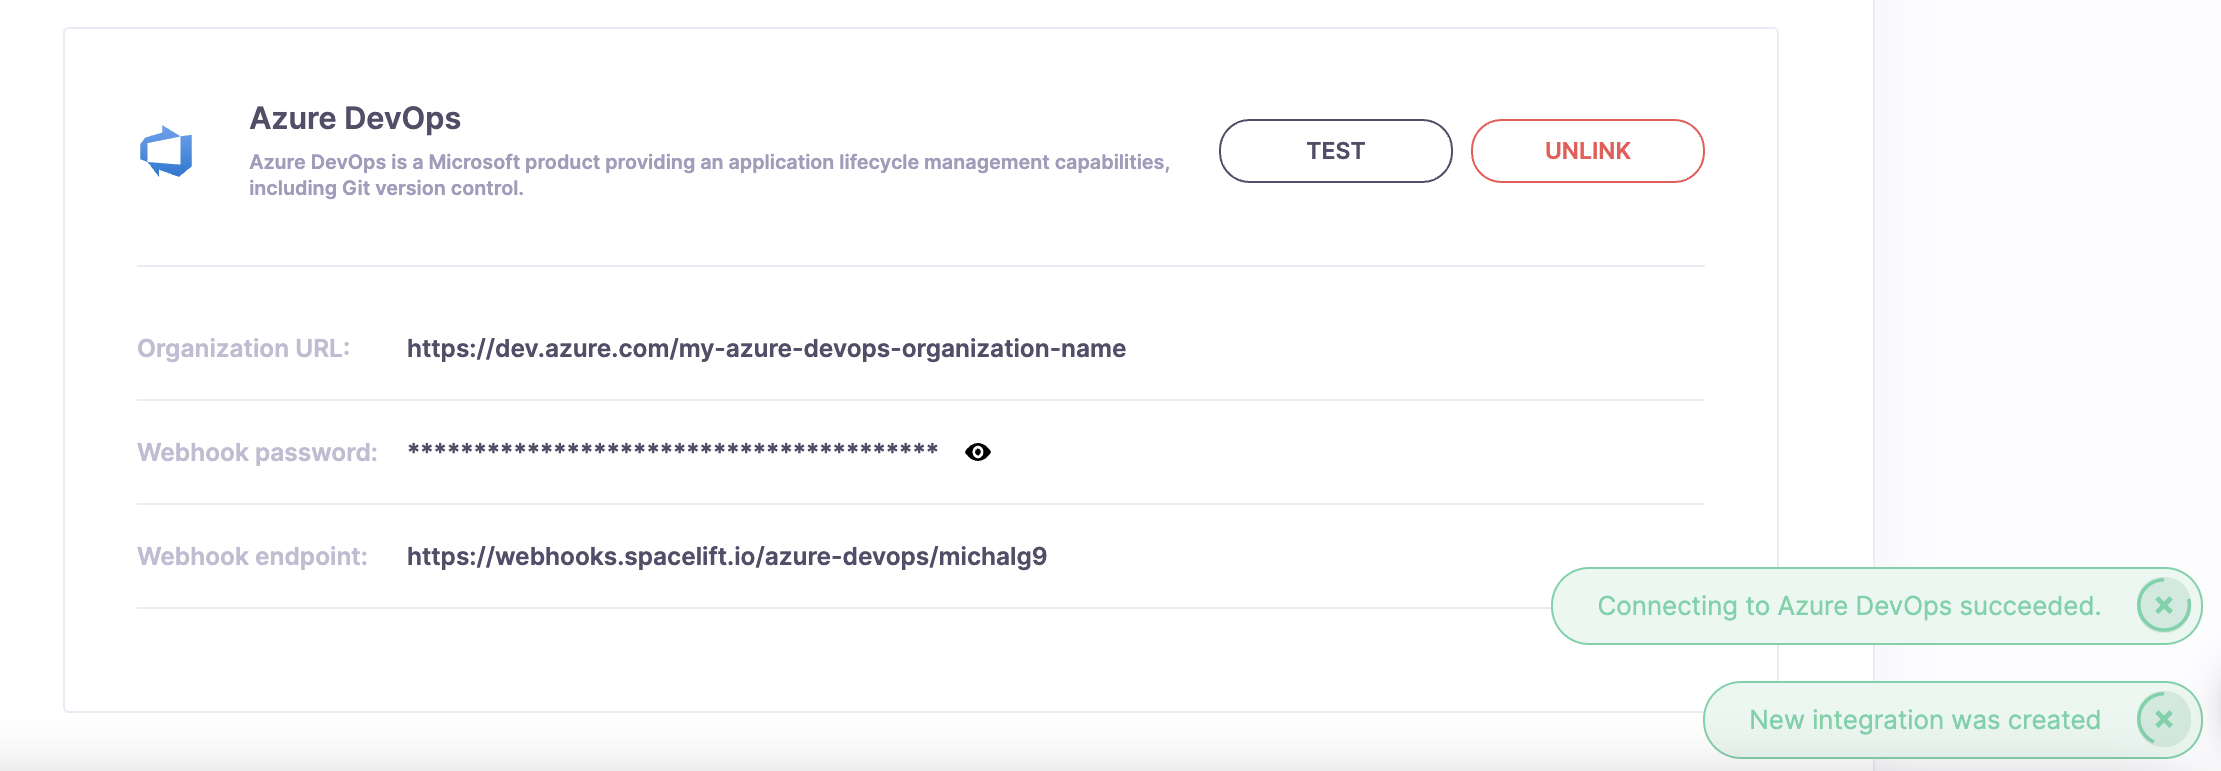
After doing all this you should have all fields filled in.
If all the data is correct, after saving you should see two notifications in the bottom right part of Spacelift: New integration was created; and Connecting to Azure DevOps succeeded.
Configuring Webhooks»
In order for Spacelift to be notified of any changes made in your Azure DevOps repos, you need to setup webhooks in Azure DevOps. You can find your webhook endpoint and webhook password under the Azure DevOps VCS integration section:
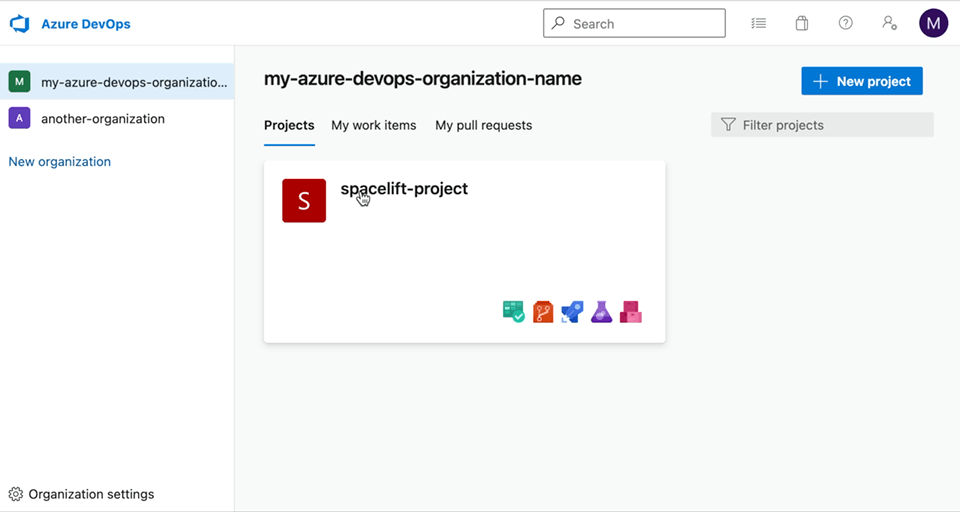
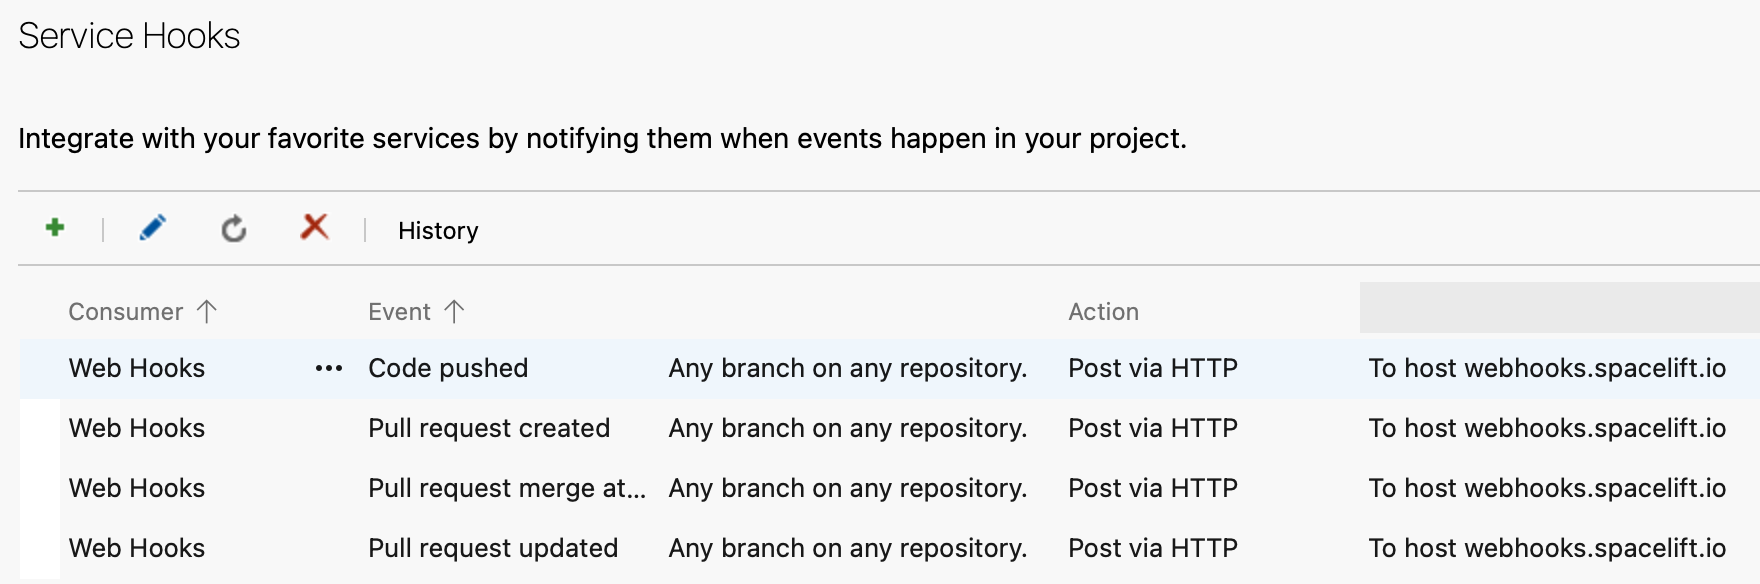
For each Azure DevOps project you want to use with Spacelift, you now have to go into its Project settings -> Service hooks -> Create subscription. Within the services list choose Web Hooks and click Next.
You will need to create a Web Hooks Service Hook for the following events:
- Code pushed.
- Pull request created.
- Pull request merge attempted.
- Pull request updated.
- Pull request commented on.
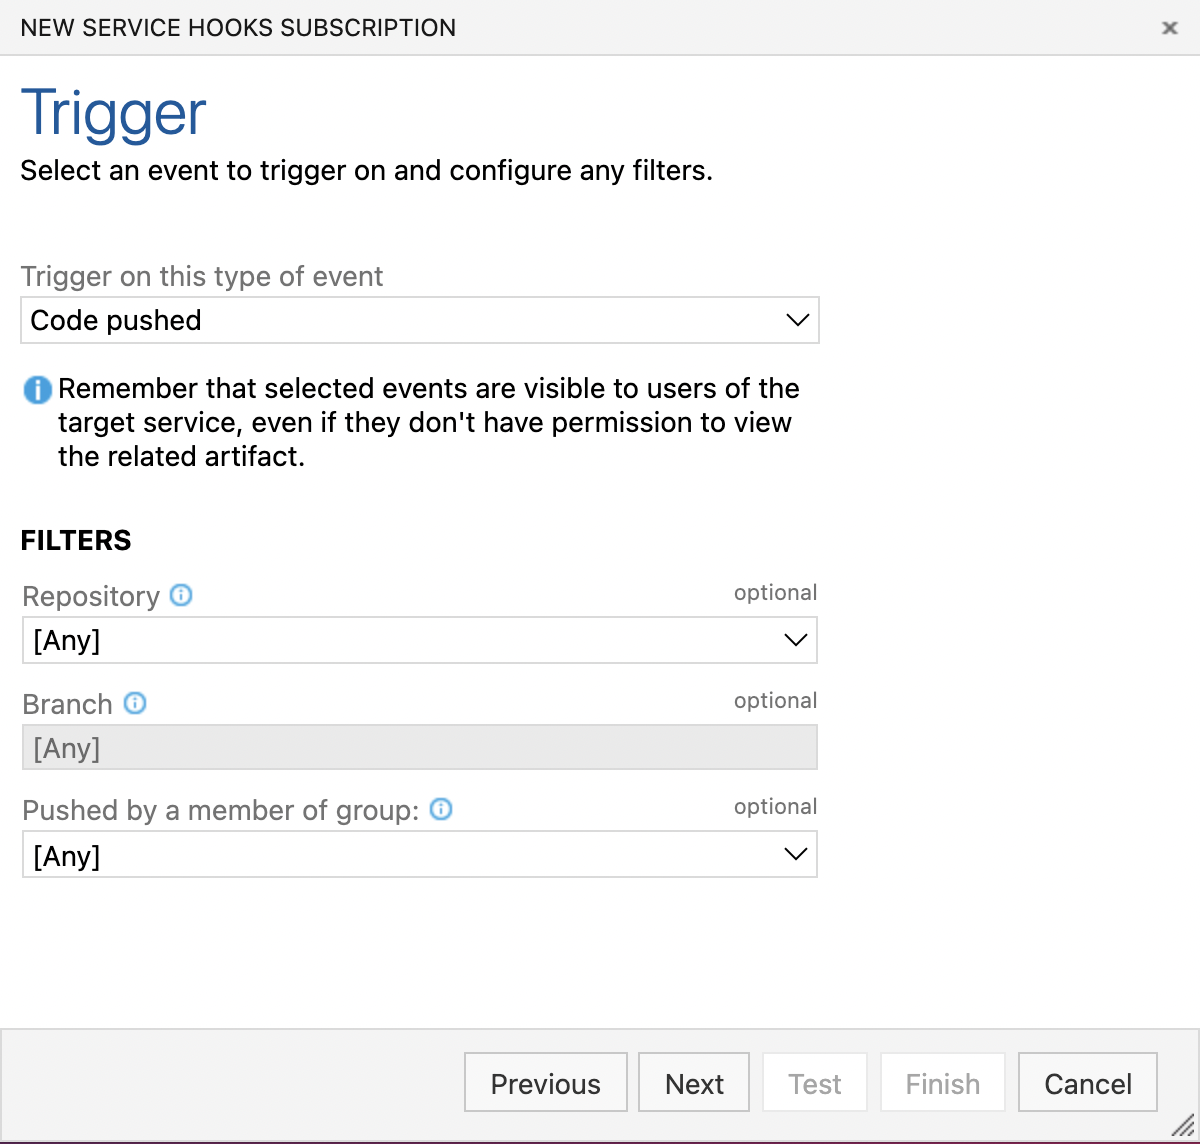
Let's first create the Code pushed webhook.
Once on the Trigger page of New Service Hooks Subscription window, select Code pushed in the Trigger on this type of event dropdown and click Next.
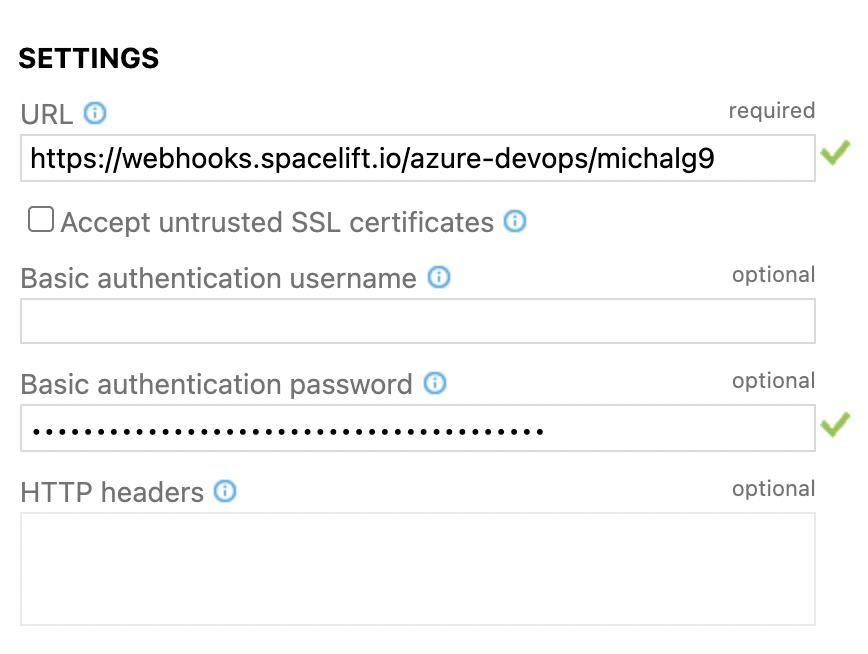
After clicking Next you should see the Action page. Under the Settings section fill in the Spacelift Webhook endpoint URL. Leave Basic authentication username empty and put the Webhook password under Basic authentication password and click Finish.
Once done you should see the list of configured Service Hooks. Repeat the same process for the others. Afterwards you should see the configured webhooks on the Service Hooks settings page.
Using the Integration»
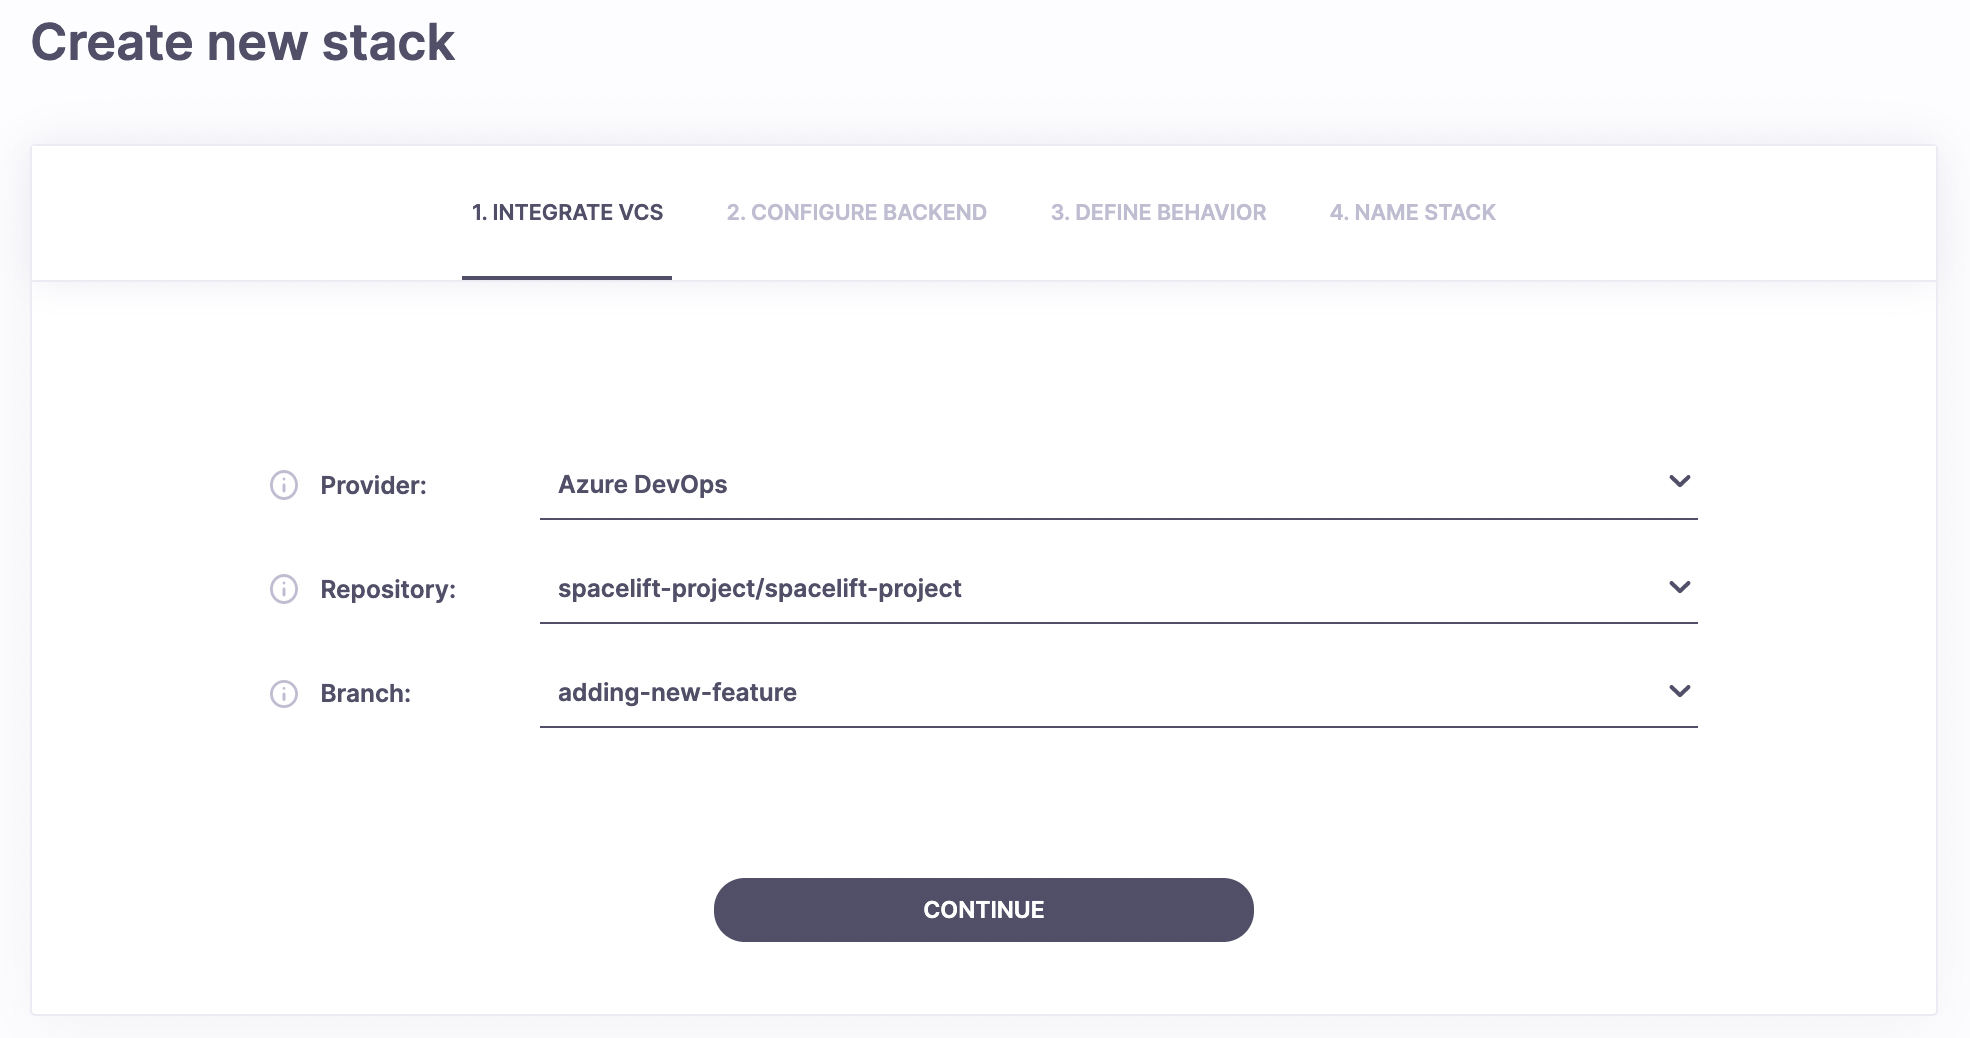
When creating a Stack, you will now be able to choose the Azure DevOps provider and a repository inside of it:
Unlinking the Integration»
If you no longer need the integration, you can remove it via the Unlink button on the VCS settings page.

Please also remember to remove any Spacelift webhooks from your repositories.