Creating a stack»
Unless you're defining a stack programmatically using our Terraform provider, you will be creating one from the root of your Spacelift account:
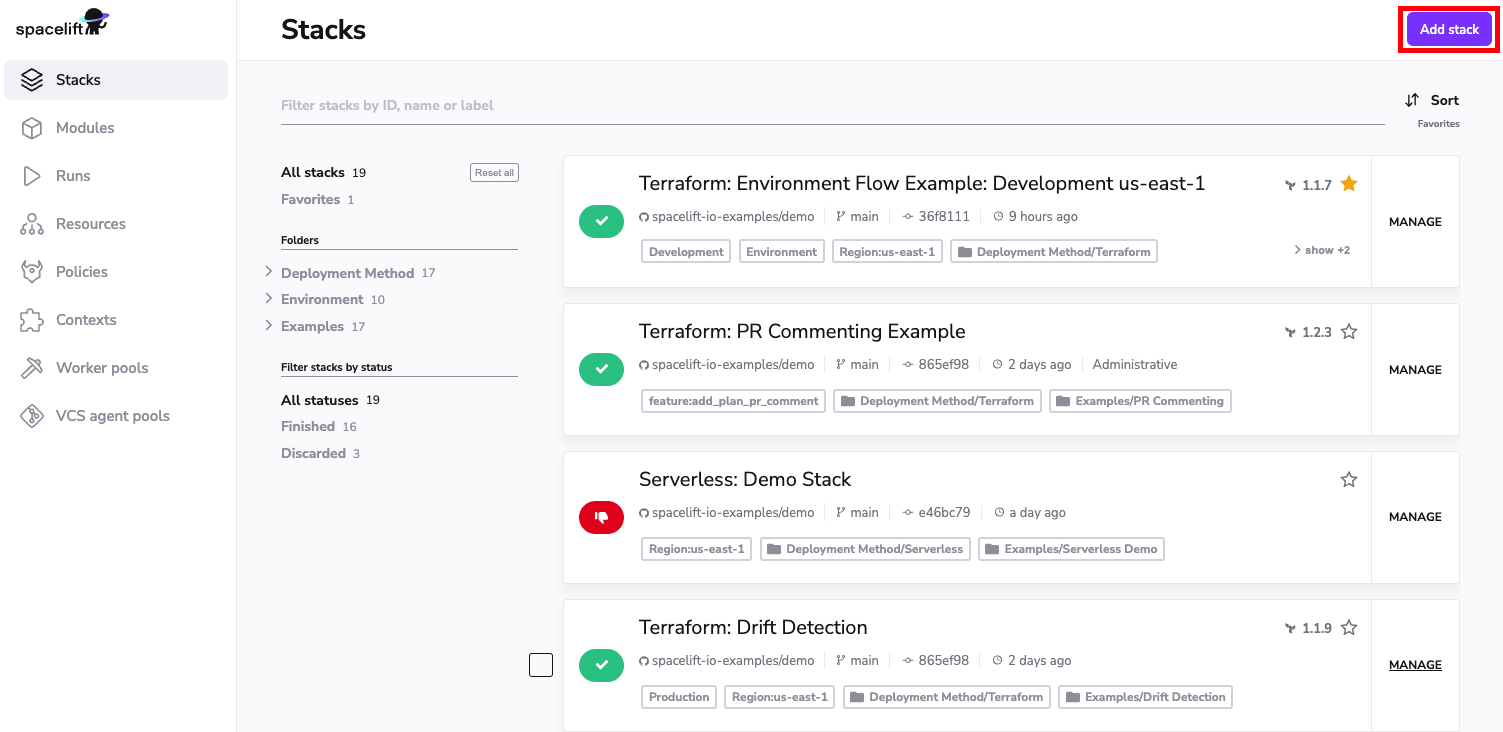
Info
You need to be an admin to create a stack. By default, GitHub account owners and admins are automatically given Spacelift admin privileges, but this can be customized using login policies and/or SSO integration.
The stack creation process involves four simple steps:
- Naming, describing and labeling;
- Creating a link between your new stack and an existing Git repository;
- Defining backend-specific behavior (different for each supported backend, eg. Terraform, AWS CloudFormation, Pulumi, or Kubernetes
- Defining common behavior of the stack;
Video Walkthrough»
Please see below for a step-by-step walkthrough and explanation or watch the video for quick consumption.
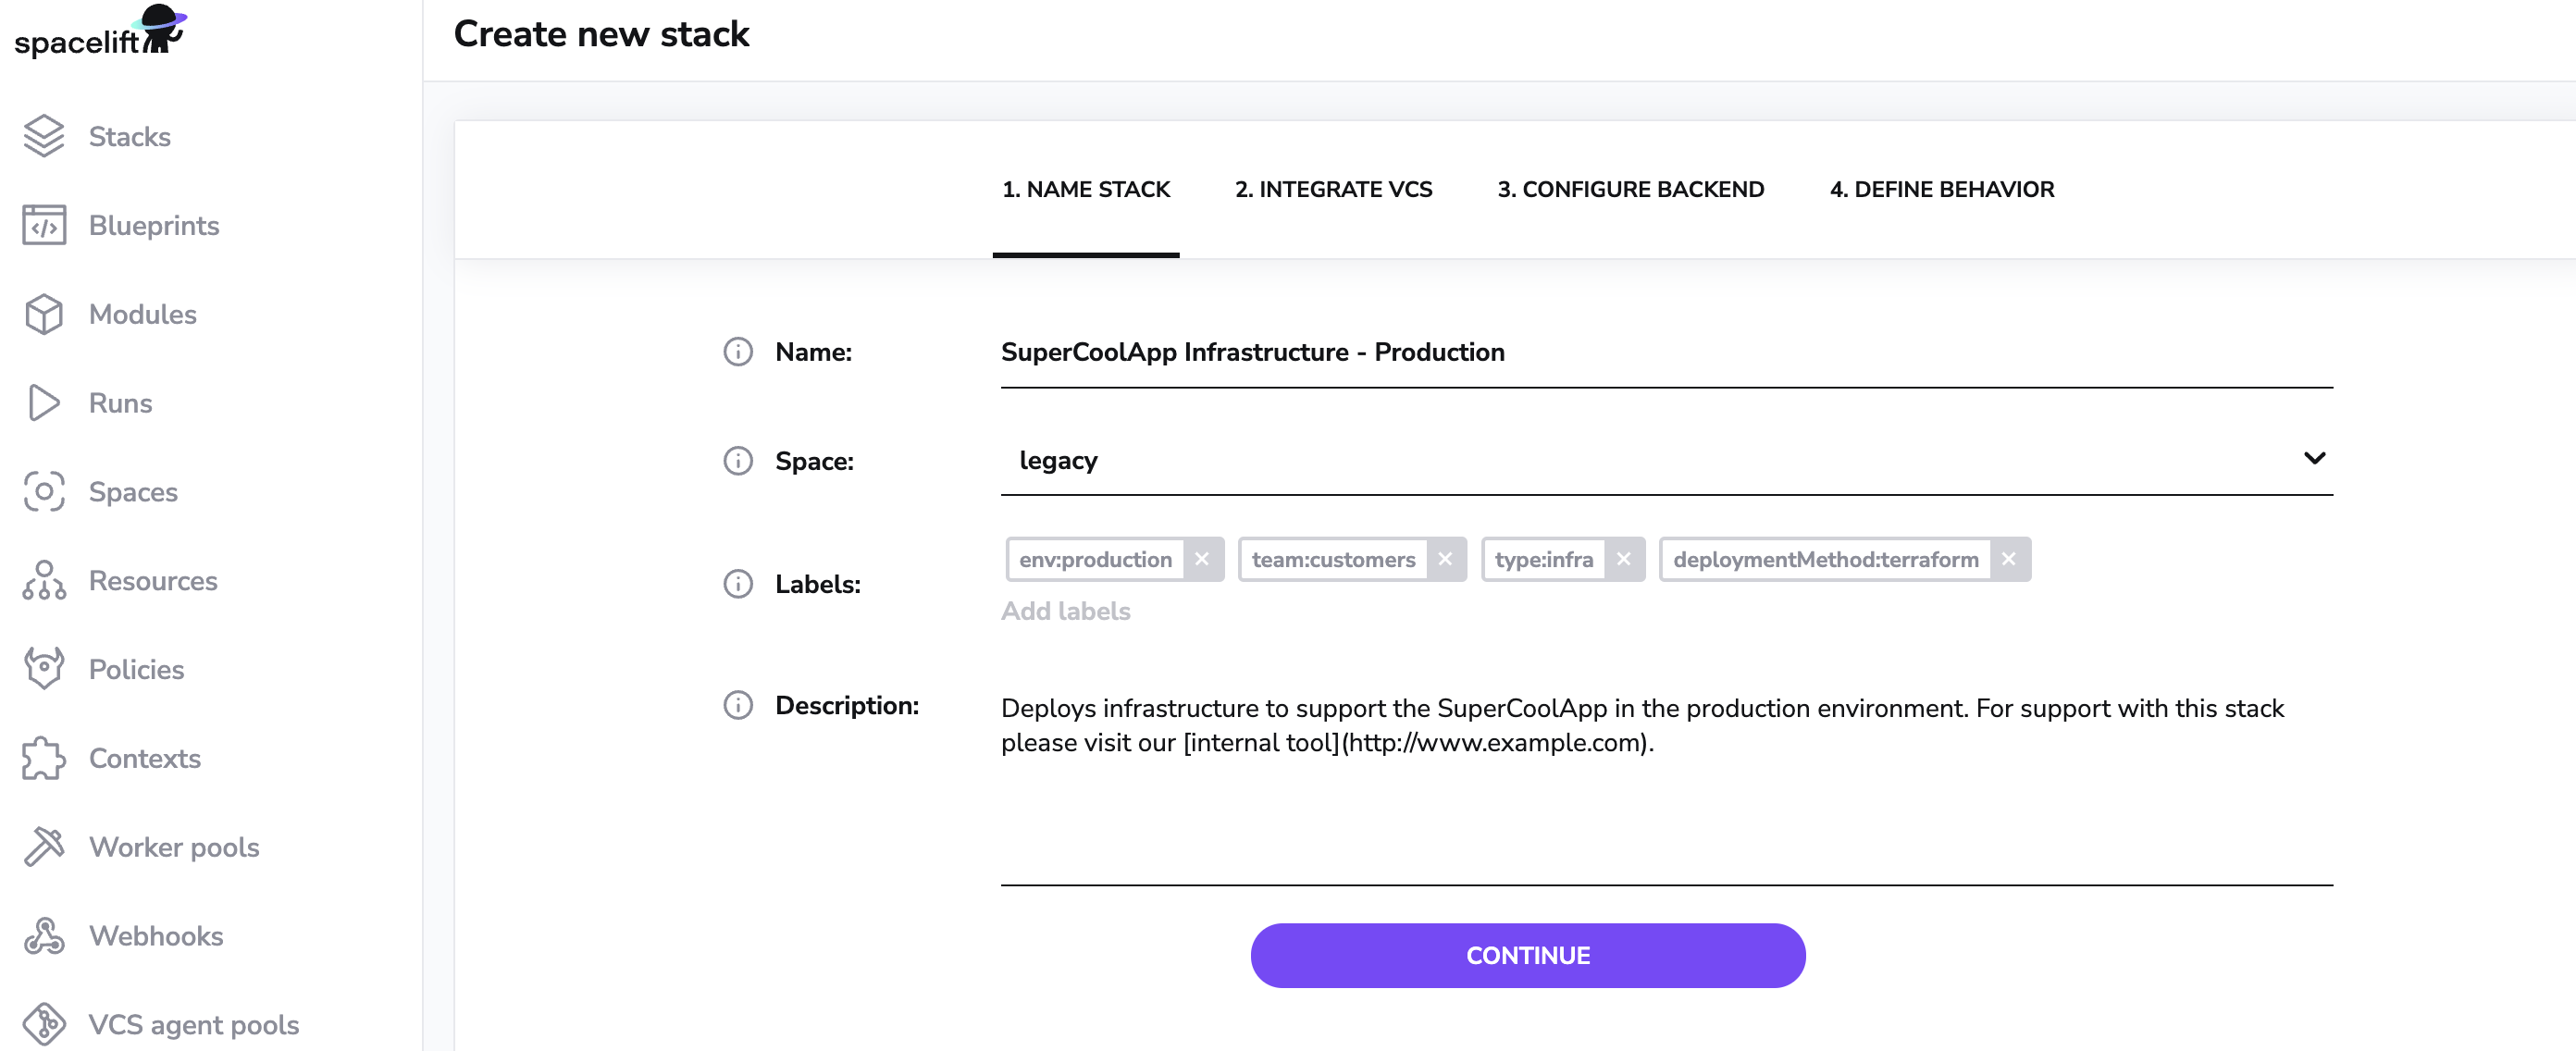
Name your stack»
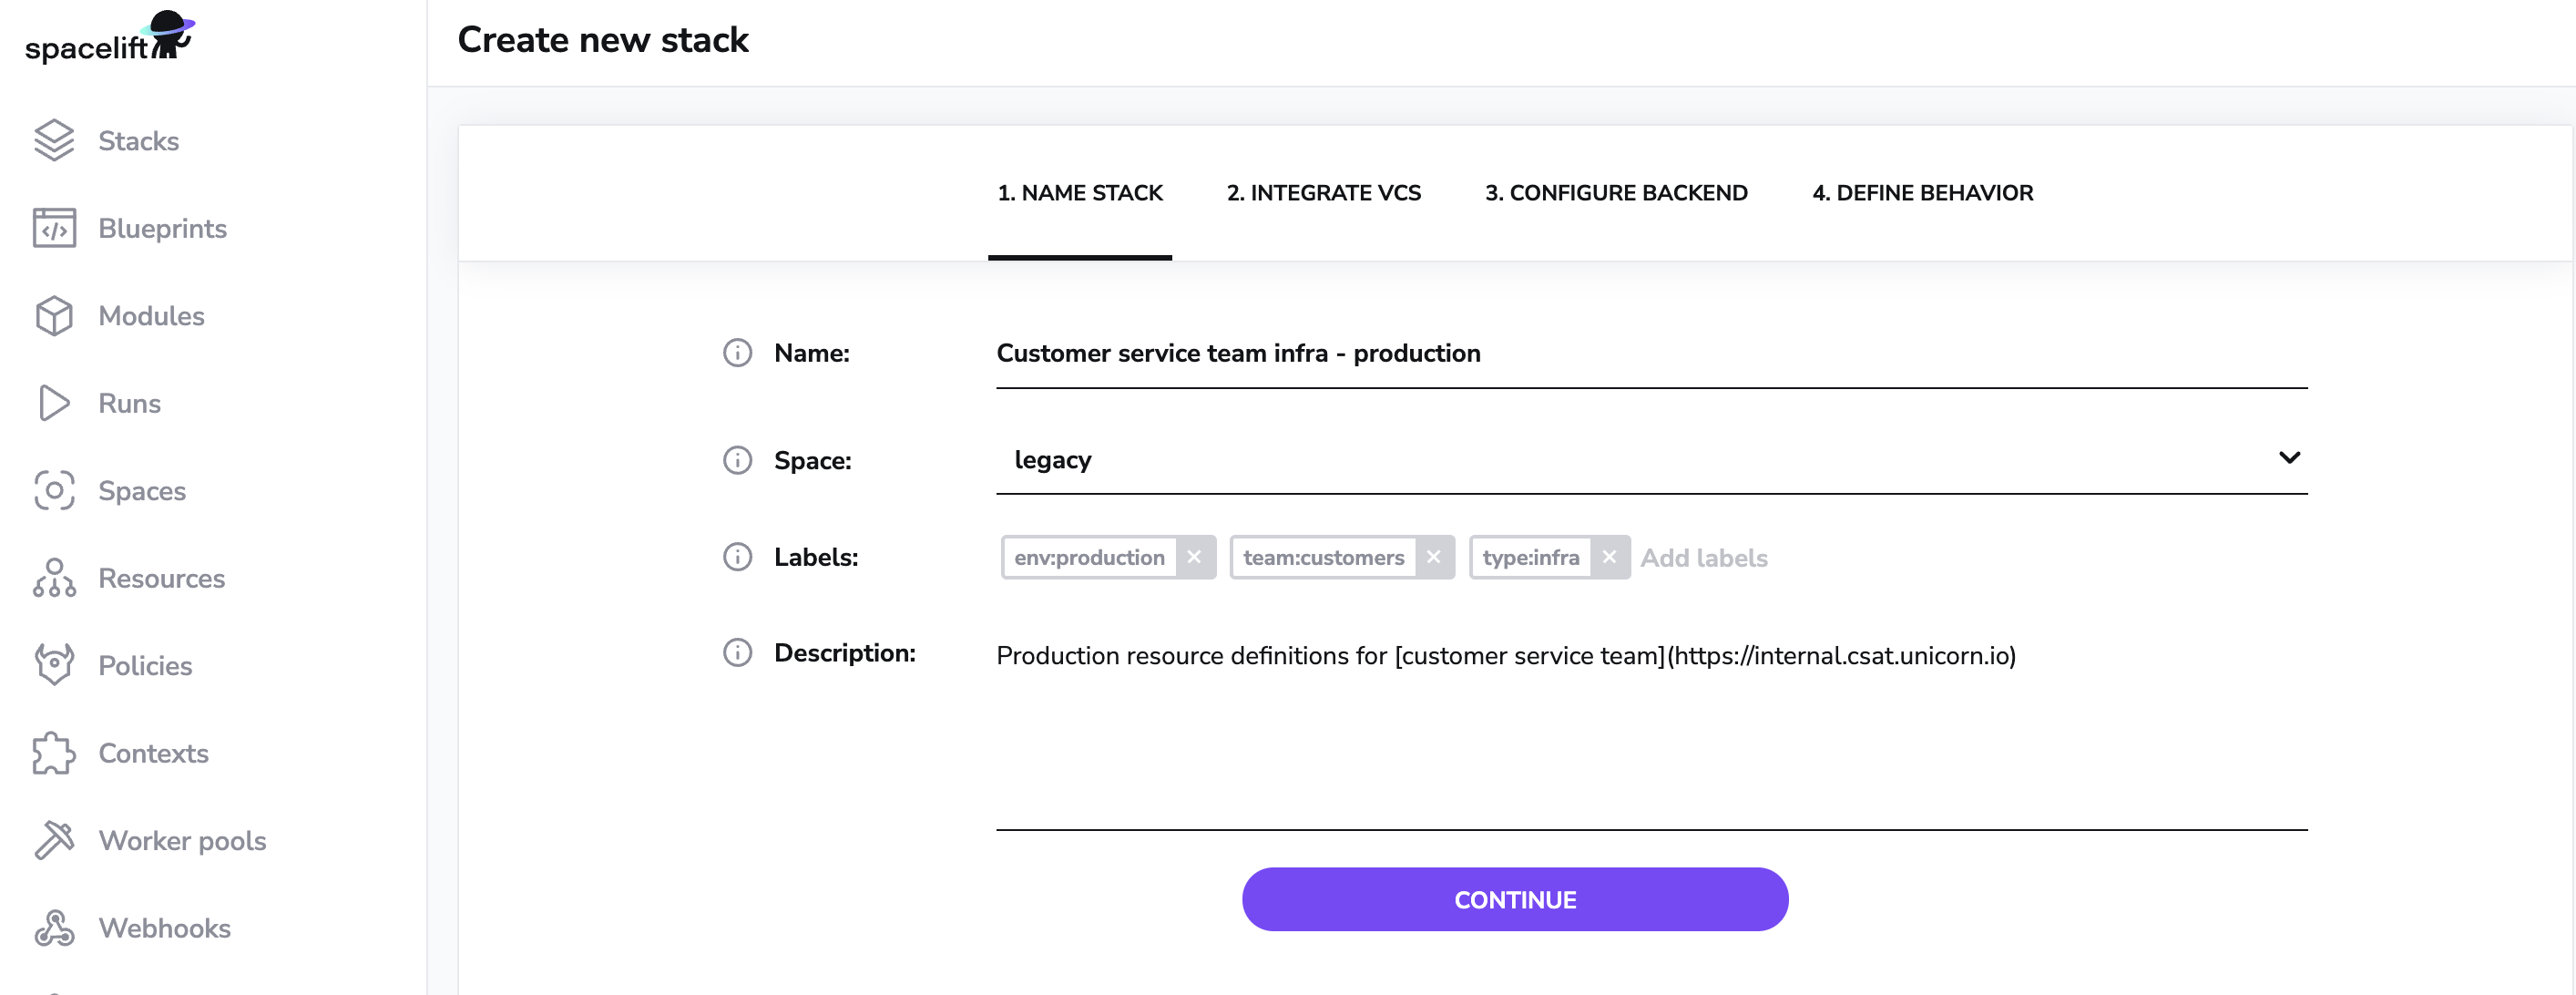
Staring with the most difficult step - naming things. Here's where you give your new stack a nice informative name and an optional description - this one even supports Markdown:
You'll be able to change the name and description later, too - with one caveat. Based on the original name, Spacelift generates an immutable slug that serves as a unique identifier of this stack. If the name and the slug diverge significantly, things may become confusing.
Here you will be able to choose which space your stack belongs to. Initially, you start with a root and a legacy space. The root space is the top-level space of your account, while the legacy space exists for backward compatibility with pre-spaces RBAC.
Also, this is the opportunity to set a few labels. Labels are useful for searching and grouping things, but also work extremely well with policies.
Integrate VCS»
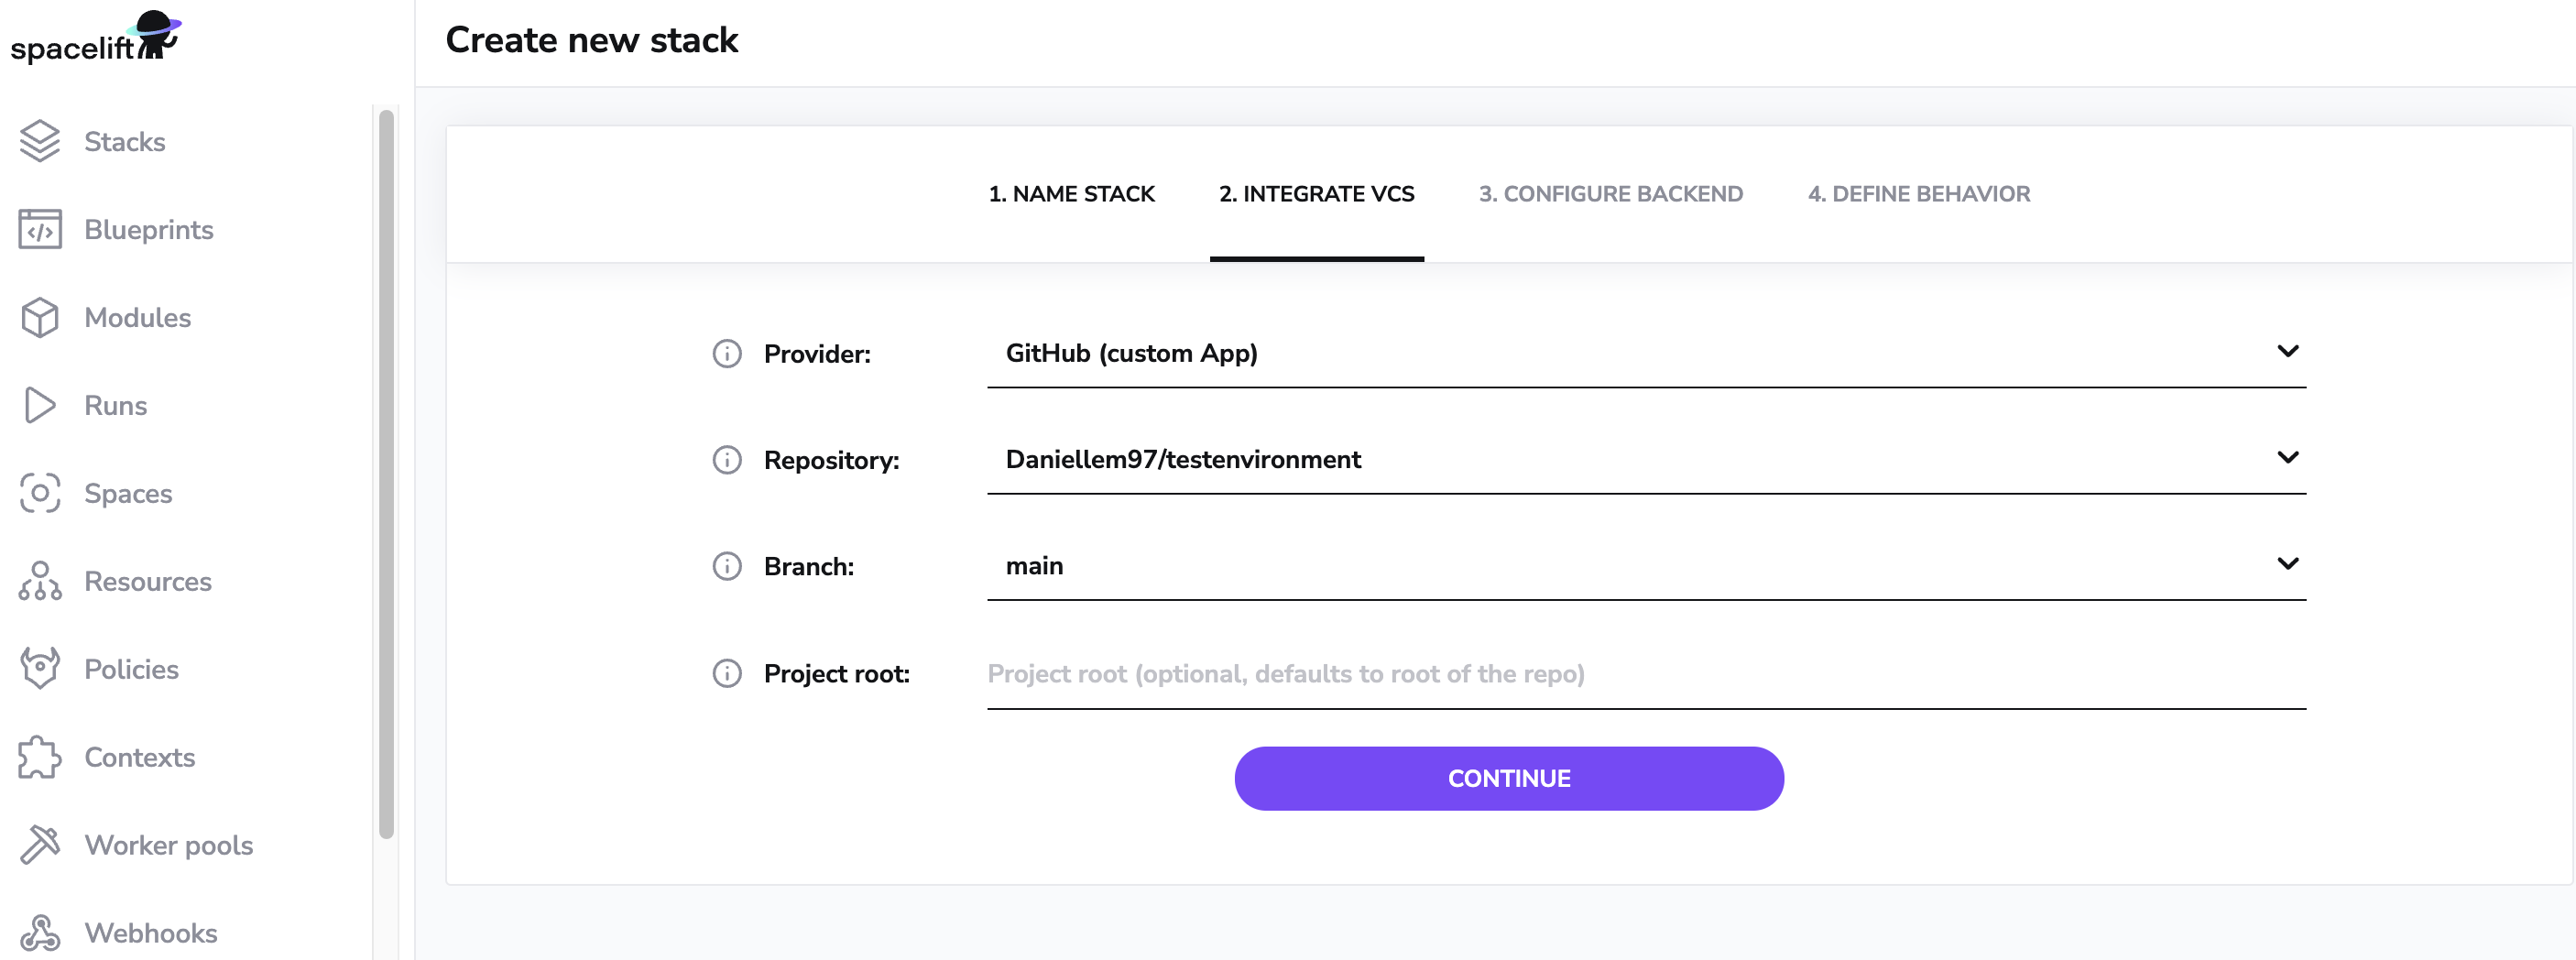
In this step, you will need to tell Spacelift where to look for the Terraform code for the stack - a combination of Git repository and one of its existing branches. The branch that you specify set here is what we called a tracked branch. By default, anything that you push to this branch will be considered for deployment. Anything you push to a different branch will be tested for changes against the current state.
The project root configuration is where inside the repository Spacelift should look for the infra project source code (e.g. create a stack for a specific folder in the repository).
A few things worth noting:
- you can point multiple Spacelift stacks to the same repository, even the same branch;
- the default behavior can be tweaked extensively to work with all sorts of Git and deployment workflows (yes, we like monorepos, too) using push and trigger policies, which are more advanced topics;
- in order to learn what exactly our Git hosting provider integration means, please refer to GitHub and GitLab integration documentation;
Info
If you're using our default GitHub App integration, we only list the repositories you've given us access to. If some repositories appear to be missing in the selection dropdown, it's likely that you've installed the app on a few selected repositories. That's fine, too, just whitelist the desired repositories and retry.
Configure backend»
At this point you'll probably know whether you want to create a Terraform, AWS CloudFormation, Pulumi, or Kubernetes stack. Each of the supported vendors has some settings that are specific to it, and the backend configuration step is where you can define them.
Terraform»
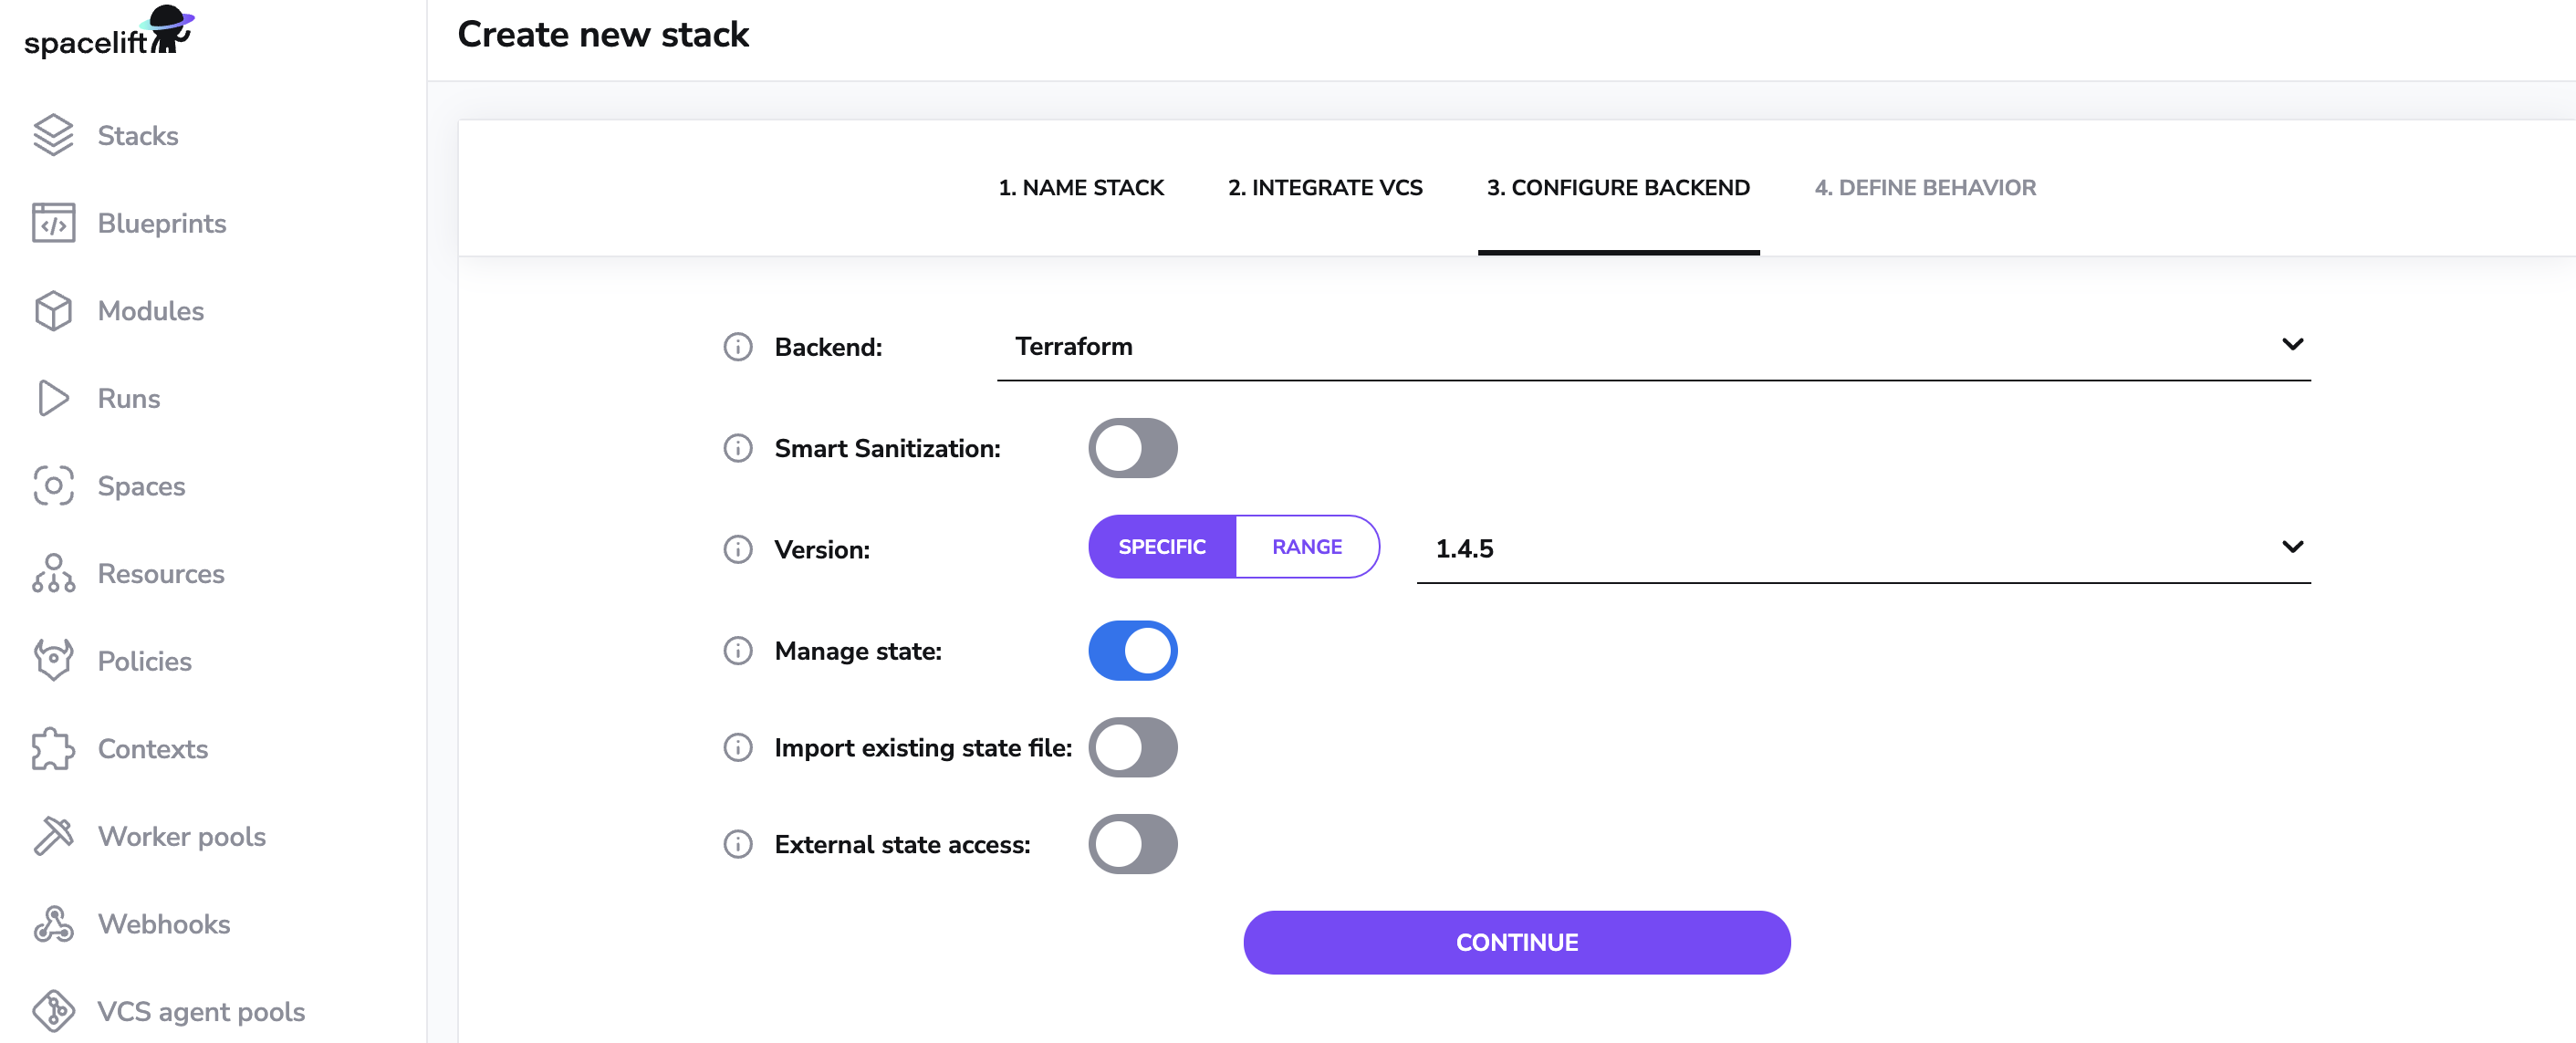
When selecting Terraform, you can choose which version of Terraform to start with - we support Terraform 0.12.0 and above. You don't need to dwell on this decision since you can change the version later - Spacelift supports full Terraform version management allowing you to even preview the impact of upgrading to a newer version.
The next decisions involves your Terraform state. First, whether you want us to provide a Terraform state backend for your state. We do offer that as a convenience feature, though Spacelift works just fine with any remote backend, like Amazon S3.
Info
If you want to bring your own backend, there's no point in doing additional state locking - Spacelift itself provides a more sophisticated state access control mechanism than Terraform.
If you choose not to use our state backend, feel free to proceed. If you do want us to manage your state, you have an option to import an existing state file from your previous backend. This is only relevant if you're migrating an existing Terraform project to Spacelift. If you have no state yet and Spacelift will be creating resources from scratch, this step is unnecessary.
Warning
Remember - this is the only time you can ask Spacelift to be the state backend for a given stack, so choose wisely. You can read more about state management here.
In addition to these options, we also offer external state access for read-only purposes, this is available for administrative stacks or users with write permission to this Stack's space.
Pulumi»
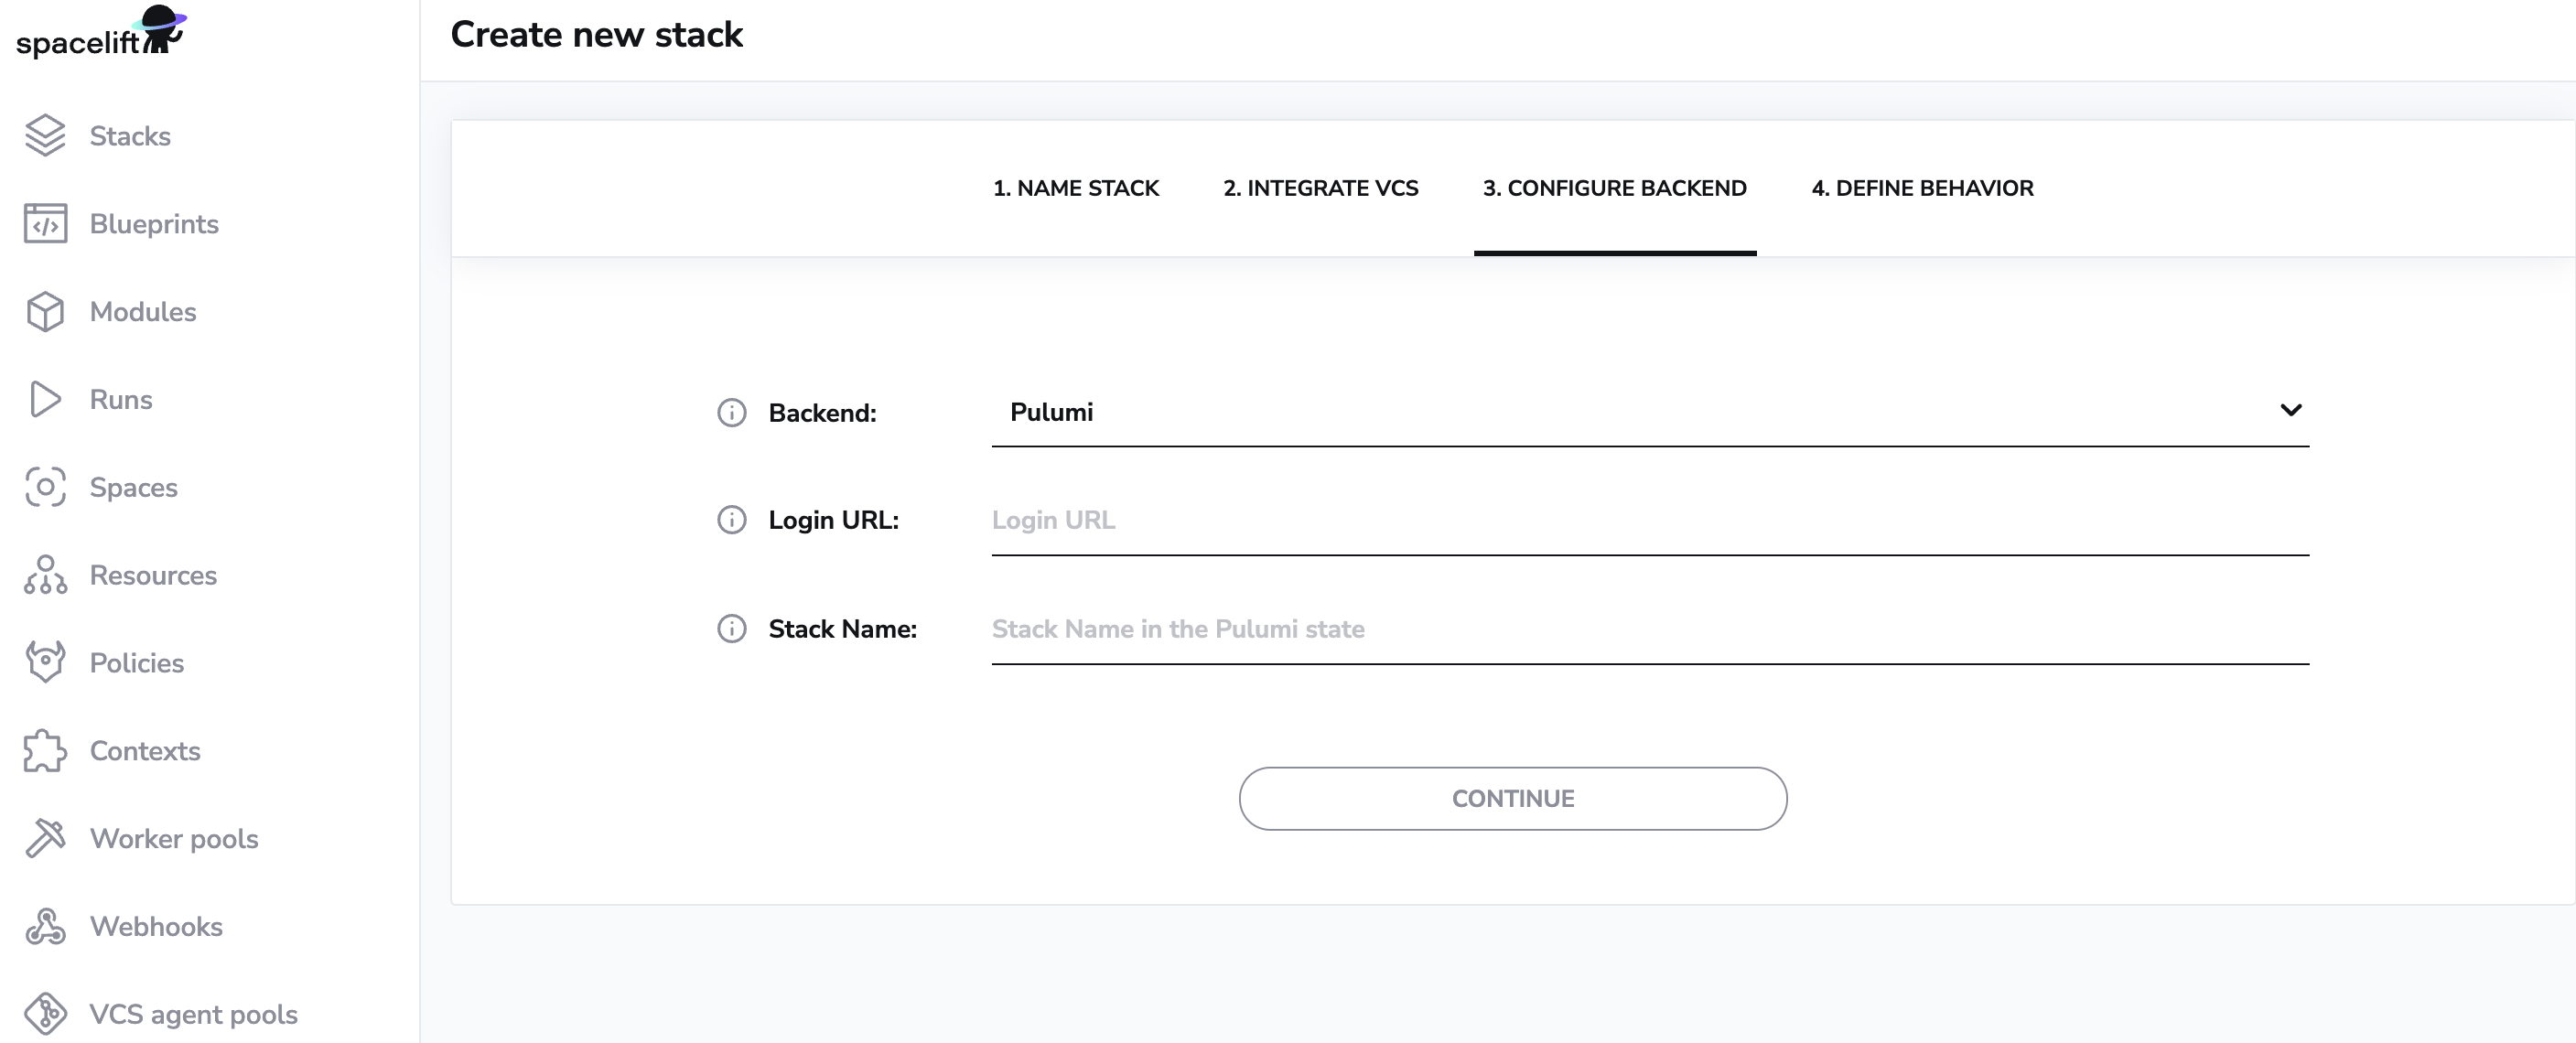
When creating a Pulumi stack, you will need to provide two things. First, the login URL to your Pulumi state backend, as currently we don't provide one like we do for Terraform, so you will need to bring your own.
Second, you need to specify the name of the Pulumi stack. This is separate from the name of the Spacelift stack, which you will specify in the next step. That said, nothing prevents you from keeping them in sync.
CloudFormation»

If you're using CloudFormation with Spacelift, there are a few pieces of information you'll need to provide. First, you'll need to specify the region where your CloudFormation stack will be located.
Additionally, you'll need to provide the name of the corresponding CloudFormation stack for this Spacelift stack. This will help us keep track of the different resources in your infrastructure.
You'll also need to provide the path to the template file in your repository that describes the root CloudFormation stack and finally you'll need to specify the S3 bucket where your processed CloudFormation templates will be stored. This will enable us to manage your CloudFormation state and ensure that all changes are properly applied.
Kubernetes»
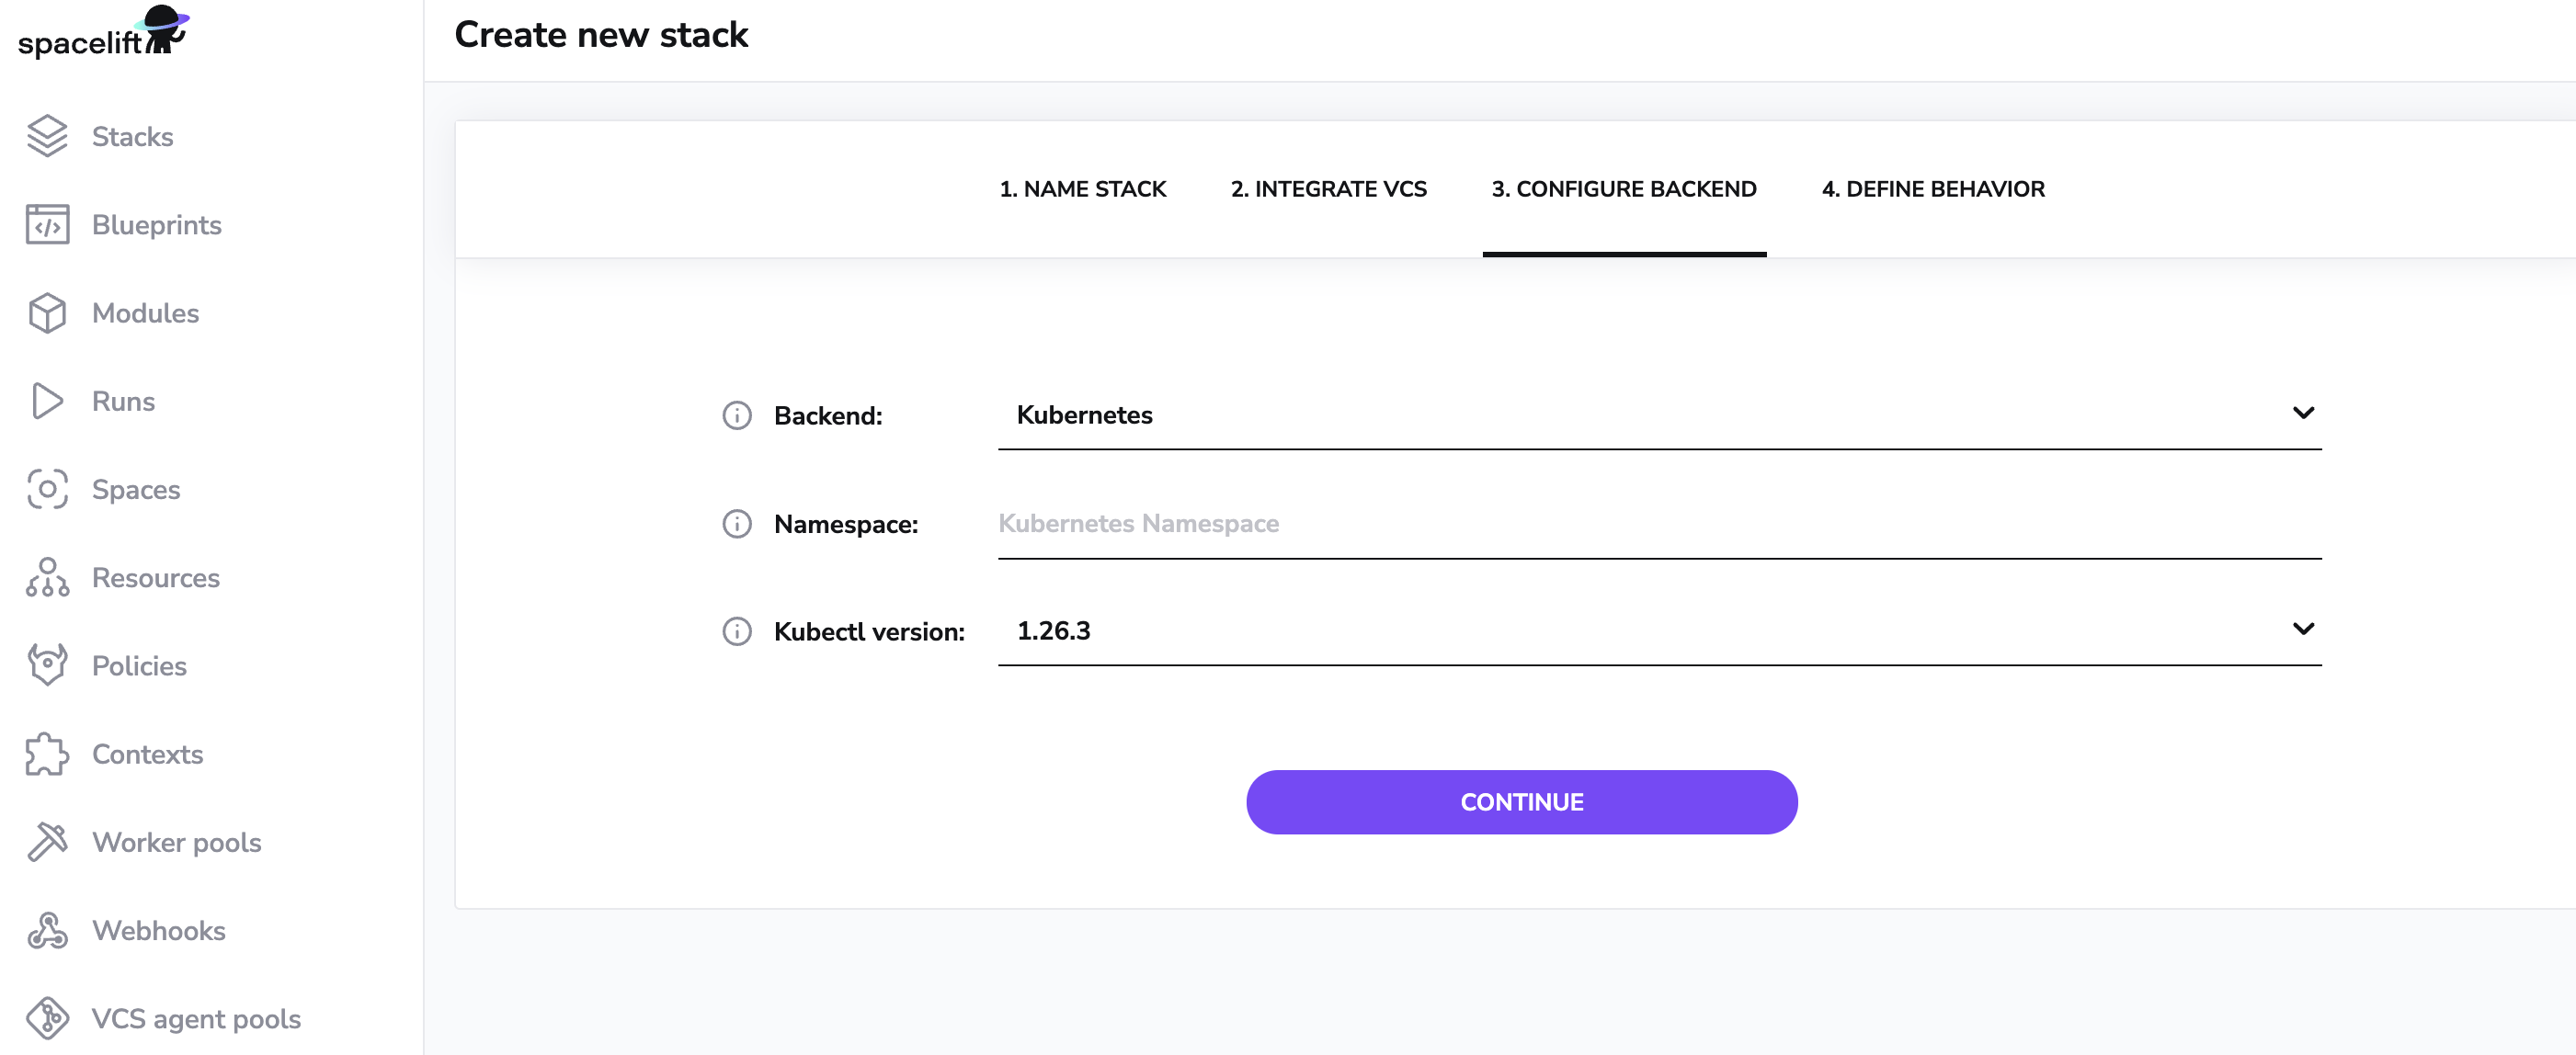
When you create a Kubernetes stack in Spacelift, you have the option to specify the namespace of the Kubernetes cluster that you want to run commands on. You can leave this empty for multi-namespace Stacks.
You can also provide the version of kubectl that you want the worker to download. This is useful if you need to work with a specific version of kubectl for compatibility or testing purposes. The worker will download the specified version of kubectl at runtime, ensuring that the correct version is available for executing commands on the cluster.
Define behavior»
Regardless of which of the supported backends (Terraform, Pulumi etc.) you're setting up your stack to use, there are a few common settings that apply to all of them. You'll have a chance to define them in the next step:
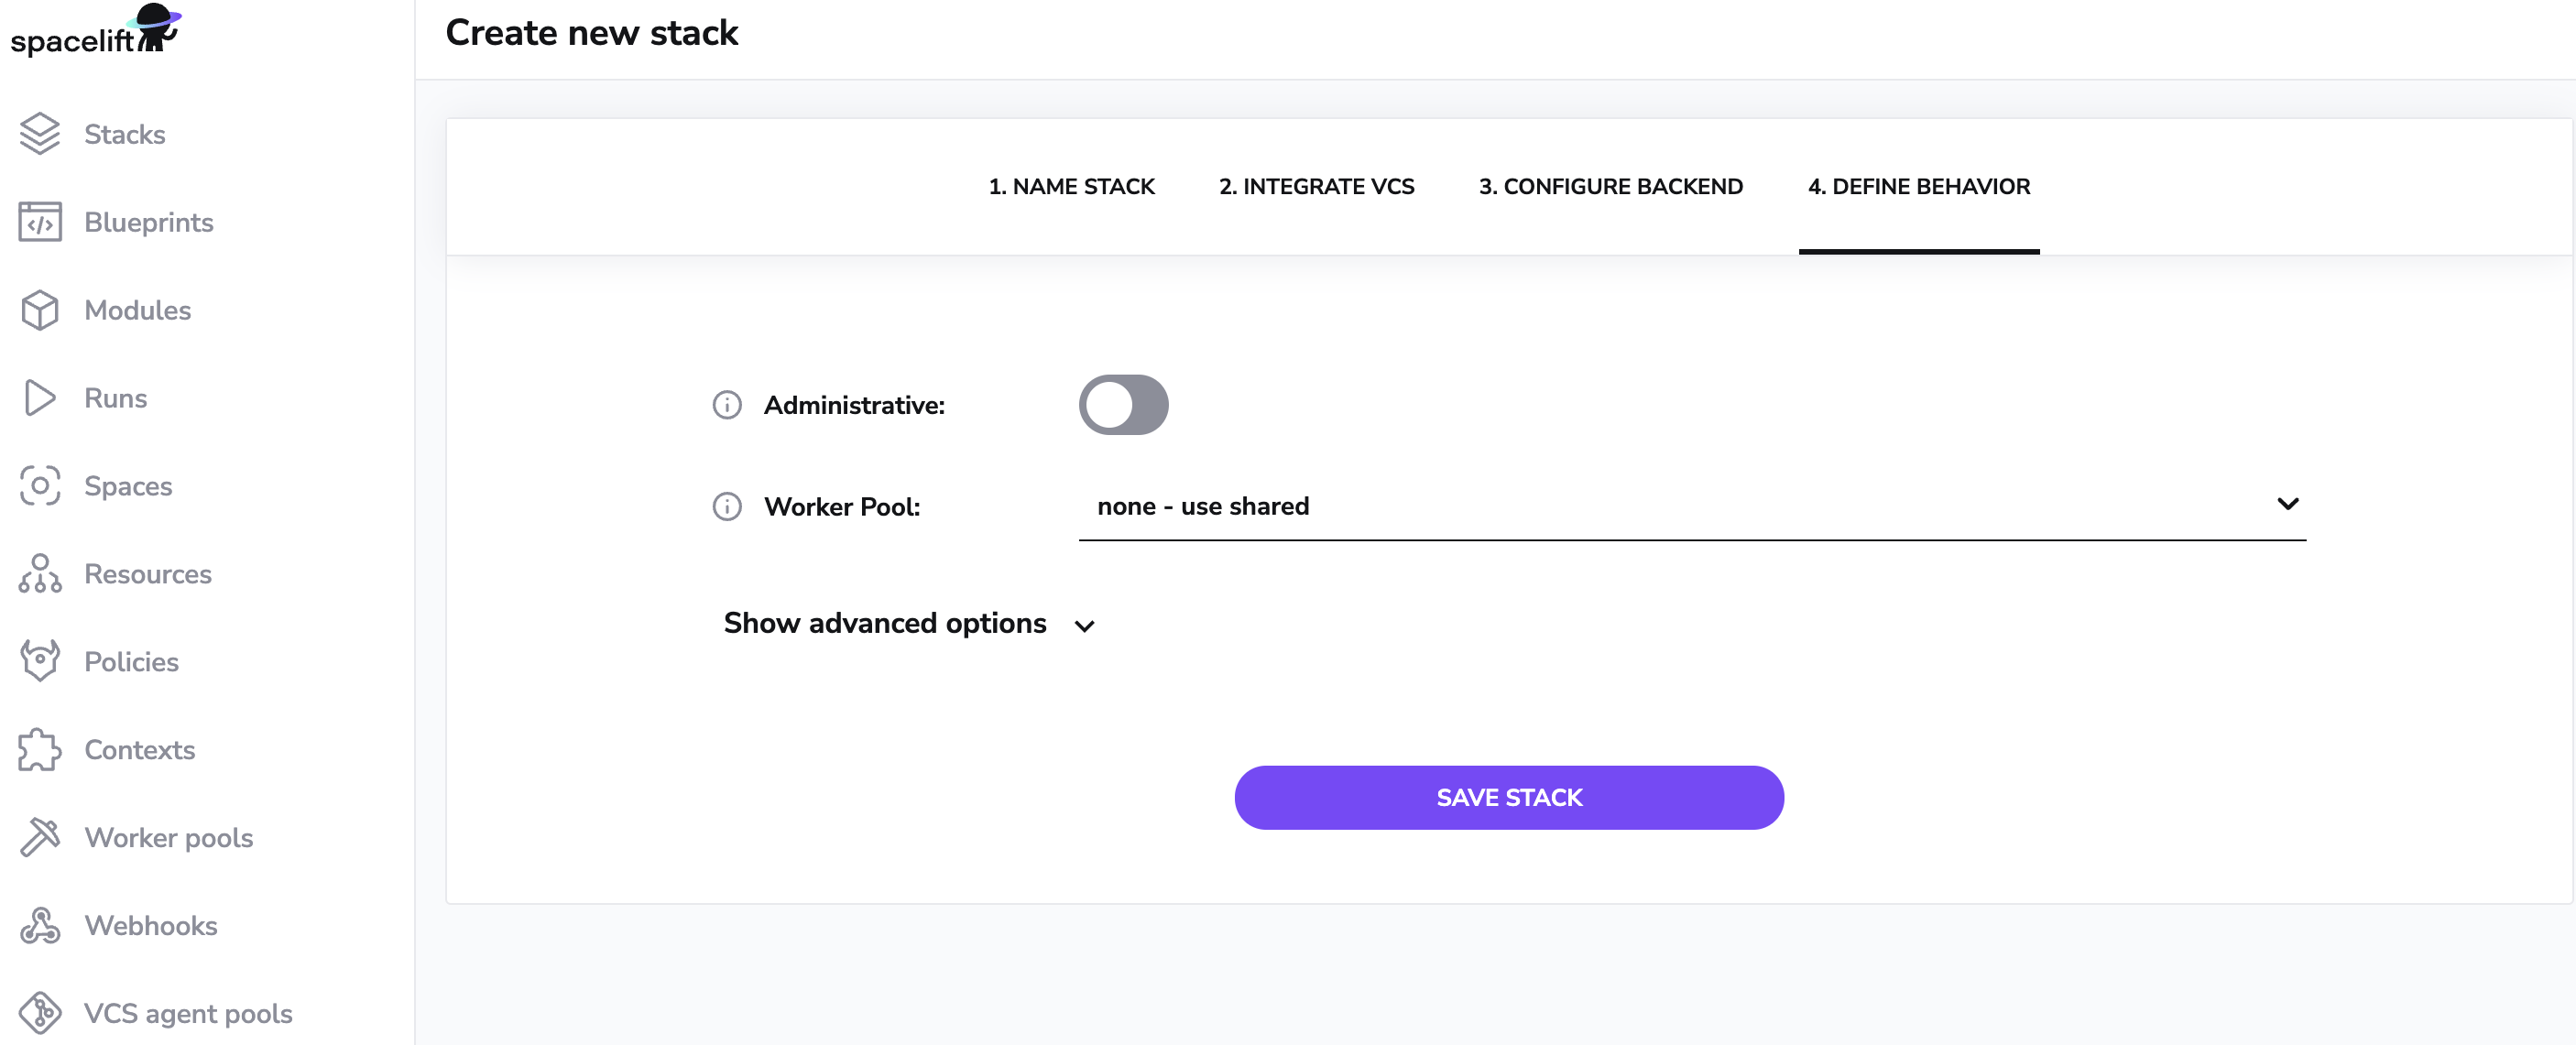
The basic settings are:
- whether the stack is administrative;
- worker pool to use, if applicable (default uses the Spacelift public worker pool);
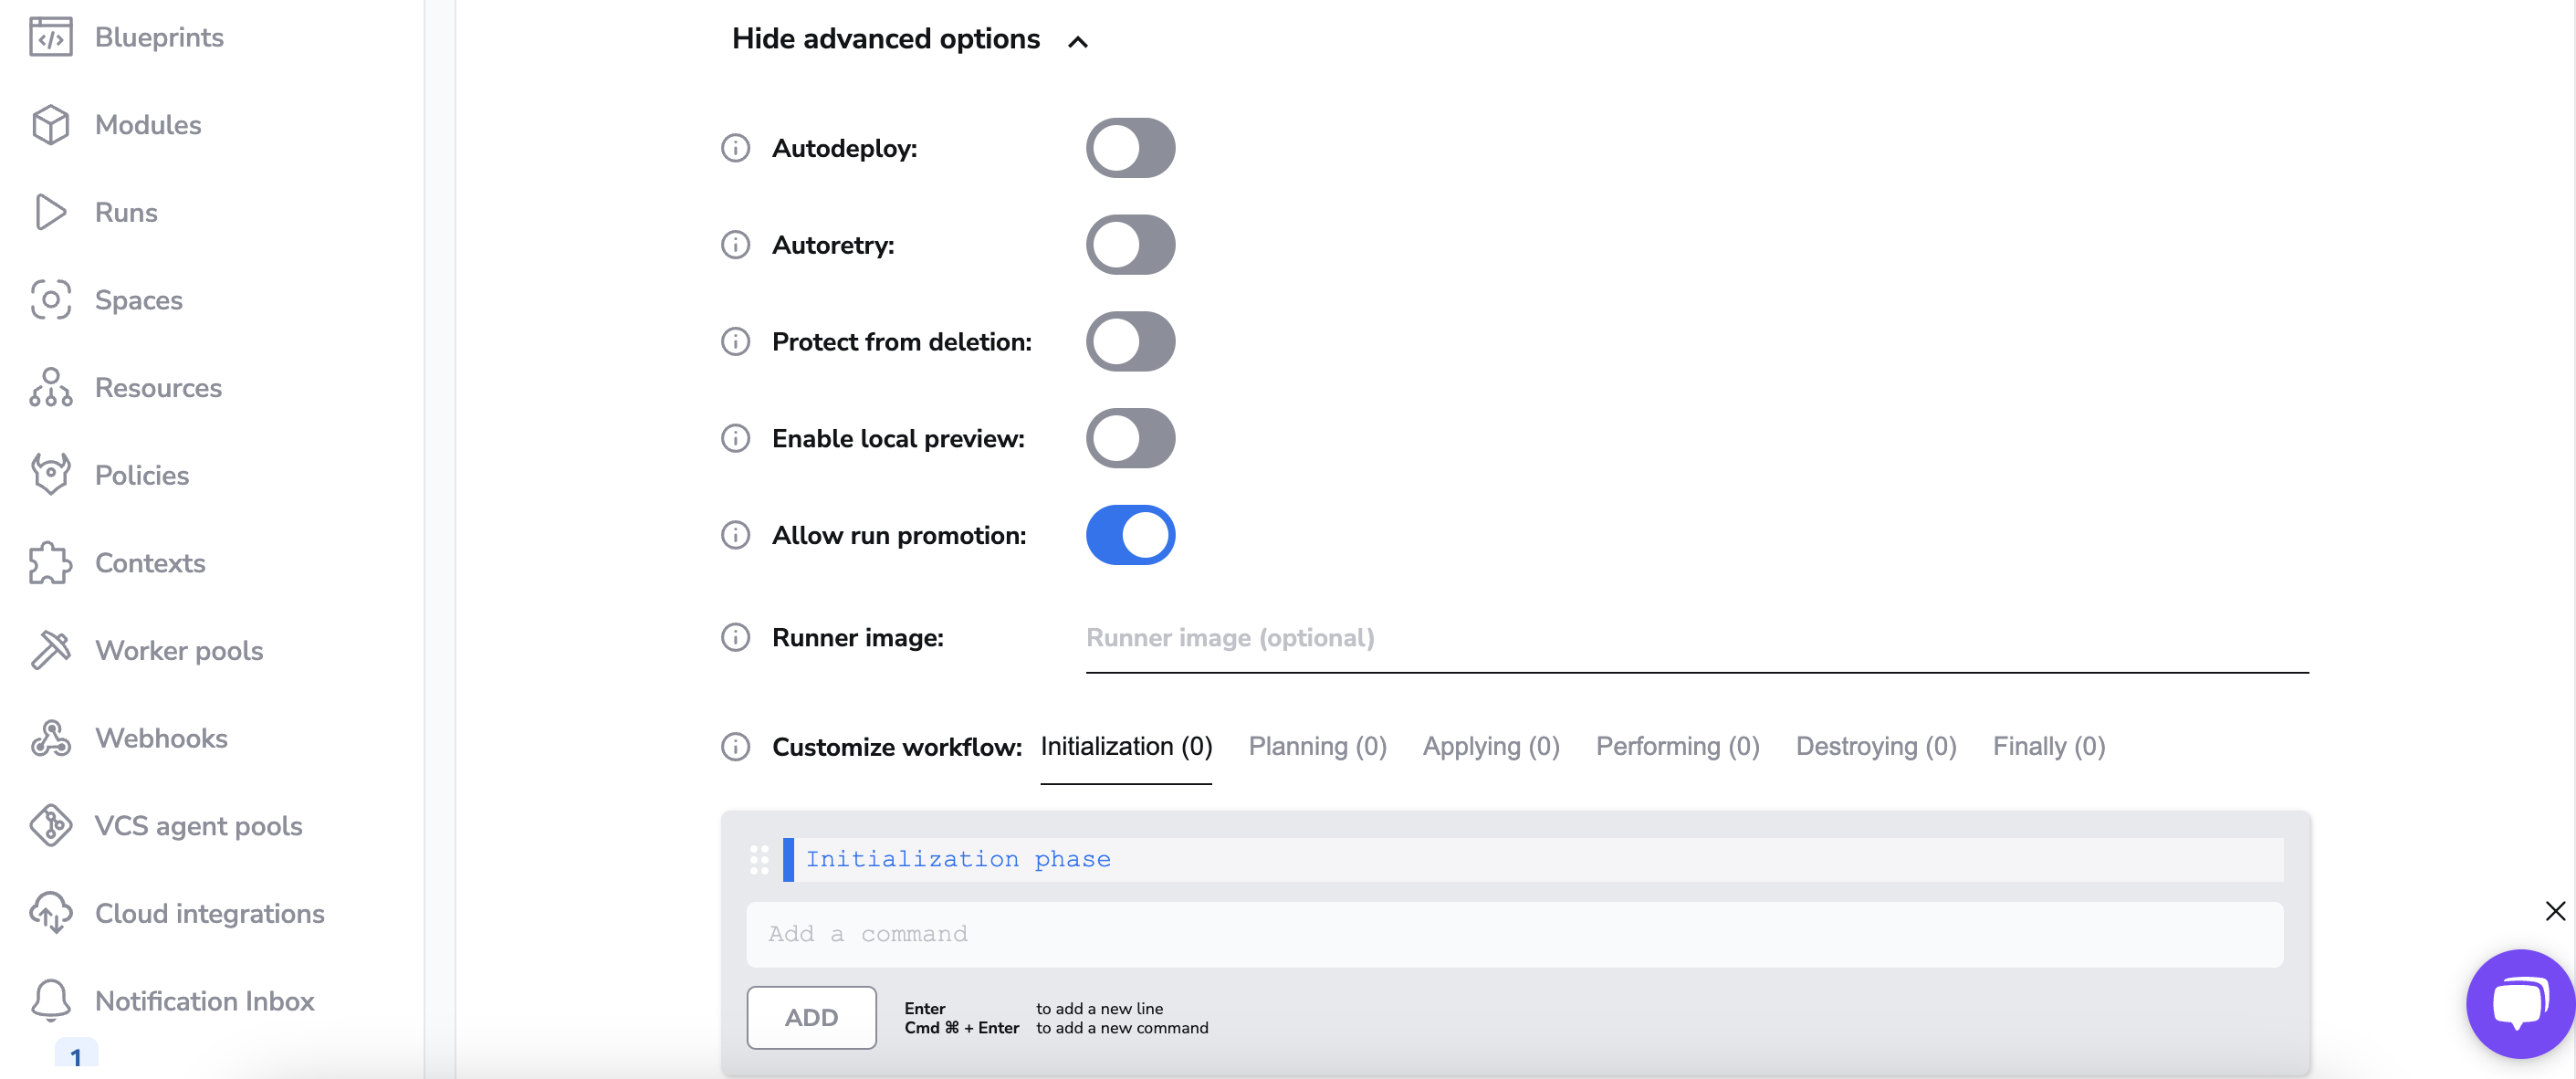
The advanced settings are:
- whether the changes should automatically deploy;
- whether obsolete tests should be automatically retried;
- whether or not to protect the stack from deletion;
- whether or not to enable the local preview spacectl CLI feature;
- whether or not run promotion is enabled;
- optionally specify a custom Docker image to use to for your job container;
- list of commands to run before/after any of the workflow stages;