Worker pools»
Info
Note that private workers are an Enterprise plan feature.
Tip
A worker is a logical entity that processes a single run at a time. As a result, your number of workers is equal to your maximum concurrency.
Typically, a virtual server (AWS EC2 or Azure/GCP VM) hosts a single worker to keep things simple and avoid coordination and resource management overhead.
Containerized workers can share the same virtual server because the management is handled by the orchestrator.
Setting up»
Generate Worker Private Key»
We use asymmetric encryption to ensure that any temporary run state can only be accessed by workers in a given worker pool. To support this, you need to generate a private key that can be used for this purpose, and use it to create a certificate signing request to give to Spacelift. We'll generate a certificate for you, so that workers can use it to authenticate with the Spacelift backend. The following command will generate the key and CSR:
1 | |
Warning
Don't forget to store the spacelift.key file (private key) in a secure location. You’ll need it later, when launching workers in your worker pool.
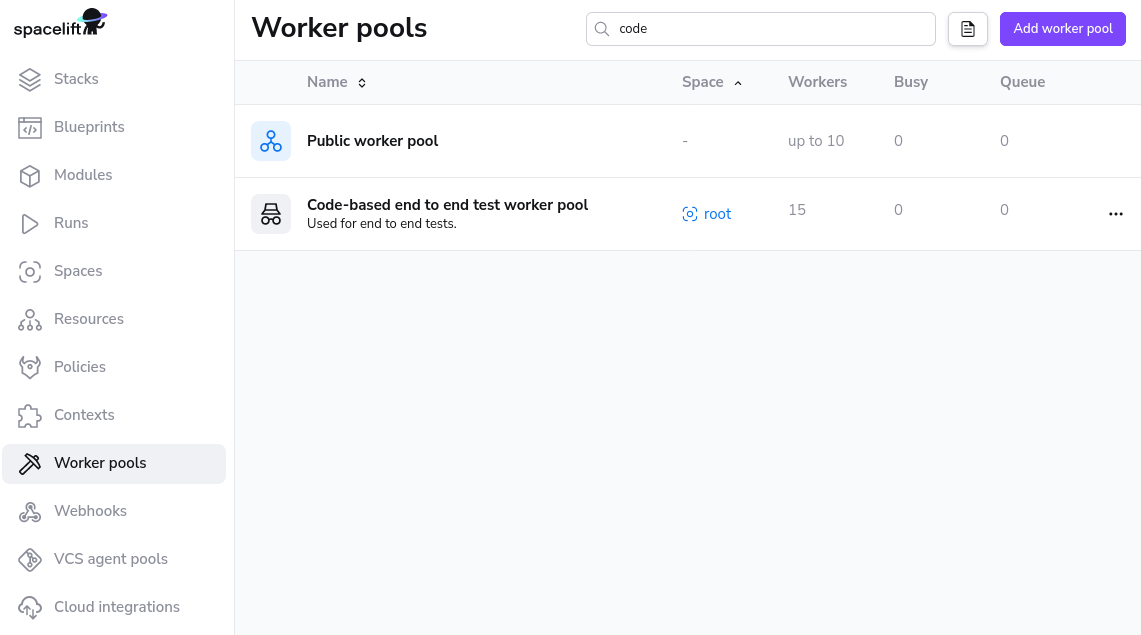
You can set up your worker pool from the Spacelift UI by navigating to Worker Pools section of your account, or you can also create it programmatically using the spacelift_worker_pool resource type within the Spacelift Terraform provider.
Navigate to Worker Pools»
Add Worker Pool Entity»
Give your worker pool a name, and submit the spacelift.csr file in the worker pool creation form. After creation of the worker pool, you’ll receive a Spacelift token. This token contains configuration for your worker pool launchers, as well as the certificate we generated for you based on the certificate signing request.
Warning
After clicking create, you will receive a token for the worker pool. Don't forget to save your Spacelift token in a secure location as you'll need this later when launching the worker pool.

Launch Worker Pool»
The Self-Hosted release archive contains a copy of the Spacelift launcher binary built specifically for your version of Self-Hosted. You can find this at bin/spacelift-launcher. This binary is also uploaded to the downloads S3 bucket during the Spacelift installation process. For more information on how to find your bucket name see here.
In order to work, the launcher expects to be able to write to the local Docker socket. Unless you're using a Docker-based container scheduler like Kubernetes or ECS, please make sure that Docker is installed and running.
Finally, you can run the launcher binary by setting two environment variables:
SPACELIFT_TOKEN- the token you’ve received from Spacelift on worker pool creationSPACELIFT_POOL_PRIVATE_KEY- the contents of the private key file you generated, in base64.
Info
You need to encode the entire private key using base-64, making it a single line of text. The simplest approach is to just run cat spacelift.key | base64 -w 0 in your command line. For Mac users, the command is cat spacelift.key | base64 -b 0.
Congrats! Your launcher should now connect to the Spacelift backend and start handling runs.
CloudFormation Template»
The easiest way to deploy workers for self-hosting is to deploy the CloudFormation template found in cloudformation/workerpool.yaml.
PseudoRandomSuffix»
The CloudFormation stack uses a parameter called PseudoRandomSuffix in order to ensure that certain resources are unique within an AWS account. The value of this parameter does not matter, other than that it is unique per worker pool stack you deploy. You should choose a value that is 6 characters long and made up of letters and numbers, for example ab12cd.
Create a secret»
First, create a new secret in SecretsManager, and add your token and the base64-encoded value of your private key. Use the key SPACELIFT_TOKEN for your token and SPACELIFT_POOL_PRIVATE_KEY for the private key. It should look something like this:
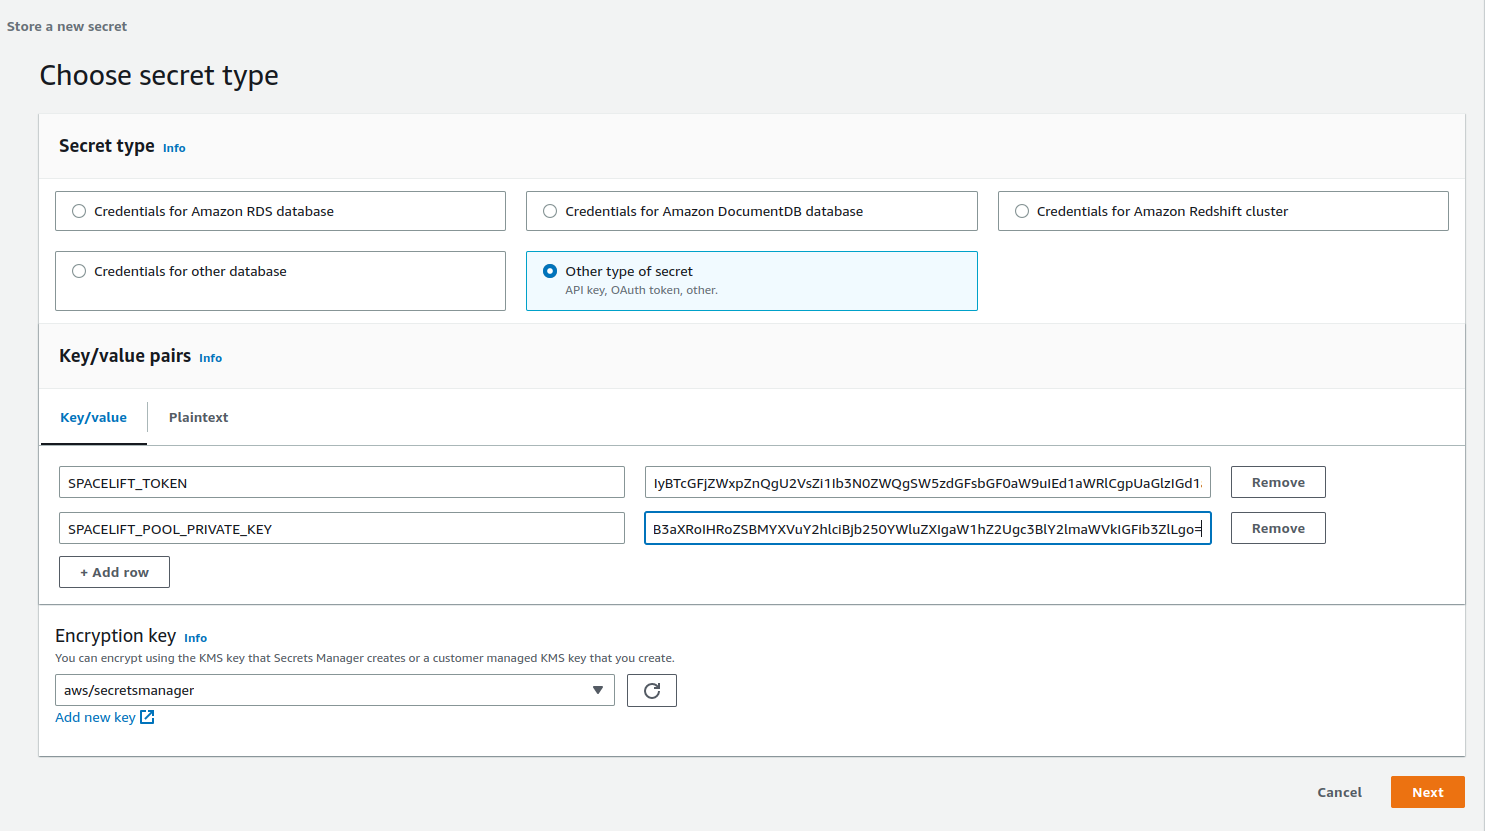
Give your secret a name and create it. It doesn't matter what this name is, but you'll need it when deploying the CloudFormation stack.
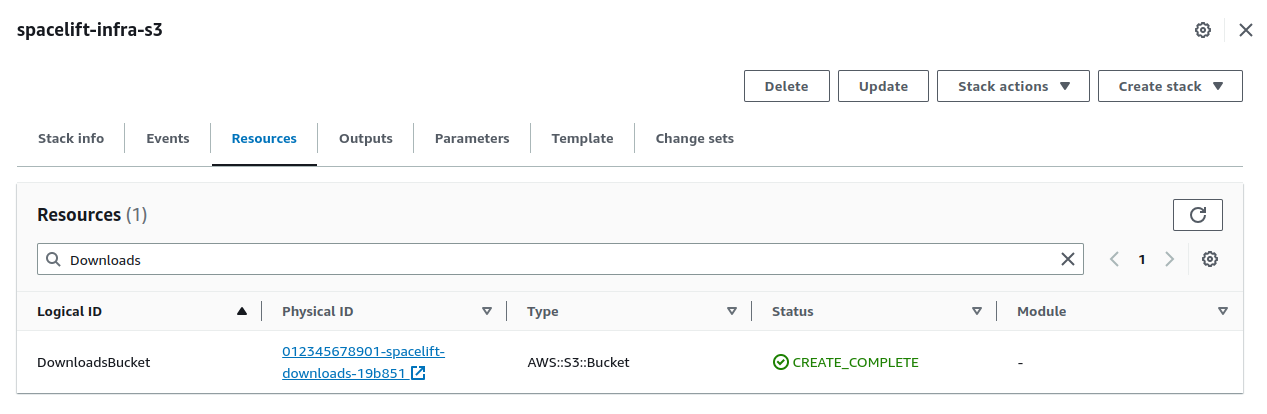
Get the downloads bucket name»
The downloads bucket name is output at the end of the installation process. If you don't have a note of it, you can also get it from the resources of the spacelift-infra-s3 stack in CloudFormation:
AMI»
You can use your own custom-built AMI for your workers, or you can use one of the pre-built images we provide. For a list of the correct AMI to use for the region you want to deploy your worker to, see the spacelift-worker-image releases page.
Note: please make sure to choose the x86_64 version of the AMI.
Subnets and Security Group»
You will need to have an existing VPC to deploy your pool into, and will need to provide a list of subnet IDs and security groups to match your requirements.
Using a custom IAM role»
By default we will create the instance role for the EC2 ASG as part of the worker pool stack, but you can also provide your own custom role via the InstanceRoleName parameter. This allows you to grant permissions to additional AWS resources that your workers need access to. A great example of this is allowing access to a private ECR in order to use a custom runner image.
At a minimum, your role must fulfil the following requirements:
- It must have a trust relationship that allows role assumption by EC2.
- It needs to have the following managed policies attached:
AutoScalingReadOnlyAccess.CloudWatchAgentServerPolicy.AmazonSSMManagedInstanceCore.
Injecting custom commands during instance startup»
You have the option to inject custom commands into the EC2 user data. This can be useful if you want to install additional software on your workers, or if you want to run a custom script during instance startup, or just add some additional environment variables.
The script must be a valid shell script and should be put into Secrets Manager. Then you can provide the name of the secret as CustomUserDataSecretName when deploying the stack.
Example:
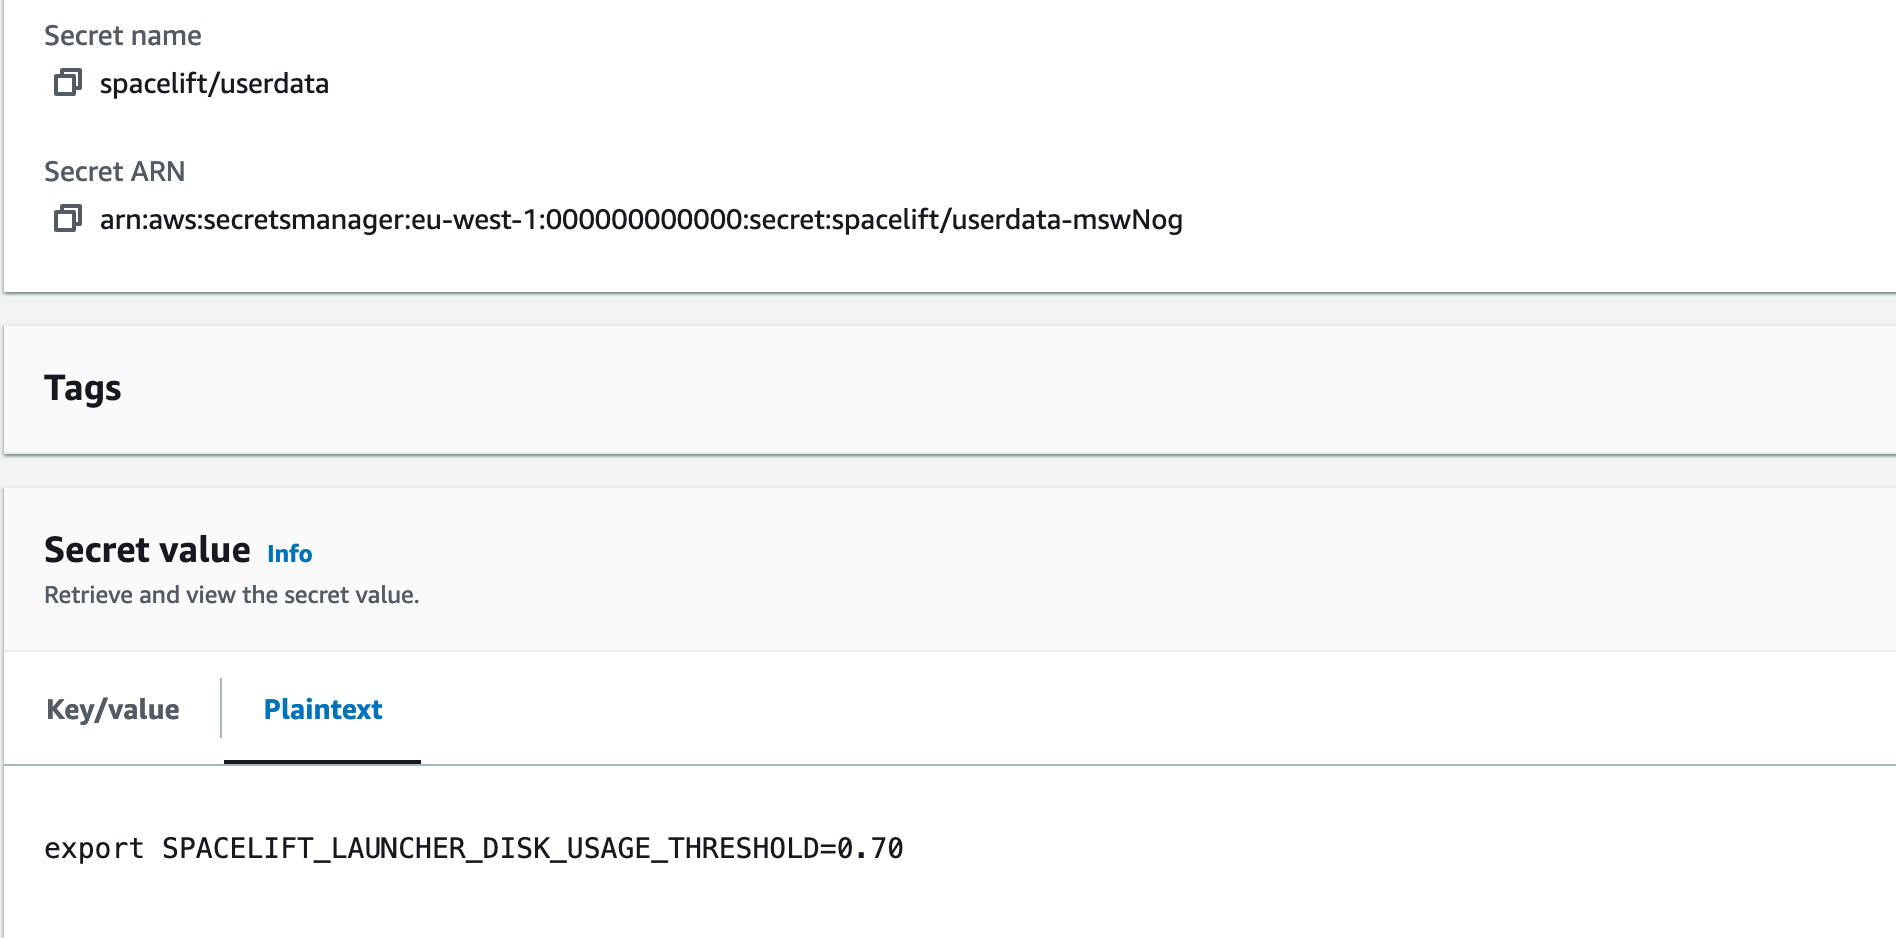
In the example above, we used spacelift/userdata as a secret name so the parameter will look like this:
1 2 3 4 | |
Granting access to a private ECR»
To allow your worker role to access a private ECR, you can attach a policy similar to the following to your instance role (replacing <repository-arn> with the ARN of your ECR repository):
1 2 3 4 5 6 7 8 9 10 11 12 13 14 15 16 17 18 19 20 21 | |
NOTE: repository ARNs are in the format arn:<partition>:ecr:<region>:<account-id>:repository/<repository-name>.
Proxy Configuration»
If you need to use an HTTP proxy for internet access, you can provide the proxy configuration using the following CloudFormation parameters:
HttpProxyConfig.HttpsProxyConfig.NoProxyConfig.
For example, you could use the following command to deploy a worker with a proxy configuration:
1 2 3 4 5 6 7 8 9 10 11 12 13 14 15 | |
Using custom CA certificates»
If you use a custom certificate authority to issue TLS certs for components that Spacelift will communicate with, for example your VCS system, you need to provide your custom CA certificates to the worker. You do this by creating a secret in SecretsManager containing a base64 encoded JSON string.
The format of the JSON object is as follows:
1 | |
For example, if you had a file called ca-certs.json containing the following content:
1 2 3 4 5 | |
You could then encode it to base64 using base64 -w0 < ca-certs.json (or base64 -b 0 < ca-certs.json on a Mac), resulting in the following string:
1 | |
You would then create a secret in SecretsManager, and deploy the worker pool using the following command (replacing <ca-cert-secret-name> with the name of your secret):
1 2 3 4 5 6 7 8 9 10 11 12 13 | |
Running the launcher as root»
By default, when the EC2 instance starts up, it creates a user called spacelift with a UID of 1983. This user is then used to run the launcher process.
If for some reason this causes problems, you can run the launcher as root by setting the RunLauncherAsSpaceliftUser CloudFormation parameter to false.
Tip
Versions v0.0.7 or older of Self-Hosted always ran the launcher as root. In newer versions this behavior has changed to default to the spacelift user.
Deploying the Template»
To deploy your worker pool stack, you can use the following command:
1 2 3 4 5 6 7 8 9 10 11 12 | |
For example, to deploy to eu-west-1 you might use something like this:
1 2 3 4 5 6 7 8 9 10 11 12 | |
To use a custom instance role, you might use something like this:
1 2 3 4 5 6 7 8 9 10 11 12 13 | |
Terraform Modules»
Our public AWS, Azure and GCP Terraform modules are not currently compatible with self-hosting.
Running Workers in Kubernetes»
You can run Spacelift workers for your self-hosted instance in Kubernetes, for example using our Helm chart. The main thing to be aware of is that the launcher is designed to work with a specific version of Spacelift, so it's important to use the correct container image for your Spacelift install.
Finding the Launcher Image»
During the installation process for your self-hosted image, an ECR repository is created for storing launcher images named spacelift-launcher. At the end of the installation the launcher image URI and tag are output. If you didn't take a note of it at the time, you can find the ECR repository URI via the AWS console, or by running the following command:
1 | |
The repository URI will be in the format <account-id>.dkr.ecr.<region>.amazonaws.com/spacelift-launcher. To calculate the correct image to use, add the version of your self-hosted installation onto the end, for example:
1 | |
Note: the cluster that you run the Launcher in must be able to pull the launcher image from your ECR repository, so you will need to ensure that it has the correct permissions to do so.
Helm Chart»
By default our Helm chart is configured to use public.ecr.aws/spacelift/launcher. The latest tag of that image is guaranteed to always work with the SaaS version of Spacelift. For self-hosted instances, you should configure the chart to use the correct launcher image URI and tag. For example, for the image specified in the Finding the Launcher Image section, you would use the following Helm values:
1 2 3 4 | |
Configuration options»
A number of configuration variables is available to customize how your launcher behaves:
SPACELIFT_DOCKER_CONFIG_DIR- if set, the value of this variable will point to the directory containing Docker configuration, which includes credentials for private Docker registries. Private workers can populate this directory for example by executingdocker loginbefore the launcher process is started;SPACELIFT_MASK_ENVS- comma-delimited list of whitelisted environment variables that are passed to the workers but should never appear in the logs;SPACELIFT_WORKER_NETWORK- network ID/name to connect the launched worker containers, defaults tobridge;SPACELIFT_WORKER_EXTRA_MOUNTS- additional files or directories to be mounted to the launched worker docker containers during either read or write runs, as a comma-separated list of mounts in the form of/host/path:/container/path;SPACELIFT_WORKER_WO_EXTRA_MOUNTS- Additional directories to be mounted to the worker docker container during write only runs, as a comma separated list of mounts in the form of/host/path:/container/path;SPACELIFT_WORKER_RO_EXTRA_MOUNTS- Additional directories to be mounted to the worker docker container during read only runs, as a comma separated list of mounts in the form of/host/path:/container/path;SPACELIFT_WORKER_RUNTIME- runtime to use for worker container;SPACELIFT_WHITELIST_ENVS- comma-delimited list of environment variables to pass from the launcher's own environment to the workers' environment. They can be prefixed withro_to only be included in read only runs orwo_to only be included in write only runs;SPACELIFT_LAUNCHER_LOGS_TIMEOUT- custom timeout (the default is 7 minutes) for killing jobs not producing any logs. This is a duration flag, expecting a duration-formatted value, eg1000s;SPACELIFT_LAUNCHER_RUN_INITIALIZATION_POLICY- file that contains the run initialization policy that will be parsed/used; If the run initialized policy can not be validated at the startup the worker pool will exit with an appropriate error;SPACELIFT_LAUNCHER_RUN_TIMEOUT- custom maximum run time - the default is 70 minutes. This is a duration flag, expecting a duration-formatted value, eg.120m;
Warning
Server-side initialization policies are being deprecated. SPACELIFT_LAUNCHER_RUN_INITIALIZATION_POLICY shouldn't be confused with that. This policy is a Worker-side initialization policy and it can be set by using the launcher run initialization policy flag.
For a limited time period we will be running both types of initialization policy checks but ultimately we're planning to move the pre-flight checks to the worker node, thus allowing customers to block suspicious looking jobs on their end.
Passing metadata tags»
When the launcher from a worker pool is registering with the mothership, you can send along some tags that will allow you to uniquely identify the process/machine for the purpose of draining or debugging. Any environment variables using SPACELIFT_METADATA_ prefix will be passed on. As an example, if you're running Spacelift workers in EC2, you can do the following just before you execute the launcher binary:
1 | |
Doing so will set your EC2 instance ID as instance_id tag in your worker.
Please see injecting custom commands during instance startup for information about how to do this when using our CloudFormation template.
Network Security»
Private workers need to be able to make outbound connections in order to communicate with Spacelift, as well as to access any resources required by your runs. If you have policies in place that require you to limit the outbound traffic allowed from your workers, you can use the following lists as a guide.
AWS Services»
Your worker needs access to the following AWS services in order to function correctly. You can refer to the AWS documentation for their IP address ranges.
- Access to the public Elastic Container Registry if using our default runner image.
- Access to your Self-Hosted server, for example
https://spacelift.myorg.com. - Access to the AWS IoT Core endpoints in your installation region for worker communication via MQTT.
- Access to Amazon S3 in your installation region for uploading run logs.
Other»
In addition, you will also need to allow access to the following:
- Your VCS provider.
- Access to any custom container registries you use if using custom runner images.
- Access to any other infrastructure required as part of your runs.
Hardware recommendations»
The hardware requirments for the workers will vary depending on the stack size(How many resources managed, resource type, etc.), but we recommend at least 2GB of memory and 2 vCPUs of compute power.
These are the recommended server types for the three main cloud providers:
- AWS: t3.small instance type
- Azure: Standard_A2_V2 virtual machine
- GCP: e2-medium instance type
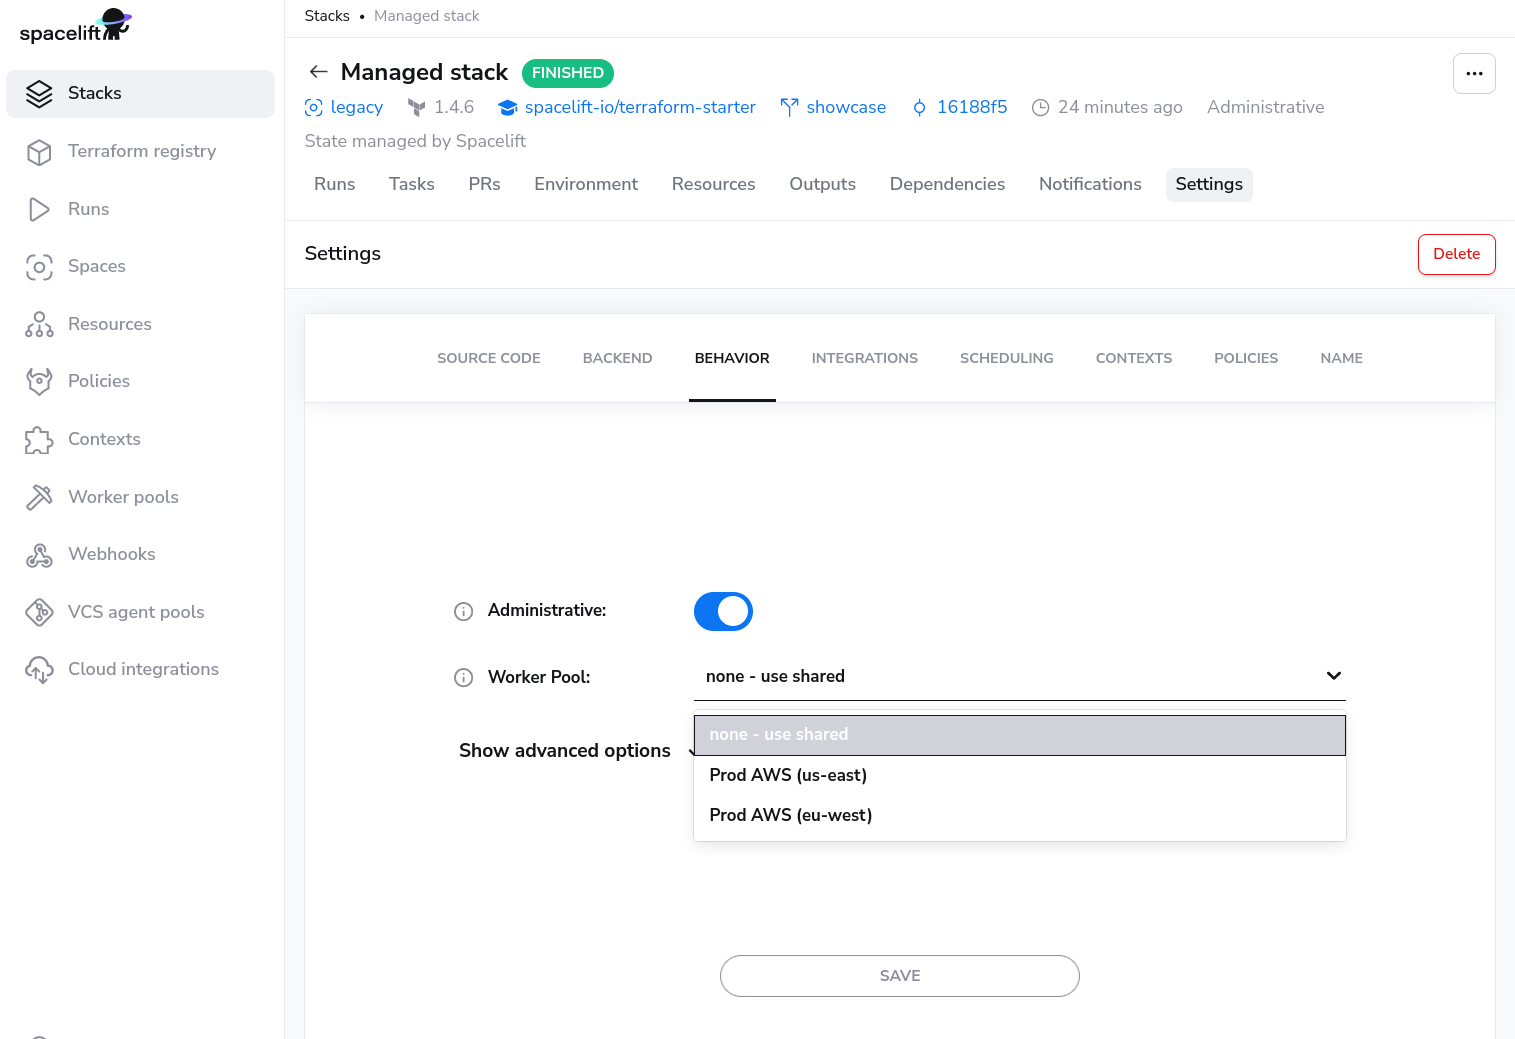
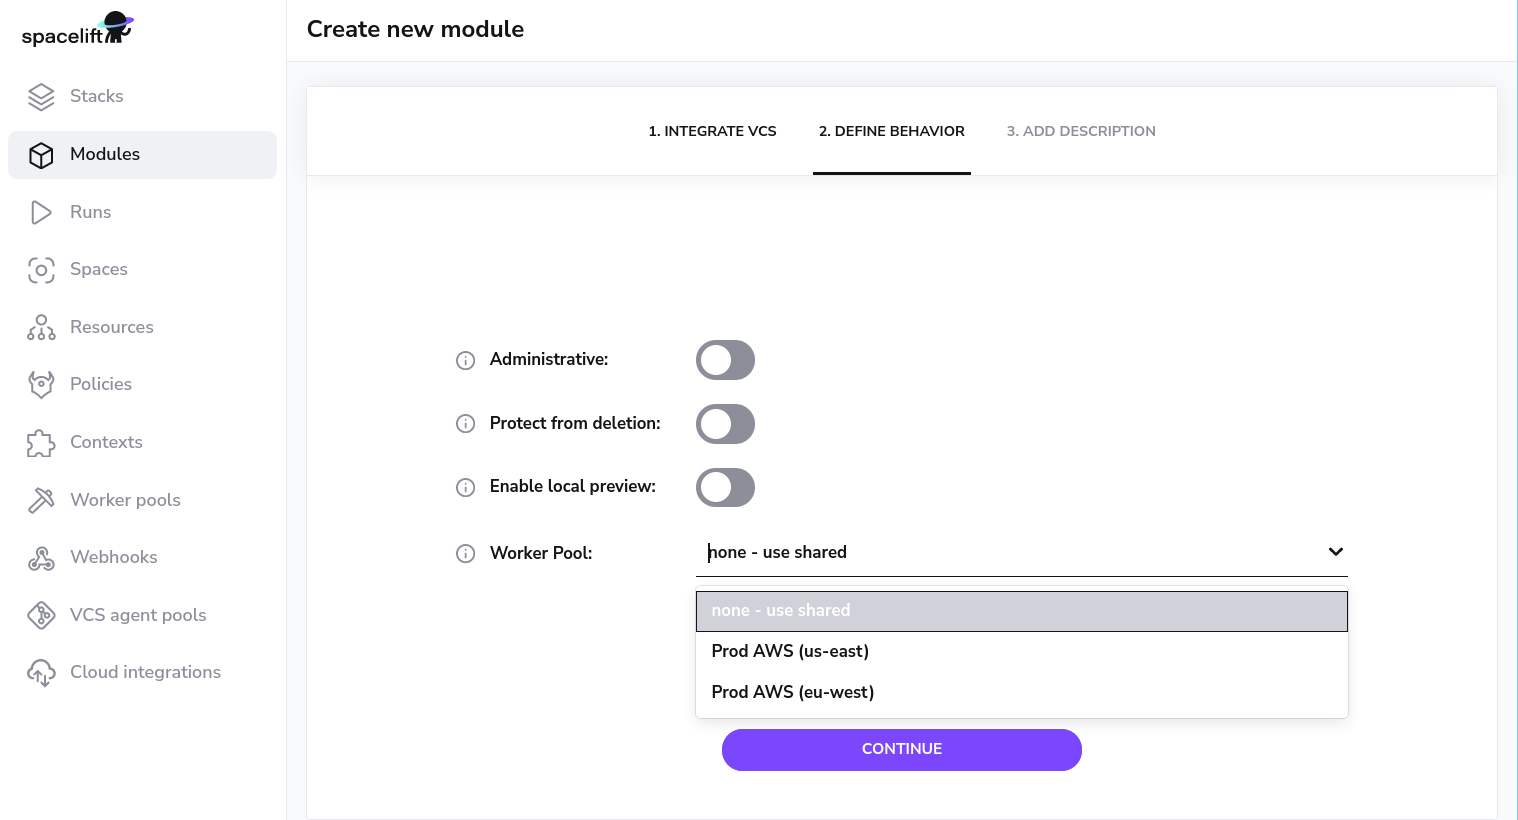
Using worker pools»
Worker pools must be explicitly attached to stacks and/or modules in order to start processing their workloads. This can be done in the Behavior section of stack and module settings:
Worker Pool Management Views»
You can view the activity and status of every aspect of your worker pool in the worker pool detail view.
You can navigate to the worker pool of your choosing by clicking on the appropriate entry in the worker pools list view.
Private Worker Pool»
A private worker pool is a worker pool for which you are responsible for managing the workers.

Workers»
The workers tab lists all workers for this worker pool and their status.
Status»
A worker can have three possible statuses:
DRAINEDwhich indicates that the workers is not accepting new work.BUSYwhich indicates that the worker is currently processing or about to process a run.IDLEwhich indicates that the worker is available to start processing new runs.
Queued»
Queued lists all the run that can be scheduled and are currently in progress. In progress runs will be the first entries in the list when using the view without any filtering.
Info
Reasons a run might not be shown in this list: a tracked run is waiting on a tracked run, the run has is dependent on other runs.
Used by»
Stacks and/or Modules that are using the private worker pool.