Worker pools»
Info
Note that private workers are an Enterprise plan feature.
Tip
A worker is a logical entity that processes a single run at a time. As a result, your number of workers is equal to your maximum concurrency.
Typically, a virtual server (AWS EC2 or Azure/GCP VM) hosts a single worker to keep things simple and avoid coordination and resource management overhead.
Containerized workers can share the same virtual server because the management is handled by the orchestrator.
Setting up»
Generate Worker Private Key»
We use asymmetric encryption to ensure that any temporary run state can only be accessed by workers in a given worker pool. To support this, you need to generate a private key that can be used for this purpose, and use it to create a certificate signing request to give to Spacelift. We'll generate a certificate for you, so that workers can use it to authenticate with the Spacelift backend. The following command will generate the key and CSR:
1 | |
Warning
Don't forget to store the spacelift.key file (private key) in a secure location. You’ll need it later, when launching workers in your worker pool.
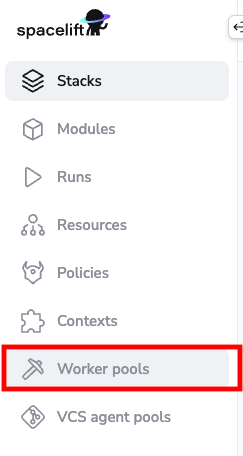
You can set up your worker pool from the Spacelift UI by navigating to Worker Pools section of your account, or you can also create it programmatically using the spacelift_worker_pool resource type within the Spacelift Terraform provider.
Navigate to Worker Pools»
Add Worker Pool Entity»
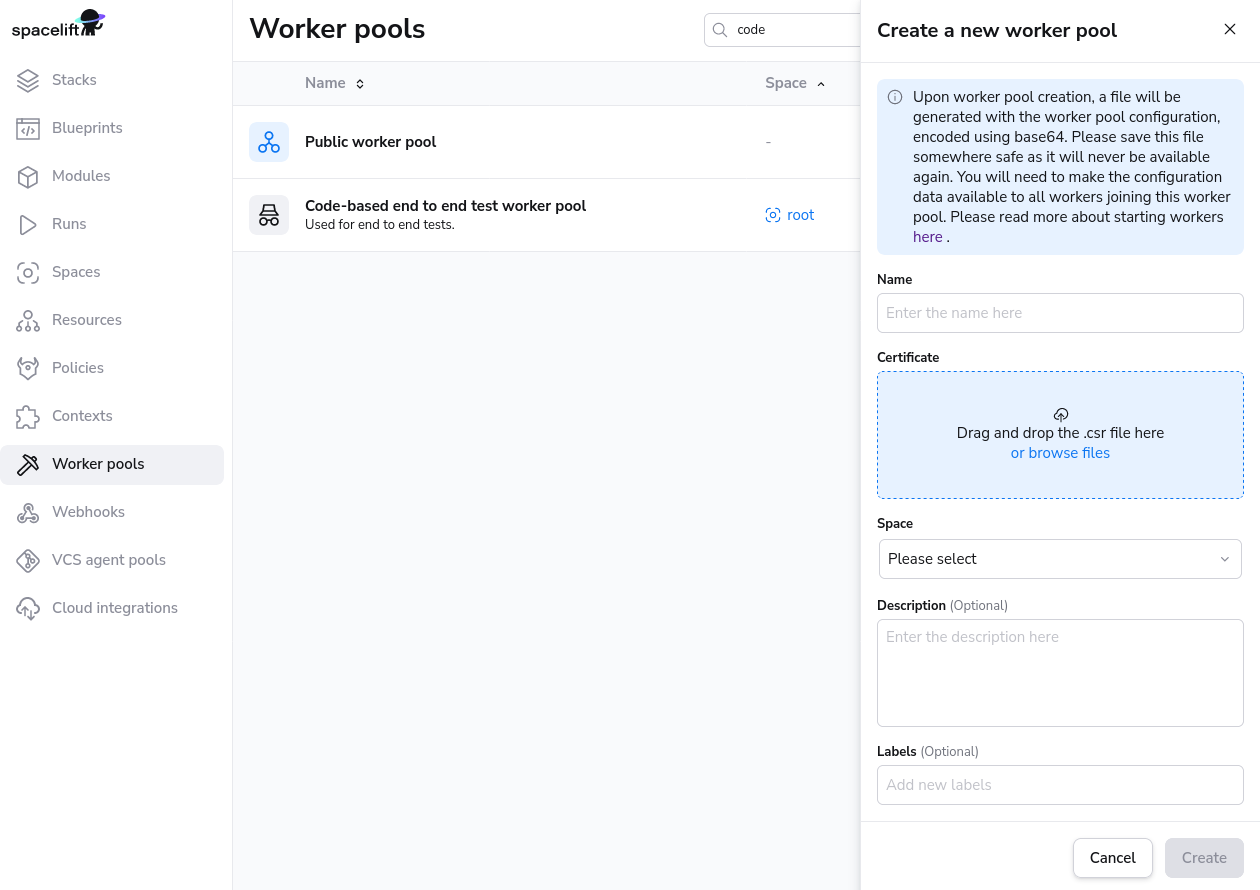
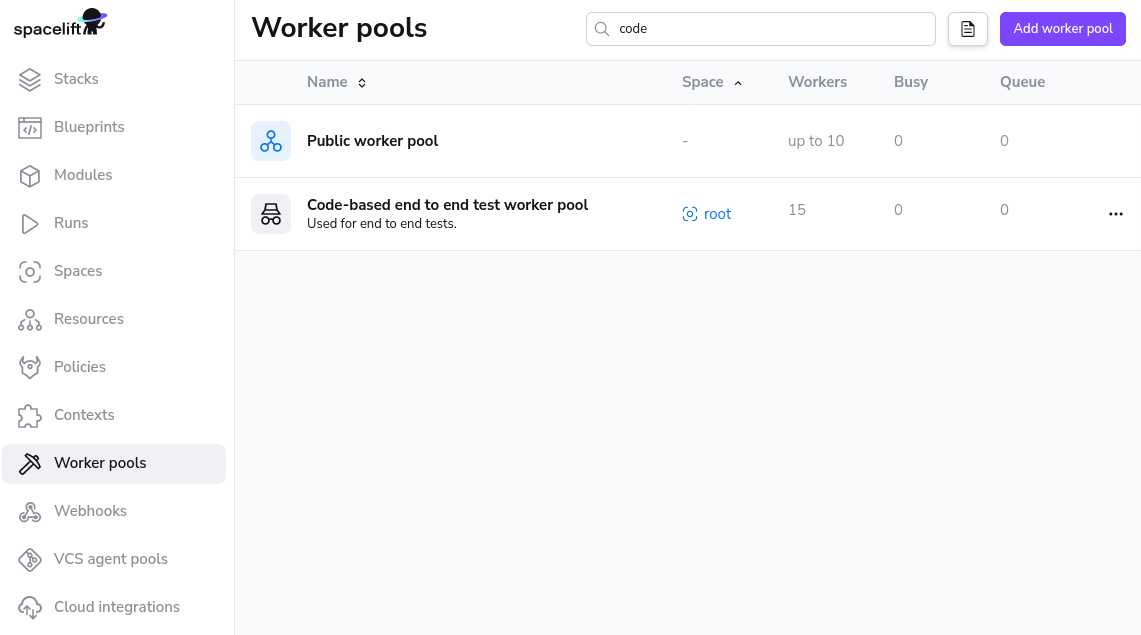
Give your worker pool a name, and submit the spacelift.csr file in the worker pool creation form. After creation of the worker pool, you’ll receive a Spacelift token. This token contains configuration for your worker pool launchers, as well as the certificate we generated for you based on the certificate signing request.
Warning
After clicking create, you will receive a token for the worker pool. Don't forget to save your Spacelift token in a secure location as you'll need this later when launching the worker pool.
Launch Worker Pool»
The Self-Hosted release archive contains a copy of the Spacelift launcher binary built specifically for your version of Self-Hosted. You can find this at bin/spacelift-launcher. This binary is also uploaded to the downloads S3 bucket during the Spacelift installation process. For more information on how to find your bucket name see here.
In order to work, the launcher expects to be able to write to the local Docker socket. Unless you're using a Docker-based container scheduler like Kubernetes or ECS, please make sure that Docker is installed and running.
Finally, you can run the launcher binary by setting two environment variables:
SPACELIFT_TOKEN- the token you’ve received from Spacelift on worker pool creationSPACELIFT_POOL_PRIVATE_KEY- the contents of the private key file you generated, in base64.
Info
You need to encode the entire private key using base-64, making it a single line of text. The simplest approach is to just run cat spacelift.key | base64 -w 0 in your command line. For Mac users, the command is cat spacelift.key | base64 -b 0.
Congrats! Your launcher should now connect to the Spacelift backend and start handling runs.
CloudFormation Template»
The easiest way to deploy workers for self-hosting is to deploy the CloudFormation template found in cloudformation/workerpool.yaml.
PseudoRandomSuffix»
The CloudFormation stack uses a parameter called PseudoRandomSuffix in order to ensure that certain resources are unique within an AWS account. The value of this parameter does not matter, other than that it is unique per worker pool stack you deploy. You should choose a value that is 6 characters long and made up of letters and numbers, for example ab12cd.
Create a secret»
First, create a new secret in SecretsManager, and add your token and the base64-encoded value of your private key. Use the key SPACELIFT_TOKEN for your token and SPACELIFT_POOL_PRIVATE_KEY for the private key. It should look something like this:
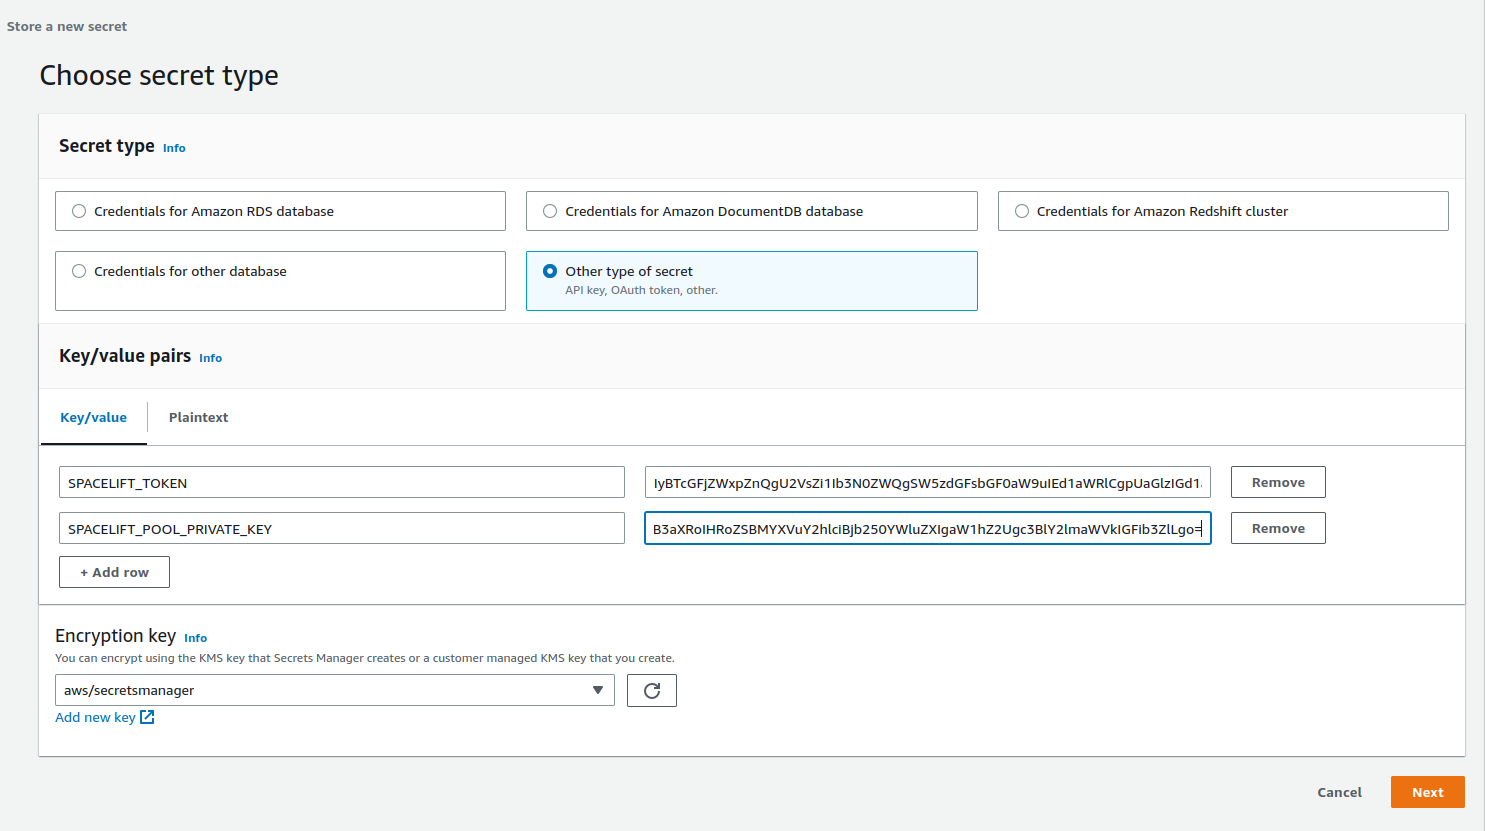
Give your secret a name and create it. It doesn't matter what this name is, but you'll need it when deploying the CloudFormation stack.
Get the downloads bucket name»
The downloads bucket name is output at the end of the installation process. If you don't have a note of it, you can also get it from the resources of the spacelift-infra-s3 stack in CloudFormation:

AMI»
You can use your own custom-built AMI for your workers, or you can use one of the pre-built images we provide. For a list of the correct AMI to use for the region you want to deploy your worker to, see the spacelift-worker-image releases page.
Note: please make sure to choose the x86_64 version of the AMI.
Subnets and Security Group»
You will need to have an existing VPC to deploy your pool into, and will need to provide a list of subnet IDs and security groups to match your requirements.
Using a custom IAM role»
By default we will create the instance role for the EC2 ASG as part of the worker pool stack, but you can also provide your own custom role via the InstanceRoleName parameter. This allows you to grant permissions to additional AWS resources that your workers need access to. A great example of this is allowing access to a private ECR in order to use a custom runner image.
At a minimum, your role must fulfil the following requirements:
- It must have a trust relationship that allows role assumption by EC2.
- It needs to have the following managed policies attached:
AutoScalingReadOnlyAccess.CloudWatchAgentServerPolicy.AmazonSSMManagedInstanceCore.
Injecting custom commands during instance startup»
You have the option to inject custom commands into the EC2 user data. This can be useful if you want to install additional software on your workers, or if you want to run a custom script during instance startup, or just add some additional environment variables.
The script must be a valid shell script and should be put into Secrets Manager. Then you can provide the name of the secret as CustomUserDataSecretName when deploying the stack.
Example:
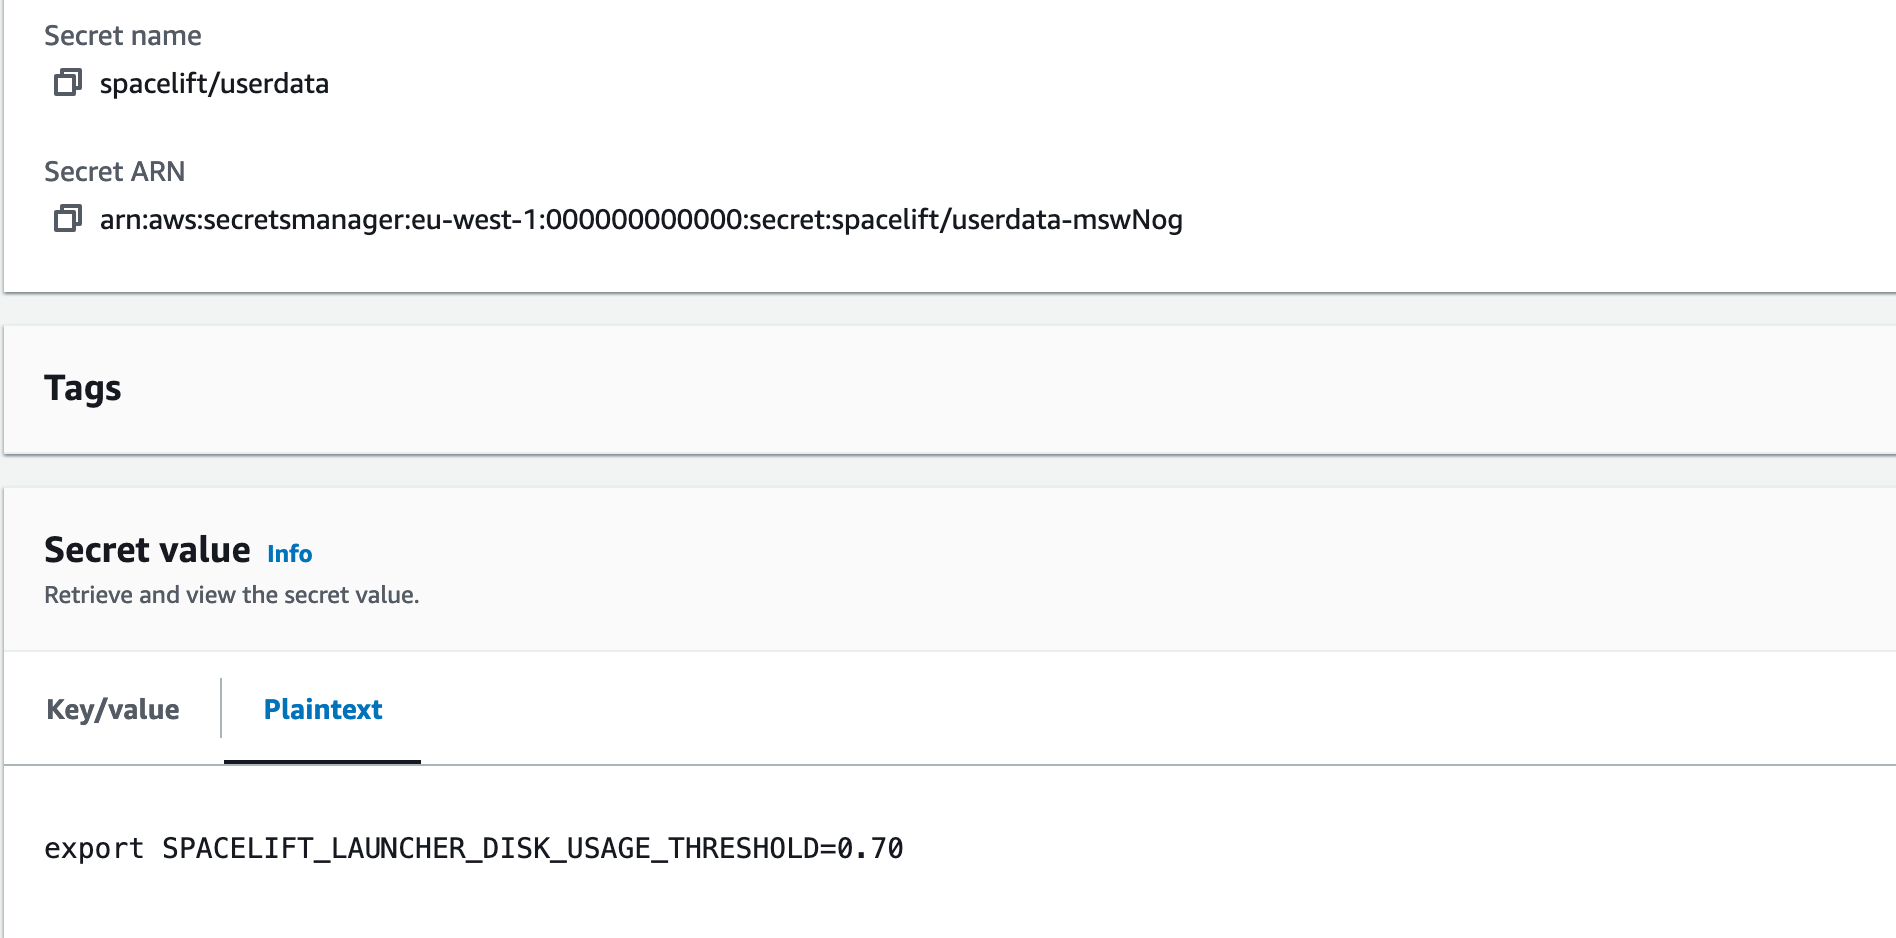
In the example above, we used spacelift/userdata as a secret name so the parameter will look like this:
1 2 3 4 | |
Granting access to a private ECR»
To allow your worker role to access a private ECR, you can attach a policy similar to the following to your instance role (replacing <repository-arn> with the ARN of your ECR repository):
1 2 3 4 5 6 7 8 9 10 11 12 13 14 15 16 17 18 19 20 21 | |
NOTE: repository ARNs are in the format arn:<partition>:ecr:<region>:<account-id>:repository/<repository-name>.
Proxy Configuration»
If you need to use an HTTP proxy for internet access, you can provide the proxy configuration using the following CloudFormation parameters:
HttpProxyConfig.HttpsProxyConfig.NoProxyConfig.
For example, you could use the following command to deploy a worker with a proxy configuration:
1 2 3 4 5 6 7 8 9 10 11 12 13 14 15 | |
Using custom CA certificates»
If you use a custom certificate authority to issue TLS certs for components that Spacelift will communicate with, for example your VCS system, you need to provide your custom CA certificates to the worker. You do this by creating a secret in SecretsManager containing a base64 encoded JSON string.
The format of the JSON object is as follows:
1 | |
For example, if you had a file called ca-certs.json containing the following content:
1 2 3 4 5 | |
You could then encode it to base64 using base64 -w0 < ca-certs.json (or base64 -b 0 < ca-certs.json on a Mac), resulting in the following string:
1 | |
You would then create a secret in SecretsManager, and deploy the worker pool using the following command (replacing <ca-cert-secret-name> with the name of your secret):
1 2 3 4 5 6 7 8 9 10 11 12 13 | |
Running the launcher as root»
By default, when the EC2 instance starts up, it creates a user called spacelift with a UID of 1983. This user is then used to run the launcher process.
If for some reason this causes problems, you can run the launcher as root by setting the RunLauncherAsSpaceliftUser CloudFormation parameter to false.
Tip
Versions v0.0.7 or older of Self-Hosted always ran the launcher as root. In newer versions this behavior has changed to default to the spacelift user.
PowerOffOnError»
By default, the startup script for the EC2 instances automatically terminates the instance if the launcher exits. This is to allow the instance to be automatically removed from the autoscale group and a new one added in the case of errors.
Sometimes it can be useful to disable this behavior, for example if instances are repeatedly crashing on startup, preventing you from being able to connect to investigate any issues before they terminate.
To do this, set the PowerOffOnError setting to false when deploying your CloudFormation stack.
Info
Please note, if you update this setting on an existing CloudFormation stack, you will need to restart all the workers in the pool before the updated setting takes effect.
Deploying the Template»
To deploy your worker pool stack, you can use the following command:
1 2 3 4 5 6 7 8 9 10 11 12 | |
For example, to deploy to eu-west-1 you might use something like this:
1 2 3 4 5 6 7 8 9 10 11 12 | |
To use a custom instance role, you might use something like this:
1 2 3 4 5 6 7 8 9 10 11 12 13 | |
Terraform Modules»
Our public AWS, Azure and GCP Terraform modules are not currently compatible with self-hosting.
Kubernetes»
We provide a Kubernetes operator for managing Spacelift worker pools. This operator allows you to define WorkerPool resources in your cluster, and allows you to scale these pools up and down using standard Kubernetes functionality.
Info
Previously we provided a Helm chart for deploying worker pools to Kubernetes using Docker-in-Docker. This approach is no-longer recommended, and you should use the Kubernetes operator instead. Please see the section on migrating from Docker-in-Docker for more information.
A WorkerPool defines the number of Workers registered with Spacelift via the poolSize parameter. The Spacelift operator will automatically create and register a number of Worker resources in Kubernetes depending on your poolSize.
Info
Worker resources do not use up any cluster resources other than an entry in the Kubernetes API when they are idle. Pods are created on demand for Workers when scheduling messages are received from Spacelift. This means that in an idle state no additional resources are being used in your cluster other than what is required to run the controller component of the Spacelift operator.
Kubernetes version compatibility»
The spacelift controller is compatible with Kubernetes version v1.26+. The controller may also work with older versions, but we do not guarantee and provide support for unmaintained Kubernetes versions.
Installation»
Controller setup»
To install the worker pool controller along with its CRDs, run the following command:
1 | |
Tip
You can download the manifests yourself from https://downloads.spacelift.io/kube-workerpool-controller/latest/manifests.yaml if you would like to inspect them or alter the Deployment configuration for the controller.
You can install the controller using the official spacelift-workerpool-controller Helm chart.
1 2 3 | |
You can open values.yaml from the helm chart repo for more customization options.
Create a Secret»
Next, create a Secret containing the private key and token for your worker pool, generated earlier in this guide:
1 2 3 4 5 6 7 8 9 10 11 12 13 | |
Create a WorkerPool»
Finally, create a WorkerPool resource using the following command:
1 2 3 4 5 6 7 8 9 10 11 12 13 14 15 16 | |
Grant access to the Launcher image»
During your Self-Hosted installation process, the Spacelift launcher image is uploaded to a private ECR in the AWS account your Self-Hosted instance is installed into. This repository is called spacelift-launcher:

The launcher image is used during runs on Kubernetes workers to prepare the workspace for the run, and the Kubernetes cluster that you want to run your workers on needs to be able to pull that image for runs to succeed.
Some options for this include:
- If your Kubernetes cluster is running inside AWS, you can add a policy to your ECR to allow pulls from your cluster nodes.
- You can use one of the methods listed in the ECR private registry authentication guide.
- You can copy the image to a registry accessible by your cluster, and then set the
spec.pod.launcherImageconfiguration option on yourWorkerPoolresource to point at it.
That's it - the workers in your pool should connect to Spacelift, and you should be able to trigger runs!
Run Containers»
When a run assigned to a Kubernetes worker is scheduled by Spacelift, the worker pool controller creates a new Pod to process the run. This Pod consists of the following containers:
- An init container called
init, responsible for populating the workspace for the run. - A
launcher-grpccontainer that runs a gRPC server used by the worker for certain tasks like uploading the workspace between run stages, and notifying the worker when a user has requested that the run be stopped. - A
workercontainer that executes your run.
The init and launcher-grpc containers use the public.ecr.aws/spacelift/launcher:<version> container image published by Spacelift. By default, the Spacelift backend sends the correct value for <version> through to the controller for each run, guaranteeing that the run is pinned to a specific image version that is compatible with the Spacelift backend.
The worker container uses the runner image specified by your Spacelift stack.
Warning
You can use the spec.pod.launcherImage configuration option to pin the init and launcher-grpc containers to a specific version, but we do not typically recommend doing this because it means that your run Pods could become incompatible with the Spacelift backend as new versions are released.
Resource Usage»
Kubernetes Controller»
During normal operations the worker pool controller CPU and memory usage should be fairly stable. The main operation that can be resource intensive is scaling out a worker pool. Scaling up involves generating an RSA keypair for each worker, and is CPU-bound. If you notice performance issues when scaling out, it's worth giving the controller more CPU.
Run Pods»
Resource requests and limits for the init, launcher-grpc and worker containers can be set via your WorkerPool definitions, like in the following example:
1 2 3 4 5 6 7 8 9 10 11 12 13 14 15 16 17 18 19 20 21 22 23 24 25 26 27 28 29 30 31 32 33 34 35 36 37 38 39 | |
You can use the values above as a baseline to get started, but the exact values you need for your pool will depend on your individual circumstances. You should use monitoring tools to adjust these to values that make sense.
In general, we don't suggest setting very low CPU or memory limits for the init or worker containers since doing so could affect the performance of runs, or even cause runs to fail if they are set too low. And in particular, the worker container resource usage will very much depend on your workloads. For example stacks with large numbers of Terraform resources may use more memory than smaller stacks.
Volumes»
There are two volumes that are always attached to your run Pods:
- The binaries cache volume - used to cache binaries (e.g.
terraformandkubectl) across multiple runs. - The workspace volume - used to store the temporary workspace data needed for processing a run.
Both of these volumes default to using emptyDir storage with no size limit, but you should not use this default behaviour for production workloads, and should instead specify volume templates that make sense depending on your use-case.
See the section on configuration for more details on how to configure these two volumes along with any additional volumes you require.
Configuration»
The following example shows all the configurable options for a WorkerPool:
1 2 3 4 5 6 7 8 9 10 11 12 13 14 15 16 17 18 19 20 21 22 23 24 25 26 27 28 29 30 31 32 33 34 35 36 37 38 39 40 41 42 43 44 45 46 47 48 49 50 51 52 53 54 55 56 57 58 59 60 61 62 63 64 65 66 67 68 69 70 71 72 73 74 75 76 77 78 79 80 81 82 83 84 85 86 87 88 89 90 91 92 93 94 95 96 97 98 99 100 101 102 103 104 105 106 107 108 109 110 111 112 113 114 115 116 117 118 119 120 121 122 123 124 125 126 127 128 129 130 131 132 133 134 135 136 | |
Timeouts»
There are two types of timeouts that you can set
- The run timeout: this causes the run to fail if its duration exceeds a defined duration.
- The log output timeout: this causes the run to fail if no logs has been generated for a defined duration.
To configure the run timeout you need to configure two items - the activeDeadlineSeconds for the Pod, as well as the SPACELIFT_LAUNCHER_RUN_TIMEOUT for the worker container:
1 2 3 4 5 6 7 8 9 10 11 | |
To configure the logs timeout you just need to add a single environment variable to the worker container:
1 2 3 4 5 6 7 8 9 10 | |
Network Configuration»
Your cluster configuration needs to be set up to allow the controller and the scheduled pods to reach the internet. This is required to listen for new jobs from the Spacelift backend and report back status and run logs.
You can find the necessary endpoints to allow in the Network Security section.
Initialization Policies»
Using an initialization policy is simple and requires three steps:
- Create a
ConfigMapcontaining your policy. - Attach the
ConfigMapas a volume in thepodspecification for your pool. - Add an environment variable to the init container, telling it where to read the policy from.
First, create your policy:
1 2 3 4 5 6 7 8 9 10 11 | |
Next, create a WorkerPool definition, configuring the ConfigMap as a volume, and setting the custom env var:
1 2 3 4 5 6 7 8 9 10 11 12 13 14 15 16 17 18 19 20 21 22 23 24 25 26 27 28 29 30 31 32 | |
Using VCS Agents with Kubernetes Workers»
Using VCS Agents with Kubernetes workers is simple, and uses exactly the same approach outlined in the VCS Agents section. To configure your VCS Agent environment variables in a Kubernetes WorkerPool, add them to the spec.pod.initContainer.env section, like in the following example:
1 2 3 4 5 6 7 8 9 10 11 12 13 14 15 16 17 18 19 20 21 | |
Scaling a pool»
To scale your WorkerPool, you can either edit the resource in Kubernetes, or use the kubectl scale command:
1 | |
Migrating from Docker-in-Docker»
If you currently use our Docker-in-Docker Helm chart to run your worker pools, we recommend that you switch to our worker pool operator. For full details of how to install the operator and setup a worker pool, please see the installation section.
The rest of this section provides useful information to be aware of when switching over from the Docker-in-Docker approach to the operator.
Why migrate»
There are a number of improvements with the Kubernetes operator over the previous Docker-in-Docker approach, including:
- The operator does not require privileged pods unlike the Docker-in-Docker approach.
- The operator creates standard Kubernetes pods to handle runs. This provides advantages including Kubernetes being aware of the run workloads that are executing as well as the ability to use built-in Kubernetes functionality like service accounts and affinity.
- The operator only creates pods when runs are scheduled. This means that while your workers are idle, they are not running pods that are using up resources in your cluster.
- The operator can safely handle scaling down the number of workers in a pool while making sure that in-progress runs are not killed.
Deploying workers»
One major difference between the Docker-in-Docker Helm chart and the new operator is that the new chart only deploys the operator, and not any workers. To deploy workers you need to create WorkerPool resources after the operator has been deployed. See the section on creating a worker pool for more details.
Testing both alongside each other»
You can run both the new operator as well as your existing Docker-in-Docker workers. In fact you can even connect both to the same Spacelift worker pool. This allows you to test the operator to make sure everything is working before switching over.
Customizing timeouts»
If you are currently using SPACELIFT_LAUNCHER_RUN_TIMEOUT or SPACELIFT_LAUNCHER_LOGS_TIMEOUT, please see the section on timeouts to find out how to achieve this with the operator.
Storage configuration»
If you are using custom storage volumes, you can configure these via the spec.pod section of the WorkerPool resource. Please see the section on volumes for more information.
Pool size»
In the Docker-in-Docker approach, the number of workers is controlled by the replicaCount value of the Chart which controls the number of replicas in the Deployment. In the operator approach, the pool size is configured by the spec.poolSize property. Please see the section on scaling for information about how to scale your pool up or down.
Troubleshooting»
Listing WorkerPools and Workers»
To list all of your WorkerPools, you can use the following command:
1 | |
To list all of your Workers, use the following command:
1 | |
To list the Workers for a specific pool, use the following command (replace <worker-pool-id> with the ID of the pool from Spacelift):
1 | |
Listing run pods»
When a run is scheduled, a new pod is created to process that run. It's important to note that a single worker can only process a single run at a time, making it easy to find pods by run or worker IDs.
To list the pod for a specific run, use the following command (replacing <run-id> with the ID of the run):
1 | |
To find the pod for a particular worker, use the following command (replacing <worker-id> with the ID of the worker):
1 | |
Workers not connecting to Spacelift»
If you have created a WorkerPool in Kubernetes but no workers have shown up in Spacelift, use kubectl get workerpools to view your pool:
1 2 3 | |
If the actual pool size for your pool is not populated, it typically indicates an issue with your pool credentials. The first thing to do is to use kubectl describe to inspect your pool and check for any events indicating errors:
1 2 3 4 5 6 7 8 9 10 11 12 13 14 15 | |
In the example above, we can see that the private key for the pool is invalid.
If the WorkerPool events don't provide any useful information, another option is to take a look at the logs for the controller pod using kubectl logs, for example:
1 | |
For example, if your token is invalid, you may find a log entry similar to the following:
1 | |
Another common reason that can cause workers to fail to connect with Spacelift is network or firewall rules blocking connections to AWS IoT Core. Please see our network security section for more details on the networking requirements for workers.
Run not starting»
If a run is scheduled to a worker but it gets stuck in the preparing phase for a long time, it may be caused by various issues like CPU or memory limits that are too low, or not being able to pull the stack's runner image. The best option in this scenario is to find the run pod and describe it to find out what's happening.
For example, in the following scenario, we can use kubectl get pods to discover that the run pod is stuck in ImagePullBackOff, meaning that it is unable to pull one of its container images:
1 2 3 | |
If we describe that pod, we can get more details about the failure:
1 2 3 4 5 6 7 8 9 10 11 12 13 14 15 16 17 18 19 20 21 22 23 24 25 26 27 | |
In this case, we can see that the problem is that the someone/non-existent-image:1234 container image cannot be pulled, meaning that the run can't start. In this situation the fix would be to add the correct authentication to allow your Kubernetes cluster to pull the image, or to adjust your stack settings to refer to the correct image if it is wrong.
Similarly, if you specify too low memory limits for one of the containers in the run pod Kubernetes may end up killing it. You can find this out in exactly the same way:
1 2 3 4 5 6 7 8 9 10 11 12 13 14 15 16 17 18 19 20 21 22 23 24 25 26 27 28 29 30 31 32 33 34 35 36 37 | |
Custom runner images»
Please note that if you are using a custom runner image for your stack, it must include a Spacelift user with a UID of 1983. If your image does not include this user, it can cause permission issues during runs, for example while trying to write out configuration files while preparing the run.
Please see our instructions on customizing the runner image for more information.
Inspecting successful run pods»
By default, the operator deletes the pods for successful runs as soon as they complete. If you need to inspect a pod after the run has completed successfully for debugging purposes, you can enable spec.keepSuccessfulPods:
1 2 3 4 5 6 7 8 | |
Configuration options»
A number of configuration variables is available to customize how your launcher behaves:
SPACELIFT_DOCKER_CONFIG_DIR- if set, the value of this variable will point to the directory containing Docker configuration, which includes credentials for private Docker registries. Private workers can populate this directory for example by executingdocker loginbefore the launcher process is started;SPACELIFT_MASK_ENVS- comma-delimited list of whitelisted environment variables that are passed to the workers but should never appear in the logs;SPACELIFT_SENSITIVE_OUTPUT_UPLOAD_ENABLED- If set totrue, the launcher will upload sensitive run outputs to the Spacelift backend. This is a requirement if want to use sensitive outputs for stack dependencies;SPACELIFT_WORKER_NETWORK- network ID/name to connect the launched worker containers, defaults tobridge;SPACELIFT_WORKER_EXTRA_MOUNTS- additional files or directories to be mounted to the launched worker docker containers during either read or write runs, as a comma-separated list of mounts in the form of/host/path:/container/path;SPACELIFT_WORKER_WO_EXTRA_MOUNTS- Additional directories to be mounted to the worker docker container during write only runs, as a comma separated list of mounts in the form of/host/path:/container/path;SPACELIFT_WORKER_RO_EXTRA_MOUNTS- Additional directories to be mounted to the worker docker container during read only runs, as a comma separated list of mounts in the form of/host/path:/container/path;SPACELIFT_WORKER_RUNTIME- runtime to use for worker container;SPACELIFT_WHITELIST_ENVS- comma-delimited list of environment variables to pass from the launcher's own environment to the workers' environment. They can be prefixed withro_to only be included in read only runs orwo_to only be included in write only runs;SPACELIFT_LAUNCHER_LOGS_TIMEOUT- custom timeout (the default is 7 minutes) for killing jobs not producing any logs. This is a duration flag, expecting a duration-formatted value, eg1000s;SPACELIFT_LAUNCHER_RUN_INITIALIZATION_POLICY- file that contains the run initialization policy that will be parsed/used; If the run initialized policy can not be validated at the startup the worker pool will exit with an appropriate error;SPACELIFT_LAUNCHER_RUN_TIMEOUT- custom maximum run time - the default is 70 minutes. This is a duration flag, expecting a duration-formatted value, eg.120m;SPACELIFT_DEBUG- if set to true, this will output the exact commands spacelift runs to the worker logs;
Warning
Server-side initialization policies are being deprecated. SPACELIFT_LAUNCHER_RUN_INITIALIZATION_POLICY shouldn't be confused with that. This policy is a Worker-side initialization policy and it can be set by using the launcher run initialization policy flag.
For a limited time period we will be running both types of initialization policy checks but ultimately we're planning to move the pre-flight checks to the worker node, thus allowing customers to block suspicious looking jobs on their end.
Passing metadata tags»
When the launcher from a worker pool is registering with the mothership, you can send along some tags that will allow you to uniquely identify the process/machine for the purpose of draining or debugging. Any environment variables using SPACELIFT_METADATA_ prefix will be passed on. As an example, if you're running Spacelift workers in EC2, you can do the following just before you execute the launcher binary:
1 | |
Doing so will set your EC2 instance ID as instance_id tag in your worker.
Please see injecting custom commands during instance startup for information about how to do this when using our CloudFormation template.
Network Security»
Private workers need to be able to make outbound connections in order to communicate with Spacelift, as well as to access any resources required by your runs. If you have policies in place that require you to limit the outbound traffic allowed from your workers, you can use the following lists as a guide.
AWS Services»
Your worker needs access to the following AWS services in order to function correctly. You can refer to the AWS documentation for their IP address ranges.
- Access to the public Elastic Container Registry if using our default runner image.
- Access to your Self-Hosted server, for example
https://spacelift.myorg.com. - Access to the AWS IoT Core endpoints in your installation region for worker communication via MQTT.
- Access to Amazon S3 in your installation region for uploading run logs.
Other»
In addition, you will also need to allow access to the following:
- Your VCS provider.
- Access to any custom container registries you use if using custom runner images.
- Access to any other infrastructure required as part of your runs.
Hardware recommendations»
The hardware requirments for the workers will vary depending on the stack size(How many resources managed, resource type, etc.), but we recommend at least 2GB of memory and 2 vCPUs of compute power.
These are the recommended server types for the three main cloud providers:
- AWS: t3.small instance type
- Azure: Standard_A2_V2 virtual machine
- GCP: e2-medium instance type
Using worker pools»
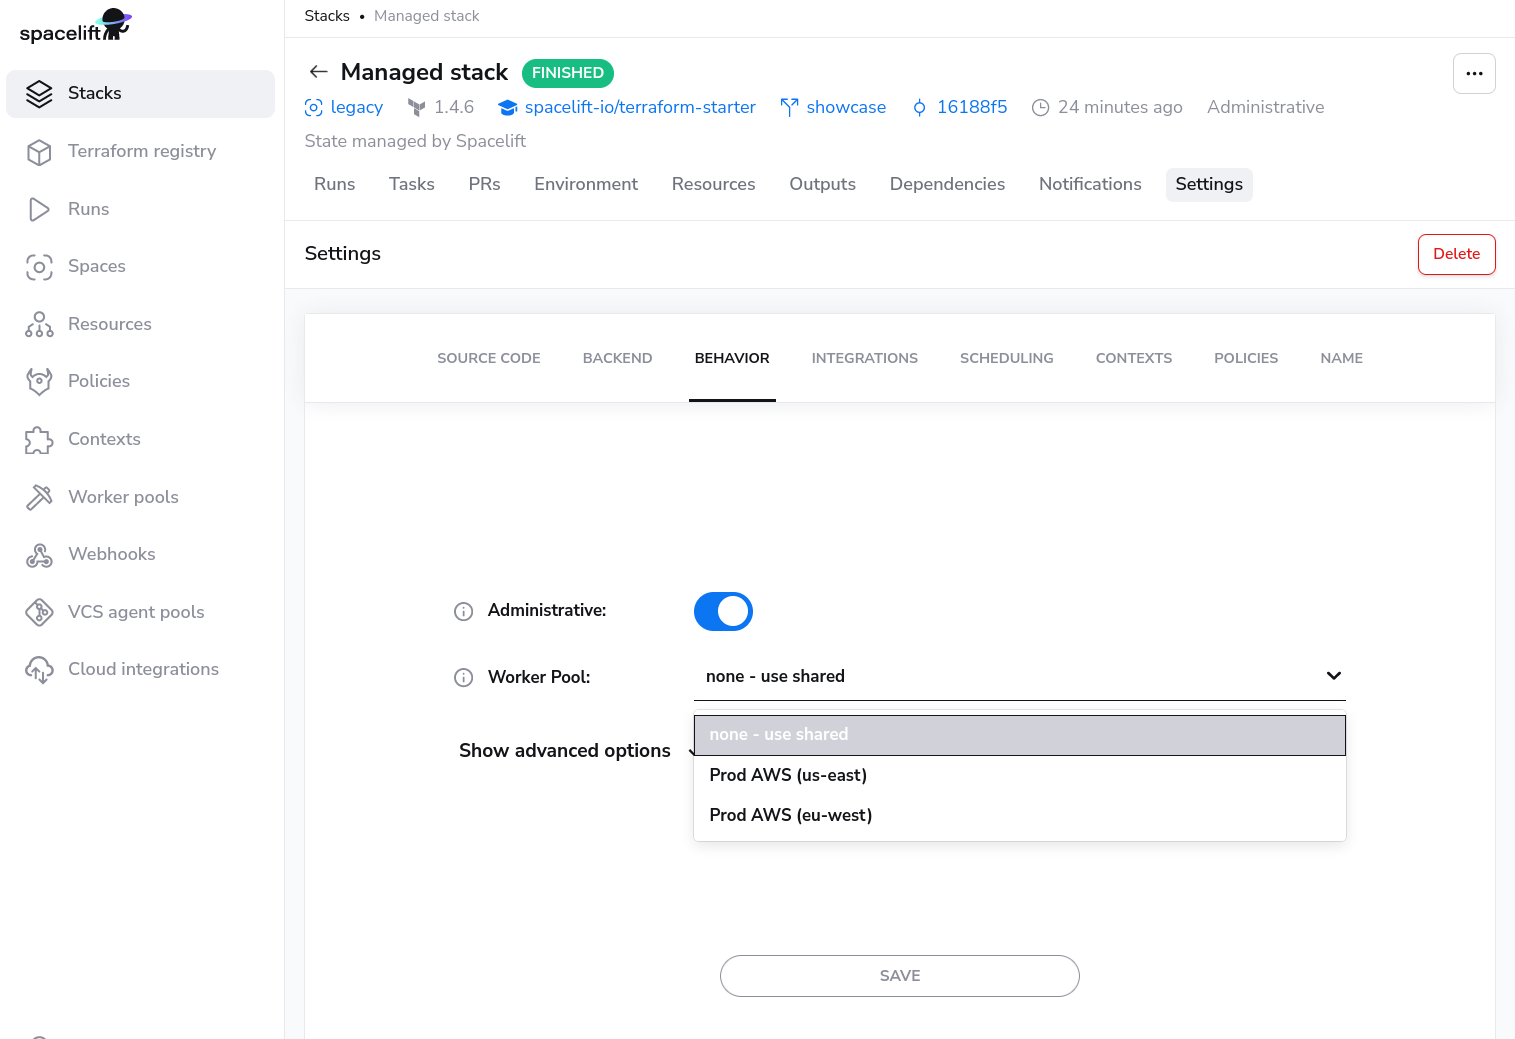
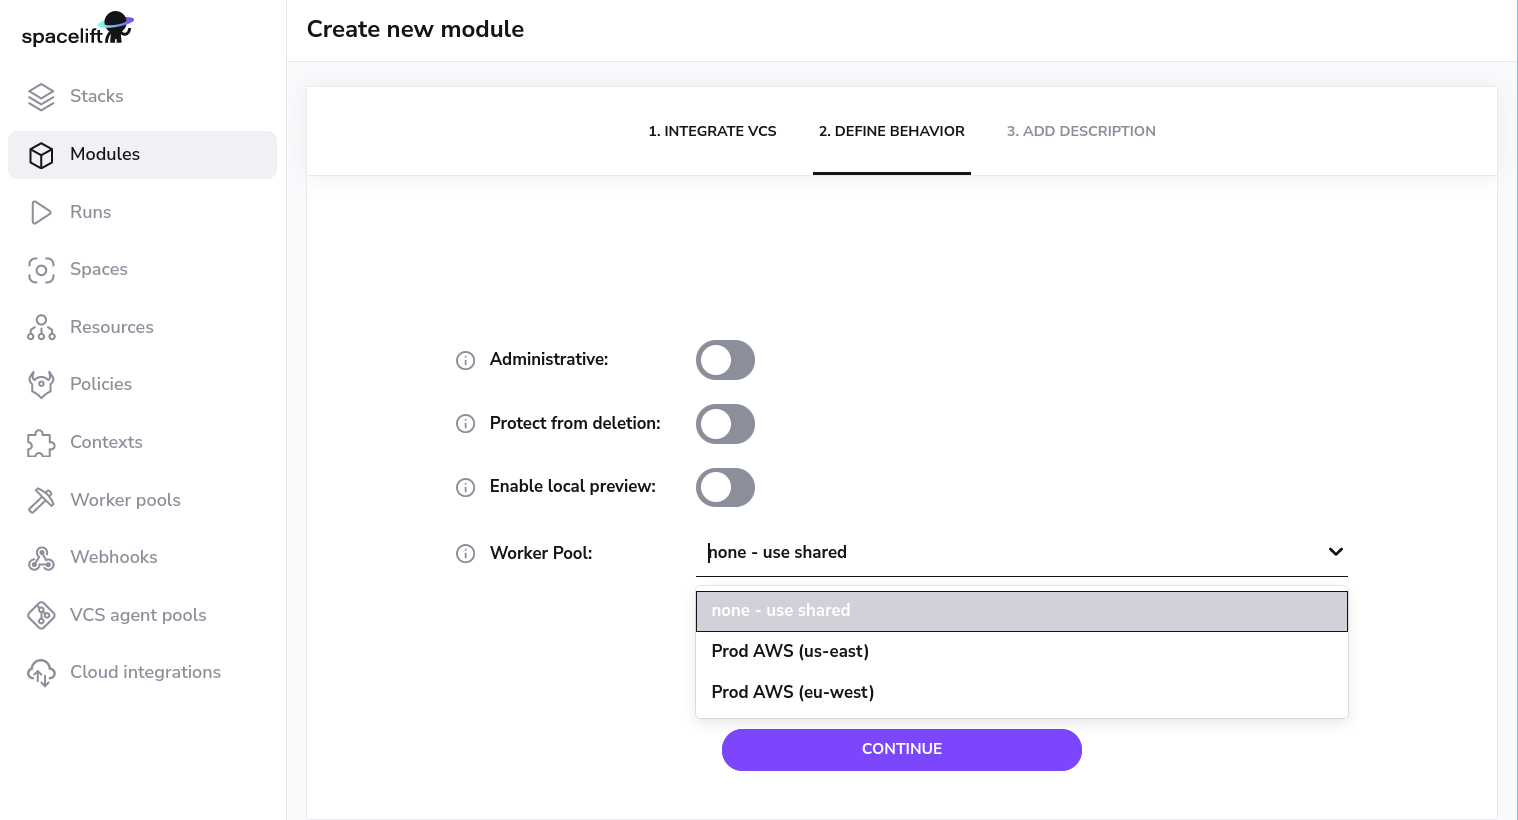
Worker pools must be explicitly attached to stacks and/or modules in order to start processing their workloads. This can be done in the Behavior section of stack and module settings:
Worker Pool Management Views»
You can view the activity and status of every aspect of your worker pool in the worker pool detail view.
You can navigate to the worker pool of your choosing by clicking on the appropriate entry in the worker pools list view.

Private Worker Pool»
A private worker pool is a worker pool for which you are responsible for managing the workers.

Workers»
The workers tab lists all workers for this worker pool and their status.
Status»
A worker can have three possible statuses:
DRAINEDwhich indicates that the workers is not accepting new work.BUSYwhich indicates that the worker is currently processing or about to process a run.IDLEwhich indicates that the worker is available to start processing new runs.
Queued»
Queued lists all the run that can be scheduled and are currently in progress. In progress runs will be the first entries in the list when using the view without any filtering.
Info
Reasons a run might not be shown in this list: a tracked run is waiting on a tracked run, the run has is dependent on other runs.
Used by»
Stacks and/or Modules that are using the private worker pool.